How to change the tubeless tires. How to rebuild the car yourself - detailed instructions how to change tires when wear
For the normal operation of the car periodically it is necessary to replace and install high-quality tires. This is a practically simple process, but not all car enthusiasts can cope with it, it applies to newbies.
Usually the replacement is performed for certain reasons:
- serious deformation or seating of several tires without the possibilities of their repair and recovery;
- strong wear of one or more tires;
- seasonal replacement of summer rubber on winter or vice versa.
To produce competent work on the replacement of rubber, you must comply with the recommendations and rules. Otherwise, it can lead to a wheel on the track and a serious accident.
First of all, you need to know that the installed tires must correspond to the total size and characteristics recommended from the manufacturer of the car. There may be small differences, but not more than 2%.
General properties and dimensions are indicated in the operating instructions vehicle. If there are no such, use the auto dealer's recommendation.
In the next step, it is necessary to learn the load index of the tire installed, as well as high-speed characteristics. They should not be less than the parameters specified in the instructions from the manufacturer.
Replacing tires can be produced with large index indicators, but not with less demands. Usually indexes are indicated in the instruction manual for the car.
Next, it is necessary to analyze the characteristics of the air pressure in the tires. Indicators must be completely identical to the factory parameters. Otherwise, the wheel can be subjected to serious deformation and burst when driving on a passenger car.
In the case when the tires are too pinched or, on the contrary, have a smaller amount of air, it will negatively affect the vehicle stability indicators and its high characteristics Control. Tire pressure indicators are specified in auto operating instructions.
Now select another an important rulewhich should be used by novice and experienced auto owners when installing a complete set of tires: purchasing tires, you need to make sure that the planting and departure characteristics and departure correspond to the factory vehicle parameters.
If such properties do not match, it will negatively affect the controllability of the car and will quickly lead to the deformation of the automotive suspension. General characteristics Departure and landing are indicated by the manufacturer of the tires and the plant, where vehicles are produced.
Replacing tires due to strong wear
On any type passenger cars The front tires are most often deformed, since the front leading bridges are installed on most passenger vehicles. Accordingly, the rear wheels are subject to smaller wear.
Many owners often try to regularly replace the front rubber, and the rear leave for another few seasons.
But in this situation, each lover car should be aware that the absolute indicators of safe and reliable ride will be achieved only through the use of all 4 tires with the same treads.
Naturally, the tires are expensive products and not everyone can afford to carry out regular replacement of products, especially in full configuration.
In such a situation, you can divide the installation of tires into two stages. To begin with, the replacement of front rubber is performed and the rear tires are installed after a certain period of time. However, all processes are recommended to perform only with identical pairs of tires.
Replacement of automotive rubber with a serious defect
If the installation work on the installation of new tires has to do urgently due to the deformation of older, then a certain rule should be known. Regardless of the model or brand of tires, the thickness of all four protector must be identical to each other.
If only one bus is spoiled and it is impossible to repair, then you should use at least a pair of new ones.
It is possible to replace only one damaged bus only in that situation, if the kit is completely new and managed to travel only a few hundred kilometers.
In this situation, the vehicle owner can purchase only a similar tire and install it instead of damaged, not afraid for the loss of quality management and safety during the ride.
When the motorist managed to drive more than 1000 km, it is no longer possible to replace only one bus. The protector is quickly erased, and the balance will probably lose when installing only one new one.
Installing new rubber on disk
Immediately before installing the new tire, you need to make a detailed check of its state.
The disk check is performed for serious defects, curvature, as well as wear of the cloud and rim. It is recommended to eliminate additional cargoes, balancing the wheel and the valve at the moment of replacing the old rubber. This procedure is performed only in the situation when the tire has no camera.
When installing a new tire, it is desirable to take into account the marking in the form of color marks applied to its surface. They indicate the main director of rotation in the form of an arrow on the side part.
The fulfillment of simpler and easy installation of the tire is directly interconnected with the application of individual spots on its side or the use of soap fluid. However, you should not overdo it with lubricant, because the rubber will start sliding on the disk rim.
Installation new rubber The disk is performed in the opposite direction towards dismantling. First you need to wear a bus on one side of the disk rim, and then put the camera. Moreover, the valve should get into a small hole of the rim. At the next stage, installing the second sidewall rubber.
How to puncture rubber properly for reliable rim additive
Thus, the tire is well put on the rim, after which the air pressure should be reduced to the desired parameters. It is important here to take into account the fact that the pressure is measured at the moment when the tire is installed on the wheel when the automotive weight is observed.
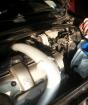
For tubeless tires, this process is a bit more complicated. Simple pumping nanos or a special compressor will not be able to use until the side of the rubber will be completely leaning up to the disk rim, since the air actively penetrates through the gap between it and the tire.
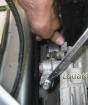
You can use alternative method: to pump the vehicle tire up to four atmospheres. After that, we remove the hose and one of its ends install on the mounted rubber valve.
It is first necessary to promote nipple and part of the hose with a special fitting insert into the tire pumped.
Then, how the fitting will be installed, the main part of the air will penetrate into the beless-free rubber and set it into place due to the stabilization of pressure. On the automotive hundred for pumping wheels use original compressors with large receivers.
However, this task can be implemented and yourself, if you show some skill and logic. Also, do not forget that after installing new rubber, the wheel is balancing.
Rubber on the front axle of the vehicle
Each owner and an experienced motorist knows that the front rubber should be changed at the very beginning. Since the car is exposed to a large drift when driving on the worn back tires, there is a big risk of deformation and rupture of the front wheels.
In that situation, when the tires are broken on the front wheel, accidents without serious consequences can no longer be avoided.
Basically, the causes of the strong wear of the anterior rubber are associated with maximum loads on the axis and regular rotation of the steering system.
Since regular front wheels are subject to serious impact and subsequently burst, then higher requirements in terms of reinforced strength and reliability are presented.
To reduce the risks of puncture and deformation, the front rubber must be changed with pairwise tires. The level of controllability of the car depends on the competent selection of the tire.
Replacing rubber for motorists The task is quite ordinary. Her decision the owners of cars are engaged in the transition from summer tires On the winter, when replacing old tires for new, damaged or punzes. As a rule, tire mounting is carried out by employees of a hundred, but no one bothers learn how to make this operation with their own hands. Moreover, there may be situations when the ability to focus the tire will be simply necessary (an unexpected situation on the track away from a hundred, in order to save).
In general, the procedure is not complicated and with some skill it can be performed by any car owner. At the same time, it is necessary to have a set of tools - a jack, a balloon key, mounting blades or a mount, a weighty hammer or a globalwood. In addition, it is necessary to know certain "secrets", which will help dismantle the tire with minimal efforts in a short period of time.
How to unfold the wheel at home
If you fell into an unpleasant situation on the road, you can simply remove the wheel and put the "spare tire". But it is not always that such a step will be the only one when solving the problem, it may be necessary to perform the starting of the wheels - a more complex operation.
Tire removal begins with preparatory stage - It is necessary to prepare tools. Nothing special is required, but an elementary toolkit toolkit is necessary (hammer, jack, set of keys, mounting blades, steel corner). In addition, a solvent or turpentine can be useful for dismantling rubber, "welded" to the bus.

To remove tires yourself is necessary in a specific sequence:
- First stage - disassembly wheel. To do this, you need to lift the car from the desired side with the help of a jack. Next you need to unscrew the mounting nuts and remove the wheel. It is advisable to lower it, as well as to pre-give a place of contact with the disk of rubber.
- The next step is directly sent automotive rubber. This operation is performed using mounting blades that provide high accuracy and allow you to remove the bus without damage. In addition, a steel corner prepared in advance is used slightly rounded in advance so as not to damage the rubber.
- The tire from the disk is worth removing carefully so as not to damage it.
- After the entire tire is out of the disk, you need to slowly remove the camera. At this stage, the question of how to remove the rubber from the disk itself is closed. Next, it is necessary or replaced with a tire to a new one, or vulcanize old rubber.
Installation is performed in reverse sequence.
In case the rubber "baked" to the disk, it will be very difficult to remove it. Do not try to pull the tire from the rim by force, you only damage it. It is necessary to take advantage of the available liquid type of alcohol or solvent. Pour the liquid required segment of the wheel, wait a few minutes and calmly with your hands using the mounting blade, remove the old rubber. After surgery, do not forget to wipe the tires.
Many modern cars Completed with tires in which there is no separation on the camera and the tire. This design is called a tubeless bus and its starting is somewhat different from the standard type of automotive rubber. It is much more difficult to shoot it. A constructive tubeless car wheel consists of a disk and tires. The latter consists of inner and outer layers. Air is between the inner layer of wheels and the disk. When crossing the tire does not immediately lose pressure, which allows the car to get to a hundred or garage.

The design of the tubeless tires is provided for the presence of special convexities or "Hampov". When creating pressure inside the joint, the tires are compacted, which greatly makes it difficult to remove the tubeless rubber with their own hands. Many owners of cars with tires do not even suspect independent repair. In fact, it is possible to remove the tubeless wheel with your own hands, the main thing is certain skills and skills. Also need a special device to create more high pressure On rubber to separate it from the disk.
If the situation is needed when the car repair is required, it happened away from a hundred or garage, you can remove with your own hands and tubeless rubber from the car disk. At the same time, it will be much more difficult to dress and pump such a tire. It is necessary not just to wear a tire, but also to ensure that its board jumps through the "Hamp" wheels. For these purposes, gasoline or ether are used, which are poured through the valve inside the tire, leaving a slightly fuel on the border. Next, it is necessary to set fire to gasoline on the side and with the help of several shots to sell rubber inside, filling out the pairs inside. A small explosion will occur, which rushes rubber on the disk and extinguishes gasoline on the surface. After that, you can turn on the compressor from the car dial to create the necessary pressure in the tires.
Several tips to those who will engage the border of the tires do it yourself:
- when assembling, after removing the tire, you should not ignore the correspondence of the size of the chamber and disks;
- you can not allow the auction between the axes and the parties to the car (installed different types rubber);
- dirt does not contribute to durability and can lead to loss of pressure;
- you should not remove the tire using a screwdriver or other sharp object, you risk damageing the rubber product, use for removal special mounting blades or metal corners with rounded edges.
You do not have to remove discs too often, but certain skills and tools must be present.

How to make a device for self-parsing wheels
In order to remove the rubber with the rim with your own hands, you can use infringement materials or to build a homemade machine to pick up. The design of such a machine is elementary and is several elements:
- frame - consists of several profile pipes located in parallel, can be used for the connection;
- vertical pipe - attached to the frame and is intended for mounting the lever used to remove the tire, is also used as a platform for a disk;
- the pipe of the machine, which is welded to the handle and serves as a lever to effectively remove the wheel.
Collect the tire removal machine should only be made of high quality materials. Loads are very large and you can get serious injuries or damage the wheel.
The base of the machine must be as reliable as possible. To create it, use high quality profile pipes. The distance between the pipes should be at least 70 cm, which will ensure the stability of the entire design for manual removal of rubber. Between themselves the pipes are best combined with a steel corner or a smaller diameter tube.
It is convenient to remove tires at an optimal height for a particular person. In this case, you can spend the legs with a height adjustable.

The next element of the machine is a vertical tube, welded to the frame. The diameter of the pipe should be 20-30 mm. The mandatory element of this pipe is welded at an altitude of 400-600 mm flange.
In addition, the vertical pipe contains fastening elements - a metal plate that serves to attach the lever used to lay the rim by hand. The lever significantly simplifies the dismantling procedure. It consists of two elements - shoulder and paws, which directly affects the unfit into the tire.
With this machine, you can easily unfold all the wheels of the car with your own hands without attracting specialists from a hundred,
How to remove rubber with rim
Unfold car drives with homemade machine can with such a sequence:
- remove the wheel and install it on the tire shaft flange, fix using the clamp;
- the narrow end of the mount print the edge of the rubber beyond the disk;
- complete the removal of the tire, completely removing it from the rim;
- do not allow the deformation of the edge of the disk, otherwise it will be very difficult to wear a new tire;
- it is advisable to lubricate the sirithol of the edge of the rim, this will allow you to preserve the integrity of the tire of removal;
- when installing a new tire, you can use the soap solution with your own hands, which will help perform an operation with less physical effort;
- when working it is worth using special tool sets.
A few more advice. Before removing the tire, wrap the profiles to which the disk will fall, the soft material. So you protect it from scratches and damage.

The machine, created by their own hands, can have a non-pieces, but it has a number of benefits.
First, the owner of the car will not need to constantly ride a hundred to fulfill simple work. It saves time and money.
Secondly, the cost of such a machine is minimal, it can be made of handicraft materials with your own hands. Also, the advantage is the simplicity of assembly, compactness.
In addition, such a machine is universal and suitable for cars of any kind, including freight.
By the minuses of the machine created by their own hands, it is necessary to attribute the impossibility of balancing, you can only remove the rubber from the disk.
The above version of the machine is only one of the many structures designed to remove the tires from the rim at home without the use of professional equipment.

What instruments can be useful in the process
Different tools are used to remove the tire from the wheel, among which:
- a set of plastic mounting blades - made of durable material and allow working with rubber products without damage to the latter;
- a set of metal tire mounts - there are different types (straight, S-shaped, Mr.) are a tool of different types impact - shock or lever;
- various tire ticks;
- a set of keys;
- hammers and sledgehamps.
How to make a machine for laying the wheels
Pierced wheel on the road, in the absence of splashing in the car, turns into a problem. Especially if there is no machine for laying. In this situation, you can get out of the position with the help of subright funds that are in the trunk of any car owner. We are talking about mounting blades and a device for separating tires from the disk. Many car owners use a piece of steel corner and a sledgehammer for these purposes, but there is a simpler version with the use of a jack and steel cable.

Work begins with dismantling old wheels. Remove it from the axis of the car and clean the mud. Release the air and put on the ground nipples up.
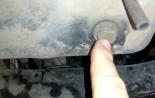
Grind steel cable through one of the holes in the rim. Install the jack on the rubber so that it turns out to be as close as possible to the disk. It is not necessary to install it close to Nippel, you can tear off the camera.
The removal procedure begins after you throw the cable on the pad to lift the jack and begin to raise the jack. At the same time, the cable will pull the rim up, and the jack to squeeze the tire down. Thus, you can easily remove the tires to replace the tires or repair of discs on road conditions.
Of course, it is easier to refer to specialists to a hundred, which in a short period of time and moderate fee will perform the necessary work. However, it is not always possible to consult professionals, especially if the problems arose in the road in the middle of the field and far from civilization. The minimum set of tools, cutter, strong hands and the desire to perform work with your own hands will help you cope with the tire fitting on your own.
During the season of "Perevoolevki" machines on tires, long queues are formed with expectations of several hours, and sometimes days. You can save time and money if you try to change the rubber on your own. How to rebuild the car yourself, we'll figure it out further.
During the onset of the winter season, every car owner wonders: how much does it cost to transfer the car to winter tires? The price of tire service is varied depending on the size of the workshop, brand promotion, the quality of equipment and the provided service in working with the client. The higher these indicators - the more expensive there will be a service.
In regions of Russia, prices are not very different: whether Moscow or Novorossiysk - there will be no significant difference. The final cost also depends on the type of car, the radius of the wheel and the type of disks.
The cost of services on the tire depends on the region, the type of car and the size of the tires, as well as additional services
A comprehensive shin change is one of the most expensive and time-consuming tire work. It includes removing and installing wheels, disassembling tires from disk, installation and balancing.
On average, "re-bag" of a full set on a car It will cost 1400 to 5,000 or more.
For crossovers, SUVs and minivans, the amount is slightly higher: from 2,000 to 5,500 and higher. Wheel change for trucks cars And Gazelle will cost in sum from 2,300 to 5,000 rubles.
When providing additional services, the amount will increase. To add. Services include:
- service out of turn;
- low-profile tires;
- alloy wheels;
- installing a tubeless valve;
- sealing the rim of the disk;
- dispose of old tires.
How to rebuild yourself
Catching wheels at home - a difficult thing that requires relevant skills and information. After this article you will learn how to change summer tires On the winter himself, without having a special tool and work experience on the tire terminal.
 The number of motorists ready to change the rubber on their own every year decreases
 To install winter rubber manually you will need:
- jack;
- cylinder key;
- iron brush;
- special ointment.
It is important to choose the place: the smooth platform with a solid coating is best. As a stop under the wheel, you can take ordinary brick.
 At home, everything is done using an ordinary jack
 When examining the secret key and bolts, make sure that they are all entire and without damage.
Be proceed to the process of "Perelevki":
- Mock the engine engine, install it on hand brake. Remove the steering wheel straight. Gearbox lever - in Parking position. If the car S. mechanical box, leave on the transfer. Under the wheel, arranged horizontally from the one you change, put the focus.
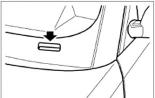
- Jack are moving under reinforced place on the verge of car. It is indicated by a triangle and is good for the flaws. Using the lift, slightly lift the car. Consider - the wheel should come into contact with the Earth. Fully unscrew the secret nut / bolt. The rest of the fasteners should be loosen at half turn.
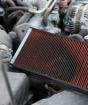
- Completely post the wheel with a jack and remove it. At this time, it is worth estimating the overall state of the system: pads, brake disc and hose, stabilizer rack and shrusov boot, if any. The surface of the hub must be cleaned of dirt. It is best to use a metal brush. Next, apply a thin layer of special copper ointment.
- Install the wheel with a winter tire. Suggest fasteners and evenly tighten the wheel crosswise. It is not necessary to zeal: the force should not exceed 20 kg. Jump on the key is strictly prohibited. Secret nut / bolt Tighten the last place.
- One wheel is replaced correctly. Do the same operation with the rest.
- After the first trip, be sure to check the fastener tightening and tire pressure.
 Most convenient when each set of rubber will be on the set of disks
 How to change summer tires on the winter yourself, if a set of disks is only one? Here are several practical Soviets For such a situation:
- Before installing winter rubber, pay attention to the disk and its integrity. It needs to be checked for damage, curvature and worn.
- Installing the bus on the disk is required in the opposite direction relative to the dismantling. First, the rubber is put on one side of the disk surface and only then the camera is invested. I need to put the valve so that it gets into the rim hole.
- Next, the installation of the second side of the rubber is performed.
- You need to repeat this procedure with all the disks and install them.
 High-quality balllock keys most often buy masters, and the usual Chinese tool is easy to break, especially if you press it onto it
 Do you need to balance
Some car owners balancing tires before each season, but this procedure is completely optional. After installation winter tires It is recommended to drive at different speeds, but not faster than usual. If the imbalance is not felt, the balancing should be postponed to future seasons.
 Balancing
 What pressure to put in winter
The most favorable tire pressure recommended by the manufacturer is in the book maintenance. For each car brand - its indicator, which depends on some factors:
- machine weight;
- diameter discs;
- tires and their index.
To maintain the optimal number of atmospheres in winter, it is recommended to follow the following rules:
- When the temperature decreases, the pressure must be 0.1 - 0.2 bar more than usual.
- To save controllability with ice, the parameters are left the same as in the summer.
- With the same weighing the wheels are pumped equally.
- The wheels on which the drive accounts should be stronger.
Checking tire pressure in winter is extremely important. It will save the machine in working condition and protect against accidents.
 Pressure control
 The process of overpowering the machine occupies enough time, but with minimal knowledge and competent approach to business, any car owner can make it easy and simple. Now you know how to change the rubber on the car itself.
And vice versa. Mechanics services on a tire station and an hour-and-and-and-a half time. Total worries. Given that almost all car enthusiasts, buying seasonal rubber on the car, acquire the second set wheel disks. After assembling and installation, further rubber shifts are reduced to the replacement of the wheels at the appropriate season of the mounted rubber. Wheel shot After washing and drying are deposited into a secluded place, as a rule, to the basement. Conditions in the normal ventilated basement are most suitable for storing replaceable rubber.
Some drivers because of their ability to plan and organize work for a week ahead, bring replaceable wheels to the tireage in advance. Wheels are inspected and balanced, pumped up the necessary pressure and set the owner upon arrival.
The question of time has always been painful. On the day off, I don't really want to lose precious time on the routine, full of different things and problems. Moreover, combine the change of rubber and departure with the family in a shopping trip. It will not work out - the trunk will be clogged with shift rubber wheels. The reserve and tools will have to shift into the interior of the car. In addition, when you need to "rebuild" the machine in connection with the dropped snow, a holler or a sharp decrease in temperature, on the tire station will be a decent queue of those who want.
Usually, when the situation on the road is already critical and postpone the replacement of rubber is simply unsafe, go to the tire station to come after work, in the dark. After a couple of hours waiting in the queue, the worker at the station will show a place where they will transfer your "seagull, will take a set of rubber from you and offered to wait for half an hour or a watch.
As a rule, the main platform in the box, on which car service takes place, clogged with "serious" machines. For ordinary customers, the adjacent area of \u200b\u200basphalt parking is proposed. Usually such places are poorly illuminated, at best there is a pair of lanterns to illuminate surveillance cameras. For the wizard, the lack of normal lighting is not a hindrance at all.
In the heat of "conveyor hot" Most operations to unscrew the fastening of the wheel and the subsequent replacement to the new, they can do with closed eyes to the touch. What, by the way, very often happens at the end of the shift, what can you do - people are not robots and heavy physical work exhausts even young and hardened guys. Their earnings directly depends on the number of customers served. The period when drivers change seasonal rubber, they are as important for them, as for specialists in Richtovka car facing the first season, a true ice called, called the "Day of Tinsmith".
During this period, in a tire station, everyone is in a hurry. We hurry clients who are full of affairs and there is no desire to wait in line. We hurry the workers and the masters, the fear of losing customers and earnings, so everyone is trying to work with minimal loss of strength and time.
There are many adverse factors, the quality of work falls. Therefore, do not be lazy to take advantage of a sauced flashlight and carefully inspect the results of the work:
- First. Make sure that your car has installed your rubber. There are no damage, fresh cuts on rubber, the level of air pressure corresponds to the required norm. Pay attention to the latest weightless loads for disks. They should be firmly fixed and not to act down the fingertips.
- Second. Check the presence of all nuts on wheels. Nuts must be relatives if the substitution occurred, immediately call the wizard and bring all attachments into the completeness.
- Third. With the help of a balloon key again "TURE" all nuts. There are many cases when the car lost from the tire station lost control and fell into an accident due to not twisted properly fastening nuts.
We pass the car yourself
Many of the motorists produce shift seasonal rubber Alone in the conditions of the garage. Moreover, most operations can be held for a couple of weeks earlier Replacement.
The wheels are removed from the storage location, pumped slightly more norms, carefully wipe with dry clean rag and inspect. If the state of rubber does not require an intervention of a specialist, sends the wheels to balancing. Checking the wheels on the imbalance must be done regularly, the frequency depends on the quality of roads and run. But in any case, when changing rubber, balancing is extremely necessary.
For changing wheels of special skills and knowledge is not required, enough to follow simple rules. Having loosening the fastening of the wheel nuts using a balloon key, we set the jack in such a way that the support of the lifting part of the jack is barely concerned the point of the application's body to the car body. As a rule, the manufacturer determines the place of installation of the jack in the schemes and technical descriptions To the car. The sole or support plate of the jack should be based on a dry smooth plot with a solid coating. Before lifting, be sure to check the gearbox lever must be installed on the first or rear speed. Under the free wheels additionally install wooden bars to prevent the possible movement of the machine during the jack.
With the help of a jack, a wheel with a separation over the support surface for a couple of centimeters, under the bottom of the car you need to install a reliable metal support, a duplicate jack. "Professionals", as a rule, do not make this, neglecting safety rules. With the help of a balloon key or hand remove the fastening nuts and remove the wheel.
With the help of the lantern, the elements of the suspension are examined, first of all - the absence of spots from the leakage of technological fluids, the integrity of rubber covers and seals. If there are traces of rust and corrosion on the wheel hub elements - they must be removed with a rigid brush and treat the surface with a protective composition, can with silicone aerosol. The latter does not concern brake discs. Usually additionally check the condition of plastic or composite protection arches of the wing, no cracks and damage.
If everything is in order - set the wheel with the appropriate rubber and spin the hand of the nut until it stops. Called key slightly increase the moment of twisting. Now you can remove the extra support and lower the wheel.
After performing a similar procedure with all the wheels, using a balloon key in turns all nuts on wheels. At the same time, from one to another nut follow the diagonal, increasing the tightening torque. The procedure must be performed by the queues with all the wheels.
The wheels removed must be thoroughly wash the water under pressure and dried in a closed room. Experts recommend to store rubber in a vertically position, pre-packing into dark polyethylene or special covers. For proper storage High-quality rubber practically does not lose its properties and serves for a long time.
POST Views: 6 402
Replacing tires and bicycle cameras do it yourself
 Bicycle repair is better not to trust outsiders, even professional craftsmen. It is necessary to learn how to understand your "horse" so that he listened only to his master. Therefore, it is better to learn to remove yourself and put a tire with the help of special tools.
Most often, the tire has to be removed to replace it with a new one when the camera is broken and during the repair of the elements of the wheel.
How to make an alignment?
Announced is the removal of the tire with rim. Repair kit depends on the design of the bike. Minimum is gloves, and to speed up the process you need to stock:
- on the installation (the tool in the form of a plate, bent on one side) to capture the edge of the tire;
- key to unscrew the wheel fixed by the old manner nuts;
- pump to install the wheel in place.

To remove a bike break, you need to do several actions:

- remove V-Brake (with disc brakes - Caliper);
- weaken nut or eccentric;
- remove the wheel;
- running through the nipple as much as possible;
- pry the edge of the tires to the laying in one place;
- flexing a tire every 15 cm, withdrawing for the rim every part between the layers;
- when one side of the bike breaks will be over the rim, you need to do the same with the other side.
If you just need to fix the camera, you do not need to completely remove the tire.
To return the tire to the place, you need to do similar actions:
start stacking one side of the vocinee need from the inside of the rim;
when 15-20 centimeters remain, one side of the tire is fixed with an alignment and transfer it inside the rim; 
the edge of the tire is placed inside the rim and install the camera;
repeat the process, bending the second edge of the tire until it is finally hope;
mount the wheel and close the brakes.
You must not forget that the thin and soft rubber of the camera may not withstand large loads. When the camera is inside, you need to act very carefully.
How to change the camera?
To replace the punctured cameras, you will need a repair kit. It contains:
- several different Synthetic Rubber Patches with a Packed Party, which will be glued,
- metal stuch for creating a rough surface,
- rubber glue, capable of paying and chamber to become one whole,
- the degreaser can be seen in some sets, for durable gluing is necessary.
Modern cyclists often use an anti-looped gel that is pumped into a new chamber before inflating.

The actions to replace the camera are quite simple, only you need to do everything carefully and apply a small physical strength. This sequence is:
put the bike up the wheels,
pump brakes V-Brake
freeing the wheel, weakening the screw on the axis or dismounting eccentric,
Renovated Yu or a new camera must be put in place. To do this, it must be put in the tire, stretching along the rim. Do not forget to check the nipple and space under the bus and follow so that the folds are not formed. The camera will take its shape if it is slightly drunk. Install the tire for the rim and put in place the wheel, trying not to confuse the location of the chain.
Put the wheel with nuts or eccentric, put the brakes in place, pump the camera and put the bike on the wheels.
Before working to replace the camera, you need to take care that there are no hot objects nearby. They create a danger of an explosion, because heat increases the internal pressure of the camera. It is possible to blow up the camera if when pumping exceeds the allowable pressure, designated on the cycle coil.
Before buying, you need to make sure that it matches the hole in the rim. Before installing inside the tire, the camera can be sprinkled with Talc. Previously, you need to make sure that there are no traces of oil on rubber surfaces.
Before installing the camera, it needs to be slightly pumping. So you can find other punctures and facilitate its placement in the rim. When replacing the chamber and tires you need to remove the bridge rear brakeTo accidentally not bend it and not spoil.
Tires are changing not only with the appearance of cracks, but also after 7-10 years, regardless of the operating conditions. If the camera had to be changed due to puncture, it is necessary to look good inner side of the tire and remove the foreign body.
So, in replacing the tires and the camera there is nothing complicated, and most cyclists independently cope with such repairs. The main thing is to stock the necessary objects and do everything neatly.
Rules for replacing tires on a bicycle
All cyclists are constantly faced with the problem of replacing the tires on the bike. Of course, you can contact the workshop in which, in addition to the fact that they can replace the details, will also repair the entire chassis. But most experienced viliters advise you to be able to do repairs yourself. So you acquire the experience in the maintenance and repair of the bike and in unforeseen situation You can eliminate breakdown. Replace tires on a bike on its own easily, it will take much less time than in the workshop, and save money.

Causes of repair of tires
- The main reason is punched camera. To flick or replace it, you need to remove the tire. It is desirable to examine it for the presence of a jammed glass or other small sharp objects.
- When the protector was strongly worn out, the camera is more susceptible to the risk of puncture. Even very small windows can damage it.
- Supports may appear and other irregularities. The camera begins to drink from under the tire. Therefore, it is necessary to replace it with a new one.
Remove the tire in hiking conditions is heavier than at home or in the garage. Especially if there are no necessary tools. Make it possible, but very hard. Especially when the tires glued to the rim as washed. Therefore, it is best to take a removal and other bicycle repair tools on the road.
Replace tools

With the help of mounting blades, we lay down the cycle hollows
- A set of mounting blades - two or three plastic blades will help to easily remove the tire. This film will not hurt the disk and rubber. The hook on the other end of the agitator clings to the needles, and thus the first blade is fixed. Another exchanger is performed circular movements around the perimeter.
- Wrench or screwdriver - can be used to replace the usual removal. But they are more dangerous for damage to the rim and puncture of rubber. Wrench keys are also used to unscrew the wheels that are attached to bolts.
- Mounting tool - 1678/2Bi. This excumber is designed to withdraw the unsuitable bicycle tires with metal frames. It can be adjusted under the different width of the bike tire, which allows you to quickly replace it, using the minimum of effort.
- Mounting mites - designed to remove the connected with the tires. As well as the previous cutter, have a function of adjusting to different widths. When installing rubber tightly pressed it to the outer part of the wheel of the bike.
- Pump.
Dismantling Tires
- Weaken brake. On the different models Bicycles are different brakes. If they are disk, then you just need to unscrew the eccentric or nuts. Most often there are bicycles with brakes V-Brake. It is necessary to unbutton the brake levers, pull out the brake cable and distribute the levers to the sides.
- Remove the wheel. It is advisable to turn down the bike from top to bottom. It should be turned off carefully so as not to damage the elements installed on the steering wheel, such as a bell, lantern, mirror or brake handles. The front wheel is removed without problems. To remove the rear - it is necessary to free the chain. Remove it better with the smallest stars.

Gently remove the wheel
How to replace the tire on the bike
There are many manufacturers who offer a large number of tire models. The drawings of the protector are symmetric or asymmetric. In the first version, you can put them on a bike to any side. In the second, usually the protectors are focused in one direction or another.
Some manufacturers label the tires with arrows and inscriptions Front (forward) and Rear. They immediately see the direction. There are also models for the front or only for rear wheels. This is the corresponding inscriptions and arrows. If you do not fulfill the recommendations of manufacturers, it leads to a bad clutch with an expensive, worsening bike management and fast wear Bicycle tires.

Setting the tire on the rim
On some V-type models there are no marks and arrows. Then experts recommend putting on front wheel Tires with edge back (/), and on the back - with the edge forward (/). This is determined by the fact that the rear wheels perform the function of the clutch with the road, and therefore should be resting on the road "legs". And the front - perform more braking process, and the "legs" in the picture should look forward.
These recommendations are designed to ride a bike on a unconfalined road. If you ride on the highway, then the editors of the arrow have a minor function. With an increase in the passability and clutch with the road, you can put both rubber edges forward.
How to install a tire?
- We put the camera in the tire. It is necessary to make sure that it is not twisted. For this, it is slightly pumped by a pump.
- Wear a tire. It is necessary to do it carefully with the help of a shift. First we put in the rim one side. Then click on the valve in the spool, we descend the air and put the shovel of the bus on the other side. It is necessary to check whether the camera has become correct, and slowly pump it, paying attention to that, exactly has become a tire.
- We put the wheel in place. We put on the chain, fix the brakes.
There is nothing complicated in replacement. Even newcomers can cope with this. The main thing is to remember what to do everything neatly. Tires are constantly demanding replacement, and from punctures, in general, it is difficult to protect yourself. Therefore, a little effort and time, the presence of the necessary tools - and replace the tire will not be difficult.

If Nipple has failed, it is not necessary to change the camera: the repair of the bicycle nipple can be made independently for free. Cost new Detail Low. Let's figure out how to change the bike nipple and what to do if the breakdown of you found away from home.

We tell about how to ride a bike: Rules road and ways of effective weight loss.

Even the most accurate cyclists sooner or later face that it is necessary to change brake disc pads for a bike. Work is although simple, but requires certain knowledge.
How to change the camera on a bike (for dummies)
If you decide to change the camera for the first time, or it happens that after replacing, the camera descends, it will be useful for you to read these tips.

Camera replacement order
1. Before unscrew and remove the wheel if it is not turned to the end, completely descend it using pressing on the nipple. Thus it will be easier to pull it out of the brakes.
2. We unscrew the wheel with two keys simultaneously, if there is only one in the presence, then the nuts are twisted along the turn alternately on each side.
3. We take a special plastic plate and insert between the rim and the tire. We stretch the tire and cling the plate behind the knit.

I have enough three such plates so that one side of the tire starts easily climbing out of the rim. When I used the keys, screwdrivers instead of plastic plates, or any other sweater materials, it often pierced a new camera when installed.
5. Now carefully unpack a new chamber without violating its integrity. I have long stopped glue old cameras. As a rule, it comes longer and more expensive.
6. Before stuffing a new chamber in a tire, it follows her a little bit, so that she takes the form and we had less chances to shove it between the rim and the tire.
7. First of all, insert nipple and fasten the washer well. Further, handle the chamber under the tire around the perimeter.
8. Now we apply a tire back to the rim, first with your hands, and at the end the same plates that they got. At this stage, you need to show maximum caution, since it is at this moment that you can damage the camera.
9. After the tire is in place, you need to slightly tapping the wheel on the ground, turn it in a circle. Thus, the camera will take its place where it could get between the tire and the rim.
10. Install the wheel in the plug. Alternately tighten the nuts on both sides, while simultaneously following the distance between the fork and the wheel, closer to the frame, was approximately the same. If you change the camera on the rear wheel, do not forget to throw the chain when installing.
11. By installing the wheel, twist it with your hand, if it is spinning some more inertia, then everything is in order, you can pump, if it almost immediately stops, then you need to unscrew it and release the locking nuts on the sleeve.
If I do not hurry and do everything in order, then I have no more than 15 minutes to replace the camera.
How to change the camera or tire on a bike: Step by step instructions
If you are a cyclist, you need to be able to cope with near typical problemswhich can happen on the road. The punched wheel is one of the main. Unfortunately, to go on a nail, a piece of metal or a broken bottle can be almost anywhere, and sooner or later it happens with each. Already happened? Read our review that we have prepared with Onliner, how to change or stick the camera, a tire in a bike.
Take out the chamber breakage
To remove a damaged camera from the wheel, it is necessary to remove it from the bike - it is much more convenient to work. After that, follow the step-by-step instructions:
1. Unscrew the protective cap with nipple. If required - Fully lower the wheel. This will facilitate work, because there will be no extra resistance.
2. With the help of the installation, picker the edge of the tire and pull it out of the rim. Special tools allow you to spend this procedure quickly and most painlessly. If there is no mounted, you can try to use any thin and durable object, such as a spoon. Her handle has repeatedly reversed cyclists, who have no repair tools at hand. Watch out only so that it does not be ground.
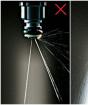
Important: The tool should not have acute ends, so a screwdriver is not the most the best decisionAlthough it corresponds to a given form. It can only hurt the wheel stronger. If you want to save the tire, do not do it.
3. Optimally use two installations. First picker the edge one, then when you fix the position, in 2-3 centimeters, picker the tire to the second install. This will follow the weakening of pressure, and work will go easier. Continuing to maintain the first assembly of the hand, the second continue to simply approach the tire in a circle until it is completely released from the rim.
4. Now, when one edge of the tire is completely taken out, free the nipple and remove the damaged camera.
Installation process We will look at the installation of both a new chamber and tires. If you save the old chamber, skip the first step.
Install a new tire
1. We put on a new tire on one "edge" of the wheels, so that we have a free pocket to put the camera.
2. We take a new chamber ( switchned) And, starting with Nipple, we deposit it along the rim.
3. While the camera is not yet closed, slightly jump it to make sure that it is put exactly and nowhere is not twisted. If the camera is installed with the inflection or twisted during the installation process, it will most likely burst as soon as you sit on the bike. Agree, such unnecessary disorders to you for nothing, because it is not only spoiled plans, but also additional financial costs.
4. Now it is necessary to "fill" the tire in the rim. In the first steps, this is done manually, but at the end I will need a mount again. You can cope with one, but it is better to use two. Pull the tire with it a little on yourself so that it easily entered the rim. You can push the tire to the tire a little inward so that it is better fixed. The main thing is that the depth of the attachment was the same throughout the circle.
5. After the wheel is closed, pumped the chamber to the desired state. Usually the desired pressure is specified on the top, check it in order to properly configure your pump.
6. Now tighten the cap on the nipple to fix the condition of the wheel.
7. It remains to install the wheel in place and that's it. Now your bike is again on the go! Make a small circle on it at low speed to make sure everything is fixed correctly, and you feel comfortable. If necessary, pull the second wheel chamber so that they are equally elastic. After replacing one chamber, many cyclists feel insignificant discomfort when driving. If everything is fine - you can travel to the road. Suddenly what happens, you already know how to change the bus and you can do it even in hiking conditions.
Important moments
Try not to rush during the procedure and be attentive at every step. Any negligence can then turn into problems on the road. In case you save the old tire, do not forget to check its inner part for the absence of stitching and cutting elements. It often happens that a part of the subject that punched through the camera is clogged and remains in a tire. This can lead to re-damage to the camera. So, if you managed to detect the "culprit" of the tragedy, make sure you remove it completely.
When you work with the installation, be sure to hold it with your hand, even if it seems to you that it keeps herself. Tire resistance can easily push it out. At best, she just falls and you will have to start working again. At worst - she will fly out with strength and can hit you in the face. The feelings are unpleasant, not to mention the fact that it can be attempting.
How to change the bike tire
 The main cycling elements requiring constant check are wheels. It is necessary to check how well the camera inside the wheel is, as a strongly worn tread protector on a bicycle, and, if necessary, change the rubber and swing the air in the chamber. If everything is simple with the first, then how to change the tire on the bike there is a lot of questions in which it is first to figure out, and then begin to fulfill.
Required Tire Removal Tool
There are two types of bike coats with a separate chamber inside and the tubeless, the structure of which are similar to the automotive. The first are most common.
 When replacing tires on a bike, you will need two mounting blades and pump.
The spatula is necessary for convenient tire movement from the rim. Flat screwdriver in this case will not save due to the probability to hook the camera, damage the rim or scratch the paint.
The pump will be required to pump air into the chamber when the new bus will be installed on the rim of the bike.
Remove the bike tire
There are two ways to change the bike plate on the wheel one of the other way the use of mounting shoulder blades is distinguished.
 In the first embodiment, you need to start the air from the camera Vobaka. Press the finger on the nipple, if it does not work, you can use the corner of the spatula. The air is descended until the cottage becomes soft. Together with this, the sound published at the air exit will become quieter and nipple will leave the tire.
Just at this stage, mounting blades will be useful. With their help, change the bike tire will be easier and safer. Find out a bus one blade. As a result, one side will come out for the edge of the rim ribs. At a distance of ten centimeters, we set the second spatula. Fingering the edge of the tire, which got out and pull it completely on one side of the rim. We remove the spatula and pull out the camera, carefully removes the nipple from the rim is great. After that, the rim can be pulled out without much effort.
 The second method of replacing cycle bumps involves the absence of a shoulder blade, but it does not become worse. After lowering the air from the chamber with one hand, we grab the wheel of the bike in such a way that to connect both walls to the fingers. The second hand we pass twice the wheel of the wheel performing the same manipulations.
This method is based on the fact that the U-shaped rim in the bend center has the smallest diameter value than near the walls. As a result of such a connection of the walls, the tire will stretch and forms a hole, providing the ability to change it.
Correct tires for bike
 In order to change the tires of the Vobaka on better it is important to understand the purpose of buying tires, the main ride and understand high-quality rubber. But these are non-core criteria when buying new rubber for a bike. In addition, the tires for cycling are divided within the season of use and type of protector on a bike coating.
For example, on winter rubber Thunderwood will be present for timely braking. Others are ideal for urban driving or racing tracks, but not for off-road, due to the lack of protestors.
Cocrees are made of composite material or rubber. The first material is longer, but has a price higher. The second, faster is erased, but the coated coating is better carried out. Depending on the quality of the bike rubber, the cost fluctuates. The artificial rubber used in the production of cheap tires has a short service life that you can not say about natural.
Deciding, change the bike breaks. Remember the following factors characteristic of poor source material:
- with a diligent pressure and finger, traces of rubber will remain on the skin;
- thin protectors on such tires will be easy to disappear, and not stretch;
- walls should be smooth.
Varieties of tires
There are several kinds of bicycle bumps: winter, mud, road or semisal, slick. Distinctive features serve a specific pattern and the number of treads on bike tires.
 Winter is a separate view that combines the characteristic drawing of the protector and metal spikes For clutch.
Mud buy for mountain bikes, for trips on the ground, sand, crushed. Present a tire with a deep pattern, a large number of tested testers along the entire surface of the touch of rubber and roads.
Tires have a half-color, have a uniform shallow pattern of protector at the edges, and in the center the pattern of strips, combining small grooves or small hooks. Focus on walks in the city, paths in the forest or for light off-road.
The slick is bicycle plasters with a low-pressure tread pattern, so unsafe in rainy weather or when wet, mud mass passes. But be excellent option For urban races.
Put a new tire on the bike
Before installing the new tire, check the integrity of the protective tape on the rim. It is necessary to prevent the camera with spokes on the wheel of the bicycle.
 An important point when you need to change the rubber is to install the tire in the direction of the wheel movement. For this, the walls are drawn on the walls pointing to the direction. If you change rear wheel, then the stars of speeds will be with right side Rim and movement will be carried out forward.
 Let's fill one board of the bikes inside the rim is great. After that, we set the inside of everything else dutched chamber. It should not be completely blown, but to maintain a form. You need to start insert from the nipple, make sure the camera has not twisted. The refueling of the second side of the facilities in the rim starts from the nipple, to prevent the chamber to prevent the chamber between the rim and the bike coupling. In the event of difficulties at the end of the work, the edge of the tire is replaced by a shovel.
After that, holding the nipple on the side of the tire to wear a pump on it and pumped the air into the chamber. This is done so that nipple does not go inside the camera.
Pumping the air half, check again whether the bike break is well, and then continue.
Choosing a tire for a bicycle can show complex, but it is only at first glance. In fact, knowing all the information about the types and appointments of the use of tires, in the store you quickly determine what you need. Also, and change the tire on the bike will not work, the main thing to do everything neatly and not to rush. Using required tool The replacement process will not be delayed for a long time, but the future walks on the bike will delight a pleasant ride, and the qualitatively performed job of the bicycle owner will ensure safety.