Cargo quadrocycle do it yourself. Homemade Quadrocycles with hands of folk craftsmen
Quad bike from the store - the pleasure is not available to everyone. Therefore, many craftsmen make quadrics with their own hands. And in this article we will tell about the most interesting of them.
In the manufacture of quad bike, everything can be useful in the garage and nearby. Each vehicle made with their own hands is unique and individually, so the drawings and schemes have to talk with difficulty.
Few people describe in detail the process of building their offspring, from this to find specific information is extremely difficult. But there are exceptions.
How to make quad bike do it yourself
in 2012, the talented designer S. Plentnev shared the drawings and nuances of the construction of his brainchild.
What was used in the design of the TC:
- Front and rear wheels from Niva Chevrolet 15 inches
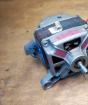
- Engine A-M Oka
- Box gear
- Intercolese gearboxes OT. rear axles VAZ "Classics"
- Slusa from car VAZ-2108, 12 pcs
- Fuel Bakis Canisters for 20l
- Emphasis Passenger Oki Headrest
- Clutch from Oka.
- Steering wheel from the motorcycle Ural »
- Instrument shield from car
The main technical specifications of the Quadrocyclaus:
Quadrocycle drawings:


Transmissionideno from AvtoVAZ nodes with some modifications. For example, a loyal to reduce speed and increase the torque instead of the main pair, a chain transmission was used.
Intercolese gearboxes are borrowed from the classics, the semi-axes are removed and replaced with shruses from front drive vase. Also equal hinges corner speeds Used in other nodes of transmissions.
Pendant independent on triangular crossings. Shock absorbers from Oka.
Silencer homemade of 2 sections, isolated asbestos.
The kit is made of fiberglass. 10kg epoxy resin took to create such plastic, 1kg of the plasticizer and the same hardener. 15 meters of fiberglass and 5 meters of glassmate.
Body body kit - fiberglass. He shouted it for the first time, and therefore first examined the recommendations for the implementation of the relevant work. But as it turned out, this process is painstaking, although the result is worth it.
Bumper and kenguryatniki cooked from a 20mm round-profile pipe.
Photos of finished quad bike:


Article-based material: http://modelist-konstruktor.com/razrabotki/853
Quad bike from motorcycle
This quadric is made on the basis of the Ural motorcycle.
All details in the video.
Quad bike with Motor IL Jupiter. Distribution from the motorcycle ant.


Quad Cobra Mix
Generator, Forced Cooling, Radio, Electrostarter from dozens, Engine from the Ural motorcycle.


Video homemade quad bike In action:
Homemade Buggy "Raptor"


Homemade Quadrocycle with an engine from Oki
To date, four-wheeled aggregates are increasingly gaining popularity. That's just buying such an apparatus not everyone by pocket. Then the question arises how to make a quad bike with your own hands. The creation process itself is very fascinating, and it is not difficult to find components. Therefore, if you have a desire, boldly try to work.
Before starting work, a distinct visual representation of the future design is necessary. Drawings of homemade quadrocycles vary in accordance with the tasks of the owner and the peculiarities of further use (transportation of goods, the passage of rough terrain, etc.). After studying the main schemes and buildings, draw your own project to create a four-wheeled bike. A visual example will serve as the basis of work and will help explain to those skilled in the art that they are required.
Sure, homemade work Loses to the proven brands. However, if you choose the right materials and collect compatible parts, then it turns out a completely powerful unit capable of moving with competitors. Moreover, you will save much.
Work process
First of all, it is necessary to make the drawings of the quad bike with their own hands. Attach the maximum amount of effort in the creation of sketches. They will be needed to determine required spare parts and counting costs.
After creating a picture, deal with the purchase of components. Usually their main composition includes:
- the framework is the main construction on which the whole unit will hold;
- pipes of different lengths and diameter, to ensure the operation of the system;
- metal rolling, for installation of flaps, protection and other things;
- shock absorbers;
- engine and its components.
Quad bike is easiest to do, having special equipment. If this is not available, the best option will refer to specialists with ready-made drawings. They not only work efficiently, but will be able to fit nonsense parts and mechanisms.
The frame is to perform an individual, under the dimensions of the conceived apparatus. However, if desired, you can take a simple frame from a motorcycle or car russian production. The easiest way to make a quad bike from Oka. As at the Okey Wheel Base is not greatThis allows you to simplify the work on the size fit.
Suspension and shock absorbers from cars and bikes are also well suited for future crafts. Considering that the ATVs are designed for challenging on complex relief, the shock absorbers from the moped minsk or the Dnieper will become an excellent option.
The brakes are a very important part of the design. They should not save. Create quad bike with your own hands, 4x4 drives, better with a brake system from VAZ. Their strength is designed for cars, so the light four-wheeled bike will be perfectly responding to such a system.
The steering wheel can be taken from any motorcycle. It is desirable that the weights are installed on it to reduce the vibration from the operation of the motor and movement along the rocky terrain. This will reduce squeezing and fatigue of the hand when traveling.
Depending on which method of operation you choose, you need to pick up the wheels with the calculation of wear. For trips on ordinary roads, simple wheels are suitable from Oka. However, if you wish to achieve good passability of off-road, it is worth spending on specialized wheels and tires from manufacturers firms.
And the most important is the engine. Best option On the role of the motor, the engines from the Motorcycle Izh Jupiter or Planet. Quite coming down new Motor. Their simple device will help to easily replace wear and breaking spare parts. At the same time, do not forget about cooling. It is necessary to choose the perfect option for different climatic conditions. Active cooling is perfectly suitable, which, unfortunately, was not used on motorcycles.
Homemade quad bike from the Oka, whose drawings, depending on the operating conditions, should contain optional equipmentmay be equipped with fogy Farams, Toolbox (very useful, in case of breakdown) or winch.

Build construction
After creating drawings and selection of the material, you can proceed to the creation of an aggregate. First of all, a framework is created to which all parts will be installed in the subsequent. It is advisable to use the most strong and corrosion-resistant materials. When driving off-road, a robust design will save your engine from breakage more than once.
Next is the installation of the chassis. Here it is necessary to show the accuracy of the assembly, since the coordinated operation of all wheels and shock absorbers will provide good dynamics and stability of the apparatus.

Then proceed to the installation of the engine and its components. With inconsider mechanisms, in no case apply gross power. This will lead to subsequent problems in the work. Connecting the engine with a box, connect fuel system. The tank for fuel can be done with a margin, which will ensure the possibility of long trips.
Now it is necessary to install electrical equipment. At this stage, the wires are laid, headlights, signal lights and other elements-consumers are installed.
After completion of the main work, you can go to cladding and body kit. Metal or plastic sheets use when installing bodybage to solve you, but recommended choose the weight load on the engine. With sufficient power, a kilogram will not be noticeable. The seats are better installed with a hydraulic pillow, but for it will have to pay extra, because with a long movement in a bad road, the mitigation of vibration will provide additional comfort.
This is the easiest way to make homemade quad bikes from Oki 4x4. The main thing in the work is the right relationship of finances and opportunities. After all, if you wish to create an equal four-wheeled bike, without having calculated costs, you risk leave your work unfinished.
How to make homemade quad bikes - a question that is the dream of almost any young designer.
However, this kind of dreams are carried out far from all and far from at that age in which I would like. But sometimes the dreamers still embody the desired reality.
Drawing skills, the ability to perform complex technological processesThe estate and time estate is the basic requirements when creating a self-made vehicle.
Today we will tell you about how to construct homemade quad bikes, using spare parts from Oka and show this process using photo selection.
Learn one of the ways and make sure that the realization of the independent creation of a quad bike from automotive parts It is possible in the example below.
All-wheelwater quad bike on the basis of the car "Oka" with their own hands (Lover Designer Sergey Pletnev)
To begin with, give general characteristics Project:
- Length - 2300 mm;
- Width - 1250 mm;
- Height - (extreme points of the wheels) - 1250 mm;
- Base - 1430 mm;
- Clearance - 300 mm;
- Engine - got from the car "Oka";
- Wheels - discs: "VAZ" 2121 (Niva);
- Tires - coordiantoffroadr15;
- Shock absorbers - "Oka";
- Hubs - "VAZ" 2109;
- Inter-wheeled gearboxes - "VAZ" classic
- Maximum speed - 60 km / h
- The gearbox taken from "Oka" was modified by replacing the standard main pair of gear on the chain drive.
Made it was to increase speed on roven road. And it looks like this:
Assembled

In disassembled form
In the form of carrier parts, the frames perform water pipes (VGP 25x3,2). Were purchased in the form of two segments of 7900 mm and weighing 38 kg in the amount of 1150 rubles.
For levers and suspensions, water pipes were also required (20x2,8) - two segments of 6100 mm long, 20 kg weighing 650 rubles.
Two used rear bridges from "penny" (VAZ 2101) - in the amount of 3000 rubles.
From the "eight" (VAZ 2108), fists assembled with discs, calipers and other steels of drives - in the amount of all these bu parts were spent 4000 rubles.
Metal sheets, nuts, bolts, washers, silent blocks, and others were useful - consumables and materials for such cases should always be enough.
From the above parts using welding, pipe bending and plumbing tools, this design was created.
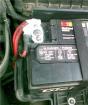
With the help of welding, most structural parts are bonded. A carburetor was installed.


Homemade all-wheel drive quadrocycle carburetor

Metal plates for suspension, engine and bridges are also fixed with welds

The hubs are connected to the suspension new phthulates, washers and bolts
After the frame was collected, the miscalculations of the nuances of the engine position, the functional of the gearbox and its mounting, as well as the front suspension with the steering wheel, began.
As a result, the following moves were applied:

From the rear post, the semi-axes are connected to the hubs. Fastening for shock absorbers

In the gearbox applies the elongated stemman production

The picture shows how the fastening for the box and the position of the rod was connected

The swivel fist is taken from the "VAZ" 2109 and the steering tower is made of metal plate alone
After a small test drive, it was noticed that the stem from the box would need a scene to switch the hand gear - this is the most convenient option in the case of a modified box.
It must be said that it was modified to increase the gear ratio from the axis to the wheels, since without this intervention, the speed at maximum revolutions would not be given above 45 km / h.
Further assembly

Side steps are welded to the frame, the front axle is installed, a cardan from the gearbox is connected to the front bridge, the front shock absorbers are installed. The front edges are connected to the hubs and the bridge


Installed brake system Separately for the wheels

Installed steering and brake system for front wheels

Off-road rubber purchased (in this case, the most appropriate option)
The stage of creating a quadrocycle matrix occurred. Installed mounting foam, cardboard, resin, fiberglass, fittings, etc.
Technology application of materials when creating a matrix is \u200b\u200bvery difficult processrequiring a deep and detailed study

Light reinforcement and cardboard set frame wings, as well as front and rear pieces Facing. The foam was filled with a margin in places where convex forms were supposed to do.

The dried foam was processed with a furnace hammer, knife and other tools

An oil radiator from the helicopter was installed and the first layer of fiberglass was applied

The front suspension is completely collected. Native ball "VAZ" 2109 below. From above steering tip from "UAZ"

Processed surface. Side view

The hubs were fitted under the wheels of "Niva" with special adapters

View of the hub from the side


The matrix is \u200b\u200balmost ready. Additional parts of the frame provided for use as a trunk and bumper are harvested at the same time.

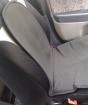
Homemade seat. The steering wheel is borrowed from the Minsk motorcycle. Controls were summed up.
Painting quadrocycla


Painted suspension elements
Assembly
The final part of the work is an assembly.

Used homemade silencers. Plastic canister used as a gas tank. Electronics mounted.

From another angle.
End of work


Completed work.

The panel is borrowed from the "Oka" car.
The popularity of four-wheeled vehicles is growing steadily - now on the roads almost every day we meet people at high speed of carrying on roaring quad bikes. This fun is not available to everyone. But the quad bike can be do it yourself.
Idea to build Quad bike do it yourselfand many lovers of auto equipment appear in many lovers. And if you figure it out, then this is not a bad option to take yourself as interesting and as a result to get your personal unique quad bike. Yes, and ride it will be much more convenient and more pleasant, since you yourself are his author and the creator, as well as know how to build every node, which is important and very useful when repairing or modified. First, it is necessary to determine with the type of quad bike and its main sizes. From this will depend on the design of the frame and suspension of your quad bike.
Here is a translation of the manufacturer's instructions. homemade Quad bike, drawings and specifications
Introduction.
The main purpose of this guide is to provide you with the necessary specifications, a list of materials, calculations, drawings and all necessary information material that will be required for building own quad bike.
Manual's compilers tried to simplify this project, but the main knowledge in the field of technology and mechanics will be necessary for you, as well as the skills of working with manual instruments and the welding machine.
Perhaps you will also be interested in the manufacture of homemade children's electrocartes - description by reference.
Used materials or changes in calculations - fully your choice, you can use the materials that are not recommended, and some others. However, you are fully responsible for the result. For example, the material we chose for the main frame (Main Frame in the drawing) - 1 "x 1" Square profile.083. We tested this material on several models, he proved its reliability to use and ease in working with it.
We will show you step by step how to make a frame in our own garage without any special devices.
Frame.
The main part is not only quad bikesA and any technique is the main frame.
Frame specification:
Material: 1 "x 1" Square profile.083
Overall Length: 50 inches
Total height: 29 inches (landing level)
Total height: 33 inches (steering level)
Wheel base: 41 inches
Distance between axes: 27 ¾ inch
Tilt axis: 14 degrees
Front wheels: 41 inch (from the outer edge of the tire to the outer edge of another tire)
Rear wheels: 44 inches (from the outer edge of the tire to the outer edge of another tire)
Clearance: 7 inches (with 16-inch rear wheels)
Calculation of speed by the formula:
It turns out the speed of 33.91 miles per hour or about 54 kilometers per hour.
Drawing:

Note:
Main Frame - Main Frame
Swing ARM - pendulum lever for rear suspension
General view of the frame:
Materials:
Square profile:
9.75 meters - 1 "x 1" Square profile.083
Pipes:
1.22 meters - 1 "x .065
1.22 meters - 3/4 "x .065
0.3048 meters - 3/4 "x .125
0.915 meters - 5/8 "x .125
0.61 meters - 1/2 "x .083 Aluminum pipe 6061 T6
Rental:
0.61 meters - 1 "x 3/16"
0.915 meters - 1 1/4 "x 1/4"
0.61 meters - 5 "x 1/8" (this plate is needed for fastening the engine and bearing suspension)
After you collect and weld a metal profile, pipes and all the rest details quad bike According to the scheme and attach to the wheel frame, you should get something like the picture shown in the photo

You also need spring shock absorbers for rear and front suspension.
Engine:
Now it is necessary to securely secure the engine on the frame. The engine is best used from moped. After screwing it to the frame, connect the engine shaft with a gear on rear axis Simple chain transmission. After that, output all engine controls on the steering wheel and secure the pedals and levers on your frame.
Bodybag:
Part parts or body quadrocycla Better and easier to make fiberglass. After making on wooden or plasticine duals, the elements of the aerodynamic body kit are adjusted relative to each other, polished and then painted in the desired color, after which they are already attached to the frame of the quad bike. Ideas, as well as some ready-made elements, such as a broken machine (of course, if you have in stock), options for external body kit can be taken from any serial models.

Important:
Remember that it will be necessary to register it in the traffic police to register it in the traffic police to operate in public roads. vehicles The engine is more than 50 cc and a maximum design speed of more than 50 km / h. Therefore, if you do not want to register, we recommend not to use engines with a volume of more than fifty cubic centimeters. We also strongly recommend remembering the safety technique: be sure! Dress at least a helmet.
Force aggregate homemade quad bike He became a motor from the "Oka" car - 32-strong, two-cylinder, four-stroke, liquid cooling. And if for the car its power often turned out to be not enough, then for quad bikes should have been enough with interest.
And this is just a dream of every man !!! I want this !!!
Frame of homemade quadrocycla - Spatial, welded. Its main elements (two pairs of spars: the upper and lower) are made of round tubes of type VGP-25 (water-based diameter of 25 mm with a wall thickness of 3.2 mm), auxiliary (so-in, crossbar, etc.) - from WGT-20. Spars - bent: the lower in the horizontal plane, the top - in the vertical. Flex a pipe on the pipe bender, "on the cold". The eyeles (pairs of ears) for fastening the levers and shock absorbers of the suspension welded to the frame immediately, and various brackets - as nodes and aggregates (by "place").
Homemade Quad bike all-terrain vehicles:
1 - front wheel (from the Chevrolet-Niva car, 2 pcs.);
2 - engine (from the car "Oka");
3 - transmissions of the front wheel drive;
4 - transmission box (from the car "Oka");
5 - transmissions of the rear wheel drive;
7 - rear wheel (from the Chevrolet-Niva car, 2 pcs.);
8 - fuel tank (20-liter canister);
9 - rear trunk;
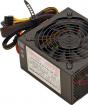
10-blower;
11-Sprinkle Passenger Support (headrest from the "Oka" car);
12 - saddle;
13 - clutch basket (from the "Oka" car);
14 - lever fixing gear;
15 - body kit (fiberglass);
16 - steering wheel (from the motorcycle "Ural");
17 - instrument shield (from the car "Oka");
18 - Front Trunk
Transmission homemade quadrocycla - peculiar. Although the machine is all-wheel drive, but dispensing box There is no. As you know, the engine is located in the "Oka", and on the Quad bike it is set along. This allowed to direct the output shafts from the transmission change box (CAT) not on the right and left wheel (both in the car), but on the front and rear axle. That's just myself force aggregate, Breakfied with a "basket" of clutch and gearbox, had to be moved relative to the longitudinal plane of symmetry a little left to reduce the horizontal angle of longitudinal swivels of transmissions. Well, their vertical angles were insignificant.

Sound transmission from units of various domestic cars, mostly "VAZ" models. But the finished industrial aggregates also had to refine. For example, from the PPC (from Oki) to ensure optimal (reduced) speed and increase the torque removed the main gear pair and replaced it on the chain transmission. The shifting stock also made another - extended, with releases on both sides of the checkpoint. The rod can be recorded in three positions: to include the 1st and 2nd gear, 3rd and 4th and rear. The selection lever of these provisions is on the right side, and the speed switch lever is with the left.
Intercolese gearboxes - from the rear bridges of the Vazovskaya "Classics", only their semi-axes together with the "stockings" are removed and replaced with shafts with shurthers from front-wheel drive models. Shruses as hinges are used in the remaining intermediate trash shafts.

Cinematic transmission scheme of self-made quadrocycle from Oka
1 - Motor (from the car "Oka");
2 - grip (from the car "Oka");
3 - gear change box;
4 - Sls (from car VAZ-2108, 12 pcs);
5 - gearbox of the main transmission with differential (from VAZ-2105, 2 pcs.);
6 - shaft (from car VAZ-2108, 6 pcs.);
7 - Wheel (from the Chevrolet-Niva car)
There are no reduced gears and blocking differentials.
Steering - motorcycle type (lever and shaft) at the top and automotive type (with steering rods) - downstairs, just simplified, without a steering mechanism, with one piece. The steering wheel first used from the Minsk motorcycle, with a pipe diameter of 22 mm, but it turned out to be a bit thin. Later found and set from the "Ural" motorcycle. The steering shaft is from the pipe with a diameter of 20 mm and a thickness of the wall of 2.8 mm. At the bottom end, it has a stroke limiter. At the bottom of the shaft rests on the stubborn bearing, and in the middle part turns into the junction of the piping bracket-sleeve.
The sump is made of a steel sheet with a thickness of 8 mm in a form resembling the letter "T". The edge of the "racks" performed a hole with a diameter of 20 mm - the steering shaft is inserted into it, and in the ears - the tapered holes under the ball tips of the steering. These holes are enhanced by suitable welded washers. The bark ears are slightly bent down so that they are almost parallel to the traction.
The wheels are 15-inch, from the car "Chevrolet-Niva". Tires with an appropriate planting diameter of 205/70 (width / height as a percentage of width) with off-road tread pattern. The diameter of the wheel running is about 660 mm.

Framework of the homemade quandercike frame:
1 - Lower spar (pipe D25x3,2,2,2 pcs.);
2 - upper spar (pipe D25x3,2,2 pcs.);
3 - Rack (pipe D25x3,2, 2 pcs.);
4 - support of the rear top lever suspension (pipe D25x3,2,2 pcs.);
5 - rear pitch (pipe D20x2.8, 2 pcs.);
6 - support front top lever suspension (pipe D25x3,2, 2 pcs.);
7 - front pitch (pipe D20x2.8, 2 pcs.);
8 - upper support front shock absorber (35 × 35 corner);
9 - top shock absorber top support (sheet S5, 2 pcs.);
10 - Front engine mounting rack (sheet S3, 2 pcs.);
11 - Rear reference rack of engine mounting (sheet S3,2 pcs.);
12 - eyelets of fastenings of levers and suspension shock absorbers (sheet S5, 18 pairs);
13 - Bracket fastening the saddle (sheet S3, 2 pcs.);
14 - upper transverse connection (pipe D20x2.8);
15 - lower transverse connection (pipe D20x2.8.2 pcs.);
16 - radiator support (pipe D25x3.2 cut along half, 2 pcs.);
17 - front console footboard (pipe D20x2);
18 - rear console footage (pipe D20x2);
19 - Communication of the front and rear consoles of the footboard (pipe D20x2);
20 - crossing the steps (sheet S5, 4 pcs.);
21 - UCHO fastening of fiberglass kit (sheet S5, kit)
Suspension wheels - independent, on two triangular transverse levers each (upper and lower) with shock absorbers from the "Oka" car (front). The levers are welded from round tubes of type VGP-20. Elastic elements (springs) and shock absorbers - from the "Oka" car (rear). In the wheels of the front levers, the hubs are welded and swivel fists - From the car VAZ-2109. And those and others had to modify. In the hubs installed studs under the wheels from "Niva", and in the front fists - home-made swivel levers.
The muffler is homemade, two-piece. To protect against temperature storage boxes, covered with a remote cover, and insulated asbestos inlet.
Body body kit - fiberglass. He shouted it for the first time, and therefore first examined the recommendations for the implementation of the relevant work. But as it turned out, this process is painstaking, although the result is worth it.

Levers suspension wheels
(A - the upper front suspension lever; b - lower lever front suspension; B - the bottom lever of the rear suspension; g - top lever rear suspension; All items, except marked, are made of pipe VGT-20):
1 - beam (2 pcs.);
2 - cross;
3 - sleeve (pipe D37x32, 2 pcs.);
4 - dressing of the shock absorber (steel, sheet S3);
5 - ball hinge (from the steering thrust of the car "Zhiguli")
At first, it was made of a steel square pipe with a cross section of 10x10x1mm. Required body contours. Fortunately, this pipe is easily neat even with his hands through the knee. The contour welded to the frame with the help of jumpers from the same pipe, in places where then (after dusting of the kit), it would be possible to cut the "tape". Then, bent from an organity (wood-fiber plate) "Wings" and fixed them with self-draws to the contour and jumpers. Where the bend was obtained steep, fastened individual strips from the same organity. The front ended with a neopolistir acquired in a shopping store. It was possible to use foam or the same mounting foam, but the polystyrene foam turned out to be a more appropriate material - it is well cut in a sharp thin knife. Separate elements of it glued into the overall design on the mounting foam.

Steering column assembly:
1 - steering shaft (pipe D20x2.8);
2 - steering connection plate (steel, sheet S6);
3 - plate plate (steel, sheet S6, 2 pcs.);
4 - Rubber Bracket Sleeve Steering Shaft (Capron, S18 Sheet);
5 - Support washer (steel, sheet S6, 2 pcs.);
6 - Cup (steel, sheet 18);
7 - steering wheel limiter (steel, S6 sheet);
8 - Bearing hull;
9 - stubborn tip (steel, circle 15);
10 - Thrust Bearing
Filshbak - complex shape. It did not seem to be taken out of the organity. Therefore, by climbing the engine with a plastic film, it began to fill the places of the mounting foam intended for it. After each layer is a mandatory drying, otherwise the thick volume of the foam may not dry inside. Filled until the layers went beyond the contour. Finally, after complete drying, the foam became a knife to withdraw the desired shape. The verge burned down coarse sandpaper. 
Under dashboard went into the course of dashboard "Oka". I fastened it on the blank, too, using a mounting foam. Since foam is a large, pores filled with plaster and then processed. When the shape of the blanks began to answer the intended design and its surface became more or less smooth, covered the workpiece of PF-115 paint. Since I was not going to make the matrix on the nerve for dusting of the kit, and immediately soldered the bodywork on it, followed by the end of the surface to the perfect state, then the shpocking of the plaster and the painting of the nerve could be neglected.