Acoustics for the scooter and its manufacture. Installing music equipment for a motorcycle configuration and additional equipment
I welcome your reader. I really want to highlight one topic already described on the Internet, but I wanted to once again describe it, especially since there is such an opportunity. Acquiring a scooter Suzuki Let "S 2 I like little child, I immediately wanted to know, and what is inside there. And being familiar with the "Delta Carpathians 2", which remained from Soviet times, decided to learn about the promotion of technical thought and the principle of operation of all internal devices: a variator, automatic grip, a starting processor.

But from orphanages have accumulated the experience that assures that it is better not to disassemble the toy all the more if it works. Naturally climbed into the Internet, find out what's there with him and how they do. And it came across the "Subwoofer on a scooter" article described in detail, as from what you can make styling Mouzon. Especially interested in the idea how to make a panel for the columns, which wanted to make himself. After that, burning the idea of \u200b\u200bthe idea of \u200b\u200bthe macrooflex, three epoxy packs, a black machine bracket (enamel) spray, a sony CDX-GT220 tape recorder, a subwoofer with a built-in amplifier (active acoustics) Helix Xmax 10a with a size of 10 "power 400W, the old columns "Ural" who were, for some reason hoarse and gave out wheezing at high frequencies therefore had to purchase two three strip columns Sony XS-F1335 diameter of 13 cm maximum power in 160W, they were told that it was best to give excellent sound on High and middle frequencies, found a capacitor (drive) to contain sudden subwoofer shots.

Of course there was an idea instead of a radio tape recorder to put a CD-ROM, but at CD-ROM "and there is no exit to the subwoofer, then it would be necessary to put a low frequency filter, and this is an additional confusion.


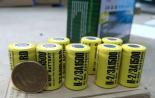
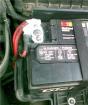
I also had to purchase a new machine battery MUTLU with a capacity of 62 Ah, as those old batteries that were not able to hold 12 volts and the sub-sab because of this turned off, and the radio tape recorder only.


From the idea to put a separate amplifier I refused, because I know that the power of the radio should be enough for columns this typeAlthough some let further believe that the amp is needed and remain in their opinion. It was very pleased that in the set to the speakers, in addition to the screws, protective nets and a set of wires are running on the speakers. The fact that the radio tape recorders do with removable panels turned out to be very powerful. A terrible labulous idea was born to get a new radio :-) and make an extension to the panel from the radio, which would not stop and not climb into the trunk, for example, to reduce the volume :-). The extensionist wanted to do not ababa as, but with the connector inserted into the radio. For the manufacture of the extension, it was necessary to "train a fee", on which contacts were to be located, and on both sides and not mirrored on both sides, and in a checker order. 7 On the one hand and 8 on the other. Drawing a marker of the track on a piece cut out of the workpiece, having previously measured and crawling to the brilliance, lowered the board into a plastic bath with a solution of three iron chloride for a few minutes, after which there was not dissolved tracks on the spot where there was no layer of the marker, but where there was no Marker tracks left. Using the coaxial 8-core cable, from two pieces, the extension cable was made to the circuit board, i.e. At one side of the cable and contacts of the disassembled panel on the other side of the cable. Higher Plus this solution It is to see the name of the radio station on the front panel and the name of the playing track on the disk.

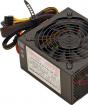
Naturally, the entire audio system was collected on the apartment, the computer gladly agreed to feed the wanderer from his 12 volt (yellow +12, the one that closer to the yellow black turned out to be a minus). But the subwoofer turned out to be voracious and with strong and intense jolts temporarily cut off and accounted for the volume. And now, how everything was going, the magnetic has wires: yellow twists with red and served on a plus, blue is not involved, black minus, blue with white stripe This is the allowing channel for a subwoofer that goes to the subwoofer input and screws to the screw with the inscription REM. Another tape recorder is there also, the other brush pairwise painted in one color of the wires is there: purple is activated under a column, gray, green is activated under a column and white and one channel and 1 on a subwoofer. A subwoofer is a screw with the inscription Batt is a plus, and the screw with the letter GND is minus, and a capacitor (drive) is connected in parallel to the subwoofer.

Naturally, plus and minus are connected in the future to the battery and as stated by observing polarity.

Next, we are talking about the work done, what and what was done. A rectangular hole was cut on the top of the steering wheel for the radio tape recorder. In order to cut through the window and that the plastic did not burst at first put the panel to the steering wheel and locked a slight knife, then the drill drilled holes on sketches.

out of holes on the holes, the window cut the window, the edges of the edges of which were cut off by the same knife although it would be better to be a file. The jigsaw were cut out of the chipboard two rings under the size of the speakers, and they were screwed earlier from the previous metal strips in which there were comfortable holes around the edges.


All this was placed on the scene of a sedental scooterist. It is naturally intended for the designed panel did not interfere with the legs of the drive. I tried to do so that both columns were located in the same plane. The edges of the planks were screwed by self-drawing to the body, after which two holes were drilled and the wiring speaking from each speaker in the trunk was dried. I stretched out of the holes in front of the wire with a small margin, kept with a black adhesive tape, which would be later when the foam stops did not need to scroll from the foam and pull out of it with efforts that everything remained hermetically and not torn.

After that, the macroflex is taken and the molds made from paper was flooded. Surprise Macrovex turned out to be very liquid as the dough.

And it was necessary to take the whole polish over the frame to stick with a scotch that would not score with a knife and not scratching the surface and unfortunately he was spent more than liquid foam than necessary, due to the lack of patience and the bay of a full form, here the error is that it was necessary to foam By layers with a thickness of 50 mm. With interruptions of 24 hours, and if this is not done, then inside the foam is formed as a result of the eggs, that is, the air can not penetrate into drying. There is an idea to tear the regular black rag material with a subwoofer and paint the tree with black paint in order to avoid moisture accumulation into wet weather, but I didn't go to the campaign, everything I don't go in the rain, but how the rain goes under the canopy and hiding there. At this time, like a foam drinned, I did the hole below (not through) in the subwoofer, I screwed three fasteners in them, the edges of which were cut with hacksaw and bent along the plane.

Subsequently, it turned out that the screws were not reliable and riding the day at the end turned out to be a lack of one or two self-tapping screws, it turned out to be simply spoiled on the bumps and pits from the subwoofer tree, of course, the idea came to make through holes from the inside by carrying a wide washer. In order to screw the screws, the diffuser itself was removed and the nuts from the inside are screwed, so now a small protection against theft of a subwoofer is provided. And now the subwoofer took a full-fledged carpet place.

It was impossible not to notice a fairly wide side of the subwoofer magnet that experts are a determining factor in determining the high quality of sound. For comparison, put the ruble from above.

It was also done under the scooter body from the magnetol in the glove compartment to the hole on the steering wheel of the panel extension, for this I had to remove the plastic cover of the beak and the cover under the scooter. The trunk was a very comfortable hole for wires, plugged with a rubber cork. As soon as the macrooflex hang out from it a special shape to the splayer, then spread the epoxy resin with a hardener in a separate bath and cutting out the fiberglass from the rag, a certain form was lowered into this bath to turn it over after the resin to a homogeneous mass.

Then I drove and waiting for the extra resin (according to properties and the color it looks like liquid honey) soles off the rag attached to my sculptural creation of foam. Before I put a rag, plucked the bottom of the unused plastics with a newspaper in advance. Tip: When cutting out fiberglass, it is not desirable to cut large pieces, because bubbles with air accumulate with air and more difficult to release them. Tip: When overlapping and smoothing fiberglass on the surface, hands wet in a pre-prepared bath with water. Tip: Do not work on the sun. The bath with a resin almost instantly boils and hardens. After completing the work, moisten the hands of acetone.

The panel soldered the soldering iron to the wires passed through the inside of the case and the steering wheel taken on the top of the steering wheel.

Painted the podium without sniffing Scotch and newspaper.

Slap in the podium hole with a knife in places where the speakers should stand, on the scheduled marker, the places drilled four holes for each column and screwed the screws that are screwed into them.


When everything fell into place, put the battery, the capacitor and the radio tape recorder in the trunk connecting all the wires. Brought three wires back from the trunk back to the subwoofer: meals, control of the inclusion from the radio and alarm. Subsequently, the antenna wire brought outwards. Painted fasteners in black on which the subwoofer is holding. Finally finished the work on the installation of music on the scooter, now it remains only to rejoice in the result.


It remains to find out how many hours of this battery is enough. Docused automatic Sirver PW150 charger for the battery home and antenna on the radio for radio.
Cash costs:
Subwoofer Helix 25cm (10`) Active Case Xmax 10 Active - 3240r
Magnetola Sony CD-GT220, 4x45W - 2750r
Mutlu Mega Calcium 62 A / h Battery - 2695r
Sony S-F1335, 13cm columns, 3-band - 1020p
Converter from 12V to 220V - 1000r
Charger Sirver PW150 -768R
Makroflex 3pcs foam. - 600r
Epoxy resin 3 pcs. - 300r
Camelion 2.1 watt lamp - 280P
Antenna Antey - 150r
Black matte paint - 75r
Spent - 12878r
CONCLUSION: After checking the performance of the entire unit, it turned out that the tracks switched only back, and all other buttons work properly it was not upset. More from refinement: I put an antenna on the subwoofer, which is attached to the magnet to the metal, connecting it to the radio tape recorder into a special connector, screwing the metal cover from the glass jar, drilling a hole in it in the middle for a self-press screwed into the subwoofer. The antenna focused on the lid of the bank, but tested magnetic fasteners when driving, the antenna dropped twice and scratching on asphalt, after which it decided for fastening strength to resort to the use of the well-known fastening element - Scotch. :) Very conveniently standing on the spot began to climb the back on the subwoofer. It turned out a convenient back of the stool. Under the weight of the subwoofer, the scooter standing on the footage is now not forwarded, and back, but it's not bad, but rather good, because there is a standing scooter on site just started to rotate rear wheel And for heating itself, the turnover itself is gaining, and now the wheel is pressed to the ground and does not rotate, and if you need to stand in place in place, you can always tilt forward. After 10 km of departure, the right column stopped playing, and then the left, it turned out that under the weight of the radio tape recorder, going along it to the speakers, pressed with sharp metal angles of radio tape recorder to the wall of the trunk and nobility, but this malfunction was found and quickly corrected. On the large turns And the busy noisy motorway has to add volume, but this is not a problem. It turned out to be very important that the speakers would look into the face of a sitting scooterist, for high frequencies of aimed action. With just a charged battery, you can hear at a speed of 60 km / h, and that it struck, picking up every word of the radio speaker. Two days grabs something to plant the battery, and when planted, you can normally hear at a speed of 30 km / h. With a planted battery, everything works until you add volume, and when it makes a subwoofer starts abandoning, although the magnetol is playing and the front speakers continue to sound. It remains to come up with how to feed the battery from the generator so as not to run and do not carry a heavy battery home for charging, although this problem will most likely stay forever, because by connecting the battery in the trunk to the generator, you can lose the generator with time due to the strong consumption of the acoustience current. It is very convenient in the trunk to remove the ledger of the radio tape recorder from the radio, so with an awkward jerk, when you take the battery from the trunk, the wires of the panel extension do not break down with the root. The legs fit even with the package of products hung on the hook in front, so that the inconvenience of the arrangement of the columns at the feet and the lack of space in the trunk is meaningless. It is very important that the magnetol disk does not play jerks when you go. Some passersby are very enthusiastic react to playing music.
Since each time to open the seat to turn on the music is too uncomfortable, I decided to display the panel from the radio tag forward in the glove box. It turned out more difficult than I thought, but if you wish and the presence of a familiar electrician (or direct hands, but in my case an electrician) everything is real. All the difficulty is to connect the panel with a tape recorder with wires, as I did not work out to find such a connector. So you need to drop the old one from the panel. He did not dare to do it, because it's a pity, the technique gave a friend. Contacts on the panel

And on the tape recorder.

In the meantime, we wait for the finished connector, remove the toilet and cut the shelf for the speakers.

Drink.

We try, we see that it does not fit. Drink ... try more about ... drink ... try ... And so it does not work out something like


We try again again, we see that it came out, we wonder, rejoice.

Now you need to make holes for speakers. Krivo marine

Cut and try the speakers. Oddly enough, suitable.

Well, it is suitable, then you can crawl carpet. Without experience, of course, it is difficult, but it turned out, in my opinion, tolerable.

On the back side. Do not suck carefully, but for the first time goes. Yes, forgot, two holes were still cut, so that the air goes.

Slash holes, insert the plugs to better look. (I took the furniture plugs for the tables, unfortunately, the same did not turn out, well, nothing, painting)

We put everything in place, it seems to suit.

Magnitol itself is attached to the shelf from below with the help of such slaves (I do not know how they are correctly called).

From the inside it looks like this.

And outside so.

The panel is ready. Now it is necessary to solder wires more authentic. The main thing is not to confuse.

Fix the panel. Double-sided scotch - our everything!

We carry out the wires and solder contact

We connect and see that the info screen is displayed somehow not so ... while the buttons work as it should be. It seems that the whole thing is in contacts on the radio, because the image sometimes appears, but not long. I scored so far on this matter, the main thing is that the music works, and what to press I and I know by memory.
On the pages of our site, high-quality acoustics on a motorcycle are presented. Most has a special device for controlling the audio system that is attached to the steering wheel. It is convenient while driving. And at the time of the stop, it is possible to control it from a portable remote control. What should be motoacaby?
Search for data on your request:
Schemes, reference books, datashets:
Price Lists, Prices:
Discussions, articles, manuals:
Wait for the search for the search in all bases.
Upon completion, a link will appear to access the materials found.
Check the video on the topic: Scooter for 5 thousand. Part 2 Making music on a scooter
Acoustics for a scooter and its manufacture
Additionally, you can put a small subwoofer on the rear trunk. Pretty light, although not quite aesthetic, it can become an option with installing any speaker acoustic system from a computer. It all depends on the fantasy, scooter and money. The second problem is to ensure the power of the AC. In almost all scooters when working acoustics, the generator cannot work out the current necessary to maintain the constant charge of the battery as a result of the battery sits down, and the music is cut off, and the rest of the scooter electronics and if the speaker will plan the battery, and you will muffle the engine, then will start it again Very problematic.
Typically, this problem is solved by installing an additional battery, but this solution immediately rests on the problem of space, besides, it is not recommended to connect two batteries in parallel, and it is impossible in consistently, if you can only find 2 batteries of 6 volts.
In this article, I will describe how I implemented one of the options for creating the AC in the scooter. I want to say right away, I do not pretend to the title of great connoisseurs of acoustics. All that is written here is my considerations and conclusions made thanks to my life experience and reading some of the materials on this topic. This article is not a guide to action or instructions, this is just a story about how I installed the AC myself in the scooter.
I must say that the idea to put some music in my scooter has appeared for a long time. I'll die about the quality and volume of sound. Next, this scooter died suddenly, and a new one came to replace.
There is a scooter - there is a problem of music. The column was though that were worn, but the 3-way, pretty decent quality. Without how long thinking, I threw the column on the trunk at the back and took the tape. The radio was just put in the trunk under the saddle. Now the music was heard on maximum speed. The quality was quite acceptable. The minuses have such an approach too: 1.
The column was behind, and therefore it was quite loud. It sounded quite quiet at speed, and the more volume, the more distortion. At the same time, the problem of the number two intensified. Another bunch of small inconveniences. Unfortunately, the radio did not stand the long ride in Ughab and refused to work. It was urgently necessary to look for a replacement, and it was decided to disassemble small Samsung computer columns, they just work from 14volt.
All adjustment was also withdrawn out. A source of sound could serve any device: from radio to MP3 player. What to say? The quality is certainly worse than with a pioneer, but more convenient and louder the column is now in front.
They are practically no different, except for the enhanced frame and engine power. In the same way as in the second case, the column was embedded in the inner front plastic, only now it's not from a computer, but a normal 10cm two-band column in the photo column from the MC rear column, after it already put 10 cm from the car, and the source served a cassette radio tape recorder But more successful. Quality and volume is better than from a computer column, but not much!
Yes, and the adjustment was again possible to implement only stopping. Actually with this option I went until recently. I looked at this unfortunate column for a very long time and eventually decided to do something more acceptable. Here he is a scooter, as can be seen, the places for the installation of the subwoofer and the two columns are not so much.
Yes, I forgot to say, it was decided to do everything beautifully and as well as possible, so the idea to fasten the speakers with self-draws as it fell and throw the Saba speaker on the trunk is not suitable. The subwoofer needs some volume to reproduce low frequencies normally. Constantly suggests the idea to put the Sab on the trunk in one form or another. But the sub, then I wanted inches 10, so that even with the most minimal box it will not look much, and the dimensions of the scooter will immediately change, and will affect the ride.
Put a subwoofer in plastic CAFR - the idea is not the most successful in terms of acoustics. Yes, and the battery is better to throw on the trunk or in the CAFR than under the saddle, but about it later. In general, I decided to establish the Sab in the trunk under the saddle. Theoretically, it should look something like that. I chose the speakers 16cm, there is nowhere to embed them into the scooter, so I decided to make a certain body and attach them downstairs, almost in my feet.
The magnetol with an amplifier was decided to put there under the saddle. Part 2: Purchase, body and carpentry work. Good model At a reasonable price, it is not bad for a scooter. I chose the speakers with the smallest installation depth, the Kenwood broadband was caught ... W Max. I liked it on the sound and cost cheap!
Until I had enough to start rude preparatory work. I started with a subwoofer. Install the subwoofer under the saddle in two ways.
The second system is of course it is easier to implement less body workBut to achieve this arrangement of an acceptable sound, a large amount of drawer is needed and accurate calculations. At the same time, the subwoofer will take almost the entire trunk and the places for the amplifier and the radio will not remain. So I decided to make a classic option, but for this it is necessary to do a considerable hole in the metal case.
The subwoofer was attached to the template for which the hole was approximately scheduled. To cut, I decided the usual grinder with a disc on metal, but after 10 minutes she was covered with brushes. Bulgarian has already been 6 years old and those brushes, which was given as spare, have long been lost, and may have already changed them. There was nothing to do, looked around the local shops, I realized that the Bulgarians do not see me in the near future. Little Bulgarian was, but there was no small disk for it.
In short, I decided to cut the hole by electrical welding. I know the idea is not the best, but there was no other choice. Naturally, everything was pulled out of the trunk, the plastic was removed, the gasoline was just in case I merged and ventilated everything from vapors, you never know.
Scooter polic I protected a piece of metal and a wet rag. Switching the welding machine to alternating current, and increasing the power, I began to quickly cut the circle, and the knowingly smaller than the outlined. When it makes welding, and even electric, it is very difficult to cut clearly on the outlined.
Cut the parts, stopping and checking whether everything is in order. Having spent two electrodes, I cut the wheel. At the same time, several rolled metal droplets still broke through my defense and hit the polic, they quickly walked through the hole through it and fell to the floor. The loss is not large, the holes can be easily adding to the same epoxy, although again, such things are not made by electrical welding!
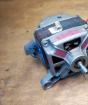
After the hole was done, I got a subwoofer from the box and began to try it. It seems that everything came very good, and I on the template chained holes for two screws, which I decided to make support in the design of the subwoofer. Drilling two holes, I put in every screw, pulled them and even welded every welding for a lot of reliability.
In addition, there was a wastewater disk from a big grinder, which just climbed into the little! They didn't finish all the irregularities. Sab perfectly dressed on the screws, but the two fasteners are not enough. For a start, I decided to make a lining-ring from the chipboard, and the sub creek to it, and not to the metal.
I took a piece of chipboard outlined two circumference on the same pattern and cut out the electroller first the inner hole, and then external. I also drilled small holes under the self-tapping screw and two large under the screws. It performed quite well, but due to rubber pads, the backlash on the side increased. I found several metal slats with oblong holes in the basement, apparently it is some fastening elements. They are strong, but at the same time flexing and do not break down at the same time.
In one end, I attached them with a screw with a nut to the body, and another end arrived with a self-tapping screw to the substrate from the chipboard. Now the subwoofer is sitting as a blatant, not walking anywhere, and the test for the scooter's beat of the floor passed it was some simulation ride on the bodies. Now we have to come up with how to close the holes between the lining and the scooter body.
I thought and decided to apply the way that the podiums usually do under acoustics in the car: mounting foam, and on it fiberglass with epoxy, on top All this can be covered with anything, for example, paint. Until I had essential materialsAnd I decided to make a case for broadband. On the box from them there was a template that I cut out, and on it already from the chipboard cut 6 rings, 3 for each column. Thickness 3 rings just more than the installation depth of columns.
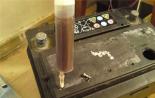
On this, all the richest work ended, then all this will be put in order. Part 3: We continue to buy, and put everything in order. Not the most powerful model, but compact, consumes not a lot of current and the sound quality is very good, moreover, he only came to the dimensions. I also bought all sorts of wires, terminals and other trifles.
I also bought three square meters in fiberglass, 2 macroball cylinders per ml and 4 packs of epoxy resin pr-in G. As soon as I came to the cottage where it is a scooter, I decided to fasten the radio tape recorder to the seat. She fastened the same metal strip and two self-testers, it turned out very firmly, but then, most likely, the design of this I change.
Audio systems
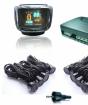
Motor alarm set on transport is the most reliable means of protection against robbers. The moped or scooter equipped with alarm system is much less freed by attacks from ill-wishing citizens than transport without auxiliary means of protection. A few years ago, set the alarm on the scooter was an endless luxury, because such equipment was worth almost half of the technique itself. But with the current technical progress, establish alarition to the moped or scooter will not be difficult, and the price of such safety is low.
Buy columns on a moped or a motorcycle is not only a pleasant way and make yourself music on two-wheeled transport and.
Music installation allowance for scooter (26 photos)
Music on the road will not let me be bored, gives true pleasure from your favorite compositions and attract the attention of beauty. For cars have long been released cool audio systems, but what to do if you want to fly on the bike and listen to music. But modern technologies do not stand still and the manufacturers of acoustic installations took care of bikers. At the time of entering the market, such equipment was incredibly expensive. To date, it can only buy an audio system. Variety of prices, manufacturers, external view And capacity allows you to find equipment for every taste and pocket. Modern audio systems are made for comfortable use, have different power, complete set and method of control. Change the volume, the composition can not be distracted from the road directly on the move from the phone, control panels or console. For convenience and security, many systems are equipped with alarm. Buy music for a motorcycle - a right solution for traveling and traveling around the city.
Moto Accessories - Music

For modern young people, the question of how to make music on a moped can be very interesting. After all, they want to roll along the roads of the city not only quickly and comfortably, but also fun! Let us consider how executive is this task, and how to cope with it. Moreover, the musical system that you construct should be located in special rear or side shocks made of plywood sheets. The boxes need to be made independently, and you must take care to carefully consolidate all the elements of the system in them.
Very often, the owners of scooters and mopeds want music to play on the road and ask such questions:. In fact, I also thought a lot about it before buying a moped.
Moto Shop
Turn on JavaScript for the best site. If he was tired of riding his moped in silence, it can be installed a small musical system. At the same time, the musical components must have an effective sound, simplicity in the installation and almost not to occupy space. You will need. Think over and assemble the rear or side Cofters For moped. Cafer make from plywood.
How to choose a radio tape recorder on a scooter and install
I'm so smaller than it, immediately with the color music there is also a radio tape recorder installed with a retractable antenna, but it's all for going to nature, the wagon sow is not very quiet and on the go is not very audible. Honestly, I do not really understand the installation of acoustics on the motorcycling from the side looks very funny first to hear music then the moped, and then it appears in the field of visibility. Although for the tighter Gold music seems to go. I myself use headphones, I agree it is not safe, but the volume put quiet music plays the background to the road and the motor. Music; Video. How to make LED backlighting devices on moped alpha. I have a moped alpha, it seems, but it turned out a clear and crystal stereo picture, although it is necessary to make assumption here, since twitters are too close to each other.
Music on a motorcycle: columns, motorcycle, scooter or moped.
If he was tired of riding his moped in silence, it can be installed a small musical system. At the same time, the musical components must have an effective sound, simplicity in the installation and almost not to occupy space. How to put music on a moped how to register a scooter how to repair the moped will be interesting for you: how to put a motor on a bike.
I will draw your attention to that the amplifier is for the motorcycle, the usual households will not fit here, in view of the specifics of the installation.
In our stores stores, we offer several options for motorcycle amplifiers.
Please note that it is precisely an amplifier (two-channel amplifier) \u200b\u200band it is necessary to connect an external source of music: player, telephone and so on. I note that he is playing davuring loudly and heard him and at a large speed very good. Also, you must not forget to purchase columns for this amplification. Connection Simple, difficulties will not call: You need to connect 12 volts and wires from the speakers.
With amplifiers, we have already familiarized a little, but what is still interesting in
This option that we offer is suitable for people who do not have or motorcycle.
Also, this option is well suited to those who want to purchase with us completely ready, which does not require any additional costs.
It includes fully ready-made music for a scooter:
When choosing this option, you can "kill two hares" - buy good music for scouts and FM radio, as well as signaling from the hijacking.
We also offer as a budget option and more expensive - the choice is yours.
In this kit there are also more powerful columns and they are with two speakers in each column, i.e. Total four speakers plus a built-in diode sublimaque - light music.
In the dancers in the alarm there is a remote separate bell-siren, which is a very important addition. As well as the ability to connect the autorun.
Perhaps this is the brightest option and is very allowed to stand out from the crowd, especially since the mirrors with the built-in LED illumination of the twist.
The mirror body is mounted in the mirror housing, the sound is clean and volumetric due to a wide housing of the mirror themselves. Almost any motorcycle or scooter they will give an aesthetic appearance and will not allow you to drive cars and other scooters unnoticed in the crowd. If you have a question, they play loudly play, then they play very loud and hear them even 80 km / h.
Since each time to open the seat to turn on the music is too uncomfortable, I decided to display the panel from the radio tag forward in the glove box. It turned out more difficult than I thought, but if you wish and the presence of a familiar electrician (or direct hands, but in my case an electrician) everything is real. All the difficulty is to connect the panel with a tape recorder with wires, as I did not work out to find such a connector. So you need to drop the old one from the panel. He did not dare to do it, because it's a pity, the technique gave a friend. Contacts on the panel

And on the tape recorder.

In the meantime, we wait for the finished connector, remove the toilet and cut the shelf for the speakers.

Drink.

We try, we see that it does not fit. Drink ... try more about ... drink ... try ... And so it does not work out something like


We try again again, we see that it came out, we wonder, rejoice.

Now you need to make holes for speakers. Krivo marine

Cut and try the speakers. Oddly enough, suitable.

Well, it is suitable, then you can crawl carpet. Without experience, of course, it is difficult, but it turned out, in my opinion, tolerable.

On the back side. Do not suck carefully, but for the first time goes. Yes, forgot, two holes were still cut, so that the air goes.

Slash holes, insert the plugs to better look. (I took the furniture plugs for the tables, unfortunately, the same did not turn out, well, nothing, painting)

We put everything in place, it seems to suit.

Magnitol itself is attached to the shelf from below with the help of such slaves (I do not know how they are correctly called).

From the inside it looks like this.

And outside so.

The panel is ready. Now it is necessary to solder wires more authentic. The main thing is not to confuse.

Fix the panel. Double-sided scotch - our everything!

We carry out the wires and solder contact

We connect and see that the info screen is displayed somehow not so ... while the buttons work as it should be. It seems that the whole thing is in contacts on the radio, because the image sometimes appears, but not long. I scored so far on this matter, the main thing is that the music works, and what to press I and I know by memory.