Schemes Automatic garage chargers. Car charger with their own hands
The article will be told about how to make homemade schemes with your own hands. You can use absolutely any, but the simplest manufacturer is the remission of a computer BP. If you have such a block, the application will find it quite simple. To power the motherboards, a voltage of 5, 3.3, 12 volts is used. As you understand, interest for you is 12 volts. The charger will make charging batteries, the container of which lies in the range from 55 to 65 amps-hours. In other words, it is enough to recharge the batteries of most cars.
General view of the scheme
To rework, you need to use the scheme represented in the article. With your own hands from a personal computer of a personal computer, it allows you to monitor the charging and voltage at the output. It is necessary to pay attention to the fact that there is protection against KZ - a fuse by 10 amps. But it is not necessary to establish it, as in most PBUs of personal computers there is a protection that disables the device in the case of KZ. Therefore, the charge devices for batteries from PC computers are capable of protecting themselves from KZ.
Shi-controller (designated DA1), as a rule, two types are used in BP - KA7500 or TL494. Now a little theory. Can I propagate the battery of the computer power supply normally? The answer - maybe, since the lead battles of most cars have a capacity of 55-65 amps-hour. And for normal charging, it needs a current equal to 10% of the battery capacity - not more than 6.5 amps. If the power supply has a power of above 150 W, then its chain "+12 V" is able to give such a current.
Start stage alterations

To repeat a simple homemade battery charger, you need to slightly enhance the power supply:
- Esnient from all unnecessary wires. With the help of the soldering iron, you remove them so as not to interfere.
- According to the scheme shown in the article, find the R1 constant resistor, which must be dropped and installed in its place to install the resistance of 27 com. On the top contact of this resistor, it is subsequently necessary to submit a constant voltage "+12 V". Without it, the device will not work.
- The 16th output of the chip is disconnected from the minus.
- Next, you need to disclose the 15th and 14th conclusions.
It is quite simple, a homemade scheme can be used any, but it is easier to make from computer BP - it is easier, easier to operate, affordable. If you compare with transformer devices, the mass of devices is significantly different (as well as dimensions).
Charger adjustments

The rear wall will now be anterior, it is desirable to make it from a piece of material (the textolite is perfect for). On this wall, you must install the charging current controller indicated in the R10 scheme. The current measuring resistor is best used as powerful as possible - take two with a power of 5 W and a resistance of 0.2 ohms. But it all depends on the selection of the batteries charger circuit. In some designs, you do not need to use powerful resistors.
When connecting, they are in parallel with the increase in power twice, and the resistance becomes equal to 0.1 ohms. On the front wall, indicators are also located - a voltmeter and an ammeter that allow you to control the corresponding parameters of the charger. To accurately adjust the charger, a trimming resistor is used, with which the voltage to the 1st output of the Shi-controller is supplied.
Requirements for the device
Final assembly

K 1, 14, 15 and 16 conclusions need to solder stranded thin wires. Insulation should be reliable, so that under load does not have heating, otherwise the self-made charger for the car will fail. After the assembly, you need to install a stress of about 14 volts (+/- 0.2 V) with a stress resistor. It is such a voltage is considered normal to charge batteries. Moreover, this value must be in idle mode (without a connected load).
On the wires that are connected to the battery, you must install two crocodile clamps. One red, second black. Such can be bought at any store of household goods or automotive spare parts. This is a simple homemade charger for a car battery. Connection schemes: Black is attached to minus, and red to the plus. Charging process is fully automatic, human intervention is not required. But it is worth considering the main stages of this process.
Battery charging process

With the initial cycle, the voltmeter will show the voltage of approximately 12.4-12.5 V. If the battery has a capacity of 55 a * h, then you need to rotate the knob until the ammeter shows a value of 5.5 amps. This means that charging current is equal to 5.5 A. as the battery is charged, the current decreases, and the voltage tends to the maximum. As a result, at the very end of the current will be equal to 0, and the voltage of 14 V.
Regardless of which the manufacturer used a selection of circuits and structures of charging devices, the principle of operation is largely similar. When the battery is fully charged, the device begins to compensate for the self-discharge current. Therefore, you do not risk the fact that the battery recharge. Therefore, the charger can be connected to the battery and day, and a week, and even a month.

If you do not have measuring instruments that would not mind it to be installed in the device, you can refuse them. But for this, it is necessary to make a scale for a potentiometer - to designate the position for the values \u200b\u200bof the charging current equal to 5.5 A and 6.5 A. Of course, the installed ammeter is much more convenient - you can visually observe the rechargeable battery charging process. But the battery charger, with their own hands made without the use of instruments, can easily be operated.
Long exploitation of the car leads to the fact that the generator stops charging the battery. As a result, the car no longer starts. To revive the car requires a charger. In addition, acid-lead batteries have increased sensitivity to temperatures. Therefore, problems may arise with their work if a minus temperature outside the window.
The charger for the car is not particularly technical complexity. To assemble it, it is not necessary to have any highly specialized knowledge, sufficiently adherence and smelting. Of course, you will need certain details, but they can be easily purchased on the Radiorenka almost for nothing.
Varieties of chargers for cars
Science does not stand still. Technologies are developing with incredible speed, it is not surprising that transformer charging devices gradually disappear from the market, and they come to replace impulse and automatic memory.
The pulsed charger for the car has a compact size. His just use, and in contrast to transformer type, this class devices provide a complete battery charge.. The charging process takes place in two stages: first at constant voltage, then at a current. The design consists of the same type of schemes.
Automatic charger for the car is extremely simplicable in operation. In fact, this is a multifunctional diagnostic center, which is essentially extremely difficult to assemble.
The most advanced devices of this class will notify you by the signal when the pole is incorrect. Moreover, the supply of electricity will not even begin. You can not get around the diagnostic functions of the device. It is capable of measuring battery capacity and even charge level.
In electrical circuits there is a timer. Therefore, the automatic car charger allows charging of various types:
- full
- fast
- restorative.
As soon as the automatic charger for the car finishes the charging, the beep sounds, and the current supply will automatically stop.
Three ways to make a charger for the car do it yourself
How to charge a computer block

Old computers are not uncommon. Someone leaves them from the sense of nostalgia, others expect somewhere to apply good components somewhere. If your home has no old stationary computer, nothing terrible. Second-hand the power supply can be purchased for 200-300 rubles.
Power supplies from stationary computers are ideal for creating any chargers. As a controller, the TL494 chip is used here or similar to it KA7500.
The power of the power supply for the charger must be from 150 W and above. All wires from sources -5, -12, +5, +12 in fear. Also done with the resistor R1. It needs to be replaced with a rapid resistor. The value of the latter should be 27 ohms.
The scheme of the charger for the car from the power supply is extremely simple. Voltage from the tire with a markup in +12 V is transmitted to the upper output. At the same time, the conclusions 14 and 15 are simply cut due to their unobability.
Important! The only conclusion that must be left is the sixteenth. It adjoins the main wire. But at the same time it needs to be disabled.
On the rear wall of the power supply, you should set the R10 control potentiometer. You also need to skip two cords: one to connect terminals, another network. Additionally, you need to prepare a block of resistors. It will allow adjustment.

To make the above-described block you will need two toko-measuring resistors. It is best to use 5W8R2J. Power in 5 W is quite enough. The block resistance will be 0.1 Ohm, and the total power of 10 W.
For configuration, you will need a rapid resistor. He is attached to the same fee. Pre-removed part of the printed path. This will eliminate the possibility of communication of the hull and the main chain, and will also significantly increase the safety of the charger for the car.
Before as out of conclusions 1, 14-16, they must be pre-lit. Strategic thin wires are falling. The total charge is determined by the idle stroke. The standard interval is 13.8-14.2 V.
Complete charge is set by a variable resistor. It is important that the R10 potentiometer is in this middle position. Special clamps are installed to connect the terminals to the ends. It is best to use the type "crocodile".
Insulating tubes of clamps must be performed in different colors. Traditionally red - plus, blue - minus. But you can choose any moral colors. This is not fundamentally.
Important! If you confuse the wires, it will lead to a damage of the device.

In order to save time and money when assembling a charger for a car, you can exclude from the design of the Volt and ammeter. The initial current can be set using the R10 potentiometer. Recommended value of 5.5 and 6.5 A.
Adapter Charger
The best option for creating a charger for the car will be a 12-volt adapter. But when choosing a voltage, you first should consider the battery parameters.
The adapter wire must be trimmed from the end and talk. Approximately 5-7 centimeters for comfortable work will be enough. Wires with remote charges need to be laid at a distance of 40 centimeters from each other. At the end of each worn "crocodile".
Clamps in consistent manner are connected to the battery. Plus to the plus, minus to minus. After that, everything you need to do is turn on the adapter. This is one of the simplest schemes for creating a charger for the car with your own hands.
Important! In the process of charging, you need to ensure that the battery does not overheat. If this happens the process must be immediately interrupted to avoid damage to the battery.
All ingenious simple or charger for a car from a light bulb and diode

All you need to create this charger can be found at home. The main element of the design will be the usual light bulb. In this case, its power should not be above 200 W.
Important! The more power, the faster the battery will be charged.
When charging, it is necessary to observe certain caution. Do not charge a 200-watt light bulb with a small capacity battery. Most likely it will lead to the fact that it will just boil. There is a simple calculation formula that will help you choose the optimal power of the bulb for your battery.
You will also need a semiconductor diode that will carry out electricity only in one direction. It can be made from the usual charge from the laptop. The final element of the design will be wire with terminals and plug.
It is very important when creating a charger for a car to follow safety rules. First, always turn off the scheme from the network before touching one of the elements of the hand. Secondly, all contacts must be carefully insulated. Talled wires should not be.
When assembling the circuit, all items are connected sequentially: lamp, diode, battery. It is important to know the polarity of the diode to connect everything correctly. For more security, use rubber gloves.

During the assembly of the scheme, pay special attention to the diode. It usually has a shooter that looks at the plus. Since he misses electricity only one way, it is extremely important. To check the polarity of the terminals, you can use the tester.
If you configure and connect everything correctly, the light bulb will burn in Polkanal. If there is no light, it means that you did something wrong or the battery is completely discharged.
The charging process itself takes about 6-8 hours.After this temporary interval, the charger for the car needs to be disconnected from the network to avoid overheating acb.
If you urgently need to recharge the battery process you can speed up. The main thing is that the diode is quite powerful. It will also be needed. All items are connected in one chain. The efficiency of this method of charging is only 1%, but the speed is several times higher.
RESULTS
The simplest charger for the car can be collected with your own hands in a few hours. At the same time, the set of desired materials can be found in every home. More complex devices require more time on their creation, but they have increased reliability and good safety levels.
There are cases, especially in winter, when car owners need to recharge a car battery from an external power source. Of course, people who do not have good skills to work with electrical engineering, it is advisable to buy a factory battery charging deviceIt is even better to purchase a start-charger to start the engine with a discharged battery without loss of time on the external recharging.
But if there are small knowledge in the field of electronics, you can collect a simple charger do it yourself.
general characteristics
 To maintain the battery and the extension of its service, recharging is required when the voltage drops on the terminals below 11.2 V. With this voltage, the engine is likely to start, but with a long parking lot in winter it will lead to sulfate plates and, as a result, to reduce the tank. Battery. With a long parking lot in the winter, it is necessary to regularly monitor the voltage on the drive terminals. It should be 12 V. It is best to remove the battery and put it in a warm place, not forgetting follow the level of charge.
Charging the battery is performed by a constant or pulsed current. When using a constant voltage supply unit for proper charging must be one tenth of the battery capacity. If the battery capacity is 50 A-h, then a current of 5 amps is required for charging.
 To extend the battery life of the battery techniques of the rechargeable plates. The battery is discharged to a voltage of less than five volts multiple consumption of a large current of short duration. An example of such consumption - launch of the starter. After that, they produce a slow complete charge with a small current within one amp. Repeat the process 8-9 times. The desulfation method is long in time, but according to all research gives a good result.
It must be remembered that when charging it is important to prevent an acb recharge. The charge is made to a voltage of 12.7-13.3 volts and depends on the battery model. Maximum charge It is indicated in the documentation for the accumulator, which can always be found on the Internet.
Reload causes boiling, increases the density of the electrolyte and, as a result, the destruction of the plates. Factory charging devices have charge control systems and subsequent shutdown. Collect yourself such systems, not possessing sufficient knowledge in electronics, it is quite difficult.
Schemes for assembling with their own hands
It is worth talking about simple charging devices that can be collected by possessing minimal knowledge in electronics, and the charge capacity should be traced by connecting a voltmeter or ordinary tester.
Charging Scheme for Emergency Cases
There are cases when the car, standing around the night near the house, it is impossible to start in the morning due to the discharged battery. The reasons for the occurrence of this unpleasant circumstance can be a lot.
If the battery was in good condition and discharged a bit, solve the problem will help:

As a power source is perfect laptop Charger. It has an output voltage of 19 volts and current within two amps, which is quite enough to perform the task. On the output connector, as a rule, internal entrance - plus, the outer contour of the plug is minus.
As a restrictive resistance, which is mandatory, you can apply the salon light bulb. Can be used and more powerful lamps, for example, from dimensions, but this will create an excess load on the power supply, which is very undesirable.
The elementary scheme is assembled: minus the power supply is connected to the light bulb, a light bulb to minus battery. Plus goes directly from the battery to the power supply. Within two hours, the battery will receive a charge for starting the engine.
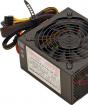
From the power supply unit from the stationary computer
 Such a device is more difficult in manufacturing, but it can be collected with minimal knowledge in electronics. The basis will serve an unnecessary block from the system unit of the computer. Output voltages of such blocks +5 and +12 volts with output current of about two amps. These parameters allow you to collect a weaker charger, which, with the correct assembly, long and reliably serve the owner. Full battery charging will take a long time and will depend on the capacity of the battery, but the effect of desulfation of plates will not be created. So, a step-by-step assembly of the device:
- Disassemble the power supply and drop all the wires except green. Remember or note the entry of the black (GND) and yellow +12 V.
- The green wire solder to the place where it was black (this is necessary for the start of the block without a PC system board). To the scene of the black wire solder a tap, which will be minus for charging the battery. At the scene of the yellow wire solder the plus removal of charging the battery.
- It is necessary to find a chip TL 494 or its analog. The list of analogs is easy to find on the Internet, one of them will definitely be found in the scheme. With all the diversity of blocks without these chips, they are not produced.
- From the first leg of this chip - it is the left lower, find a resistor that goes to the exit +12 volts (yellow wire). This can be done visually on the tracks in the diagram, you can with the tester, connecting the power and measuring the voltage at the input of the resistors going to the first leg. Do not forget that a 220 volt voltage is on the primary winding of the transformer, so you need to follow security measures when the block is started without the case.
- Run the found resistor, measure its resistance to the tester. Pick up the variable resistor close at par. Set it on the value of the desired resistance and intersect the remote element of the circuit with flexible wires.
- By running the power supply by adjusting the variable resistor, to get the voltage of 14 V, ideally 14.3. The main thing is not to releaving that 15 B is usually the limit for testing protection and, as a result, shutdown.
- Drop the variable resistor without knocking it down, and measure the resulting resistance. Required or as close as possible, the rates of resistance to choose or type from several resistors and secure into the scheme.
- The block is checked, the output must be the desired voltage. If you wish to the outputs on the plus and minus scheme, you can connect a voltmeter by placing it on the housing for clarity. The subsequent assembly occurs in the reverse order. The device is ready to use.
The block will greatly replace an inexpensive factory charging and sufficiently reliable. But it is necessary to remember that the device has protection against overload, but it will not save from error in polarity. Simply put, if you confuse plus and minus when connecting to the battery, charger instantly fails.
Charger Scheme from Old Transformer
If there is no old power supply from the computer at hand, and radio engineering experience allows you to independently mount simple schemes, you can use the following rather interesting battery charging circuit with control and adjustable voltage.
![]() To assemble the device, you can use transformers from old uninterruptible nutrition blocks or Soviet TVs. Any powerful lowering transformer is suitable with a total set of voltages on the secondary windings of about 25 volts.
To assemble the device, you can use transformers from old uninterruptible nutrition blocks or Soviet TVs. Any powerful lowering transformer is suitable with a total set of voltages on the secondary windings of about 25 volts.
The diode rectifier is assembled on two diodes CD 213A (VD 1, VD 2), which are mounted on the radiator and can be replaced by any importal analogues. There are many analogues, and they are easily selected on directories on the Internet. Surely the necessary diodes will have home in old unnecessary equipment.
The same method can be applied to replace the control transistor CT 827A (VT 1) and Stabitron D 814 A (VD 3). The transistor is installed on the radiator.
Adjusting the supply voltage is carried out by a variable resistor R2. Scheme is simple and obviously working. Collect her can man with minimal knowledge in electronics.
Pulse Charging for Akb
 The scheme is complex in assembly, but this is the only drawback. Find a simple scheme of the pulse charging unit is unlikely to succeed. This is compensated by pluses: such blocks are almost not warm, while they have serious power and large efficiency, differ in compact size. The proposed scheme, in the board mounted on the board, fit into the container of 160 * 50 * 40 mm. To assemble the device, it is necessary to understand the principle of operation of the PWM (latitude-pulse modulation) of the generator. In the proposed version, it is implemented using a common and inexpensive IR 2153 controller.
With condensers used, the power of the device is 190 watts. This is enough to charge any accumulator of a light car with a capacity of up to 100 A-h. By installing condensers for 470 μF, power will increase twice. Will be charging the battery with a capacity of up to two hundred amps / hours.
When using devices without automatic charge control, you can apply the simplest network, the daily relay of Chinese production. It will save it from the need to follow the time of disconnecting the block from the network.
The cost of such a device is about 200 rubles. Knowing an approximate charging time of your battery, you can set the desired trip time. This guarantees timely cessation of electricity. You can dare to be destroyed and forget about the battery, which can lead to boiling, destruction of the plates and the battery output. New battery will cost much more
Precautions
When using appliances collected by their own hands, the following security measures should be observed:
- All devices, including acb, should be on a refractory surface.
- With the primary use of the manufactured device, it is necessary to ensure complete control of all charging parameters. It is necessary to control the heating temperature of all elements of charging and the battery, it is impossible to make the electrolyte boiling. Voltage and current parameters are controlled by a tester. Primary control will help determine the time of complete battery charging, which is useful in the future.
To collect charging for the battery is easy even for a beginner. The main thing is to do everything carefully and abide by security measures, since it will have to deal with an open voltage of 220 volts.
The analysis of more than 11 schemes for making your own hands at home, new schemes 2017 and 2018, how to collect a fundamental scheme for an hour.
TEST:
To understand whether you have the necessary information about batteries and chargers for them, you should pass a small test:- What is the main reasons, the car battery is discharged on the road?
A) the motorist left the vehicle and forgot to turn off the headlights.
B) the battery is too heated under the influence of sunlight.
- Can the battery fail if the car does not use for a long time (it is in the garage without launch)?
A) with a duty, a simple battery will fail.
B) No, the battery will not deteriorate, it will only be necessary to charge and it will function again.
- Which current source is used to recharge the battery?
A) There is only one option - a network with a voltage of 220 volts.
B) network for 180 volts.
- Be sure to remove the battery when connecting a self-made device?
A) It is advisable to dismantle the battery from the installed place, otherwise the risk will damage the electronics by the intake of a large voltage.
B) it is not necessary to remove the battery from the installed place.
- If you confuse "minus" and "plus" when connecting the memory, then the battery will fail?
A) Yes, when improperly connected, the equipment is scorified.
B) Charger simply will not turn on, you will need to move the necessary contacts to the required places.
Answers:
- A) No headlights when stopped and minus temperature are the most common reasons for the battery discharge on the road.
- A) Akb fails if it is not necessary to recharge it for a simple car.
- A) to recharge the network voltage in 220 V.
- A) It is not desirable to charge the battery with a homemade device if it is not removed from the car.
- A) should not be confused by the terminals, otherwise the homemade apparatus is overrigent.
Battery On the vehicle require periodic charging. The reasons for the discharge can be different - starting from the headlights that the owner forgot to turn off, and to negative temperatures in the winter on the street. For feeding AKB It will take good charger. Such a device in large varieties is presented in auto parts stores. But if there is no possibility or the desire to buy, then Zause You can make it yourself at home. There is also a large number of schemes - they are preferably studied to choose the most suitable option.
Definition: The charger for the car is intended for the transmission of electric current with a given voltage directly to Akb.
Answers to 5 frequently asked questions
- Will it take some additional measures before you start charging the battery on your car? - Yes, you will need to clean the terminals, since acid deposits appear during operation. Contacts It must be cleaned very well to clean the current without difficulties to go to the battery. Sometimes motorists use lubrication to handle terminals, it should also be removed.
- What to wipe the terminals of the charger? - Specialized tool can be bought in the store or prepare yourself. As an independently made solution, water and soda use. Components are mixed and mixed. This is an excellent option for processing all surfaces. When the acid becomes contact with soda, then the reaction will occur and the motorist will definitely notice it. This place will need to thoroughly wipe to get rid of all acids. If the terminals were previously treated with lubricant, then it is removed by any clean cloth.
- If there are covers on the battery, then you need to open before you start charging? - If the lids are on the housing, they are definitely removed.
- For what reason do you need to unscrew the lids with the battery? - It is necessary that the gases formed in the process of charging are free from the housing.
- Is there a need to pay attention to the level of electrolyte in the battery? - This is done necessarily. If the level is lower than the required, then you need to add distilled water inside the battery. The level to determine will not be difficult - the plates must be completely covered with liquid.
Another important to know: 3 nuances of operation
Homemaking by method of operation is somewhat different from the factory option. This is explained by the fact that the purchase unit has built-in functions Helping in work. They are difficult to install on the device assembled at home, and therefore will have to adhere to several rules when operation.
- The charger assembled with your own hands will not be turned off when charging the battery. That is why it is necessary to periodically monitor the equipment and connect to it multimeter - To control the charge.
- Need to be very neat, not to confuse "plus" and "minus", otherwise charger grill.
- Equipment must be turned off when connecting to charger.
Fulfilling these simple rules, it turns out to correctly produce a feedback AKB And prevent unpleasant consequences.
Top 3 Charger Manufacturers
If there is no desire or the opportunity to collect with your own hands Pray That pay attention to the following manufacturers:
- Stack.
- Sonar.
- Hyundai.
How to avoid 2 errors when charging the battery
It is necessary to comply with the basic rules to properly focus battery. by car.
- Directly to the electrical stub rechargeable battery It is forbidden to connect. For this purpose, charging devices are intended.
- Even device It is made high quality and of good materials, you still need to periodically observe the process. charging So that trouble do not happen.
Performing simple rules will provide reliable operation of independently made equipment. It is much easier to monitor the unit than after spending on the components for repair.
The simplest charger for the battery
Scheme 100% of the working memory by 12 volts
Look at the picture on the scheme Zause On 12 V. The equipment is intended to charge automotive batteries with a voltage of 14.5 volts. The maximum current obtained by charge is 6 A. But the device is also suitable for other batteries - lithium-ionic, since the voltage and output current can be adjusted. All major components for assembling the device can be found on Aliexpress.com.
Required components:
- dC-DC lowering converter.
- Ammeter.
- Diode Bridge KSRS 5010.
- Hubs 2200 μF by 50 volts.
- transformer TC 180-2.
- Circuit breakers.
- Plug for connecting to the network.
- Crocodiles for connecting terminals.
- Radiator for a diode bridge.
Transformer Any one is used, at its own discretion, the main thing is that its power is not lower than 150 W (with a charging current of 6 A). It is necessary to install thick and short wires on the equipment. The diode bridge is fixed on a large radiator.

Look at the picture on the Charger Scheme Dawn 2.. It is composed of original Head. If you master this scheme, you will independently create a high-quality copy, not different from the original sample. Constructively, the device is a separate unit closed by the body to protect the electronics from moisture and exposure to bad weather conditions. On the base of the case, a transformer and thyristors on radiators must be connected. A fee will be required that will stabilize the charge charge and control thyristors and terminals.
1 scheme of smart memory

Look at the picture of the intelligence scheme charger. The device is necessary for connecting to lead-acid batteries having a capacity of 45 amps per hour or more. Connect such a type of device not only to batteries, which is used daily, but also to duty or in reserve. This is a rather budgetary version of the equipment. It does not provide indicator, And the microcontroller can be bought the cheapest.
If there is a necessary experience, the transformer is going to do it. No need to install also audio alert signals - if battery It will be connected incorrectly, the discharge light light will notify the error. It is necessary to put the pulse power supply unit by 12 volts - 10 amps.
1 scheme of industrial memory

Look at the industrial scheme charger From Bars 8a equipment. Transformers are used with one power winding by 16 volts, several VD-7 and VD-8 diodes are added. This is necessary in order to provide a bridge scheme of the rectifier from one winding.
1 inverter scheme

Look at the picture of the diagram of the inverter charger. This device before starting charging discharges a battery to 10.5 volts. The current is used with the value of C / 20: "C" denotes the capability of the installed battery. Thereafter process The voltage rises to 14.5 volts, with the help of a discharge-charging cycle. The ratio of charge and discharge is ten to one.
1 Electronics Electronics

1 scheme of a powerful memory

Look at the picture on a powerful charger for a car battery. The device is used for acid Akb, having a high container. The device easily charges a car battery having a capacity of 120 A. Output voltage The device is adjusted independently. It ranges from 0 to 24 volts. Scheme Noteworthy in that there are few components installed in it, but it does not require additional settings.

Many could see Soviet charger. It looks like a small box of metal, and may seem very unreliable. But it is not at all. The main difference between the Soviet sample from modern models is reliability. Equipment has a structural power. In the event that to the old device Connect an electronic controller, then charger It turns out to revive. But if there is no such thing at hand, but there is a desire to collect it, it is necessary to study the scheme.
To features Their equipment includes a powerful transformer and rectifier, with which it turns out to be quickly charged even highly discharged. battery. Many modern devices will not be able to repeat this effect.
Electron 3m

For an hour: 2 Charging schemes do it yourself
Simple schemes
1 simplest scheme for automatic memory for auto battery

Each owner of the used car faces the need to recharging the battery. In addition, rechargeable batteries are often used as a backup (or main) source of electricity in the garage, shed, in the country without centralized supply with electricity.
To restore the battery charge, you can buy ready, there is no shortage in the proposal.
Used to charge a car battery
However, many homemade masters prefer to make their own hands. If you have a radio engineering education, the scheme can be calculated independently. And for most lovers who know how to keep a soldering iron in their hands, we offer a couple of simple designs.
First of all, we define what batteries you need to charge. As a rule, it is acidic starter batteries used in cars.
This battery can be cheap purchased in the car shop, or to use the old left from the replacement on your car. Used may not be able to work as a starter, but to connect a lighting device (especially LED) or a radio receiver at the cottage - easily.

How to calculate the self-made charger?
The first rule that must be learned is the magnitude of the charge voltage.
Lead batteries have a working voltage within 12.5 volts. But for the charge it is necessary to submit a voltage in the range of 13.9 - 14.4 volts. Accordingly, the charger must be done with such output parameters.
The next value is power.
More precisely, the current strength at which the voltage drops on the output terminals will not occur. If you do not plan to charge the battery with a capacity of more than 65 A / h - enough steady current 12 A.
Important! This value should provide exactly the output stage of the charger, the current of the current at the inlet 220 volts will be several times less.
A low-power charger can be charged and high-capacity batteries. Only time will need significantly more.
It will also be useful to have a function of automatic termination of work when the normal charge level is reached, the protection of the device from the reverse current (the battery is a powerful source of energy capable of incorporated the output stage of incorrectly designed memory), or at least control the output voltage, and better and current.
If, besides the fuse, you set the protection against cords and short circuit - wonderful. However, any refinement complicates the device and increases its value.