How to put the original parking sensors. Installation of parking sensors on the car do it yourself
Installation of parking sensors avoids a collision in a rich car stream. The essence of the device is extremely simple, but it does not become less efficient. Special sensors feed sound signals and thus read the features of the external situation.
Properly located sensors allow you to determine not only the distance to the fence or border, but also indicate the location of the glass display case. Parktronic after installation excellent signals even about small obstacles like a road pillar. The system serves sound notification to the driver and it slows down, bypassing the collision with an obstacle.
Modern parking sensors can be equipped with cameras and multiple additional features. If you wish, you can consider it in detail, which is behind the car.
Sensors can be installed both from behind and in front. If you want to save, you can do without installing the front sensors of parking sensors. But at the same time you must take into account that the car becomes vulnerable to obstacles that are seriously noticed by the naked eye.
Another reason for the installation of parking sensors with front sensors is the convenience of parking in particularly complex places. The thing is that, leaning exclusively on vision, it is extremely difficult to assess the distance to the nearest car in the parking lot. Parktronic fully eliminates you from such problems. It will indicate you the exact distance to the nearest bumper, and you can park in all the rules.
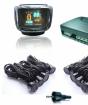
It is not surprising that many people think about the acquisition and installation of parking sensors. Fortunately, this device is not particularly expensive. It can be purchased for 2-3 thousand rubles. Of course, such a parking sensor will have a maximum of six sensors (three are installed in front and three days). But even this will be quite enough to navigate with great convenience in the city.
How many sensors should be in good parking sensors
The minimum combination of 3 comes and 2 in front. The correct installation of parking sensors is very important. If you incorrectly connect the wires, then even the most good system will constantly give failures.
Tip! The initial level device can be purchased for 1.5-2 thousand rubles.
Much more interest is a system that includes control of blind zones from all sides. The price of such a parking sensor is about 10-15 thousand rubles, but the possibilities of the device are really amazed. It protects the car during a trip, warning the driver about the danger in real time.
Important! Installation of expensive parking sensors with full control of blind zones much more difficult task and requires a thoughtful approach.
Installation of parking sensors, following the blind zones, allows you to insure a car from accidents that can occur during a restructuring from a number in a row. A special radar constantly scans space. Moreover, the smart system excludes from the list of potential hazards of the machine, which you overtake you.
Tip! A good parking sensors whose installation will allow you to improve safety on the road, is ParkMaster Plus BS-4661.
The installation of parking sensors with the control of blind zones allows you to control those zones that do not fall into the visibility field of the side mirrors. An alert is carried out by means of sound signals and LEDs. The LED panel is attached near the rearview mirror (in most cases).

Usually, the set of parking sensors with the control of blind zones includes 6 sensors, located on the bumpers, and four on the sides. Properly installed modules are invisible to the naked eye. To find them you need to be a specialist or spend a lot of time and effort to study bumpers.
Tip! Sensors are mounted on the inner side of the bumper. This makes them practically imperceptible.
It helps to disguise the painting sensors. Separate mention in modern systems deserves an intelligent element. Embedded software is easily distinguished by a parking column from the machine moving at a speed of 150 kilometers per hour.
The installation of parking sensors with the control of blind zones allows you to safely perform complex maneuvers on the road without the slightest risk for the safety of passengers and the vehicle. Moreover, the sensors perfectly perform their functions in complete darkness.
Installation
Preparation
To install the front parking sensors, a twisted pair is used with a cross section of 0.2 mm. In order to connect the entire system you need at least 12 meters of wire. The block is installed in the trunk. It is to him that the wires will be drawn.

Important! From the trunk there are wires to the dynamics and buttons.
The number of wires going to the rear bumper depends on the number of sensors that are included for installation. You must connect the plugs to the buttons and block. You will also need to connect the speaker. To create reliable connections when installing parking sensors you will need corrugations and tapes.
As an example, we take the most complex system consisting of 12 sensors. Fastening the front side modules are slightly different from the rest. When installing the system, the place is played a special role, starting the wiring. In some machines, it is the left headlight, and in other right.
You need to know from which the headlights goes the wiring to make the right pinout. To the rear bumper, you must add two wires and as many plugs. Plugs are needed for lateral sensors.
Required tool tool
An important step of preparation for the installation of parking sensors is the selection of the necessary toolkit, it includes:
- boxes
- roulette,
- pencil,
- malyary Scotch,
- spanners,
- screwdrivers
- drill,
- insulating tape,
- epoxy adhesive.
Naturally, for the installation of parking sensors you will need a set, the completeness of which will not prevent check if direct installation.

The process of installing front parking sensors
In order for the installation process of the parking sensor passed without excesses, try to fulfill everything according to instructions taking into account, of course, the technical specification of your car. The procedure itself consists of such stages:
- Remove both bumpers.
- Remove the headlights and remove the trunk's trim.
- Remove the dashboard. Also need to be done with the right lingers and gloves.
- The wire is extended to the left side.
- From the dashboard, make branches to the speakers and buttons.
- Wires stretch to the plug (usually it is installed between the door and the front wing).
- Do in the plug hole and thread the wires in it. Pre-twisted a couple must be packaged in corrugation.
- Wires are reached before the headlight. All this is done under the wing of the car.
Actually, this is the main method of installation of parking sensors. In the process of work, it is best to use a rag isolate. It provides good insulation and a decent appearance.
Installation option Parktronic 2
Parktronic installation can be carried out differently. As a visual example, you can take the BEA 300 parking sensors. Its price is located in the average price category and provides a high level of control on the road.
Parktronic sensors are mounted in the bumper. You will need 20 mm cutters for installation. At the same time, it is not necessary to use the original components, you can do less expensive analogues.
To make the installation of parking sensors, remove the bumper and the upholstery inside the trunk. Bolts are under the lining, so it will have to remove it. Unscrew the internal attachments that fix the bumper.

Attention! To unscrew the screws of the mudguards when installing the parking sensors, you will need a special key.
Below, the bumper is fixed by two self-draws. They can be more depending on the specific car model. To install the parking sensors passed according to the plan, you will have to unscrew them all.
Sometimes there are difficulties when removing the bumper due to rust, which was formed in fixation places. This problem is best solved by WD-40. This is a unique lubricant that will allow you to easily remove the bumper. There are enough of several drops and the screws are unscrewed.

Make places where you will install sensors. Note that the distance to the Earth should be at least half a meter. Otherwise, the sensors will constantly work, taking lying police officers for an obstacle.
Important! The distance between each sensor is 25 cm.
Parktronic modules must be installed so that the central device is on the axial line of the bumper. At first, take a sewer and notice the future holes. For further work you will need a drill.
Please note that plastic can easily melt from drill. That this does not happen from time to time water the surface with water. This will make it possible to cool the material and minimize the harm applied to the instrument.

Minimum hole size of 18 millimeters. Here, everything largely depends on the Parktronic model, the installation of which you spend. After the holes are drilled, you can enjoy the wiring.
Pre-surface need to wipe with a cloth and dry. Places where sensors will be installed need to be treated with special glue. Degreased degreased composition. It ensures the strength of the adhesive clutch.
When you stick the sensors, the next step of the parking sensor will be fixed by the bumper on the car. In this case, it is necessary to stretch the gluing of the wires in the pre-cooked hole.
The most responsible step in the installation of parking sensors is to install a control unit. Connecting to the electrical circuit of the car must be done on the manual, which comes with the device. At the same time, it is necessary to periodically check with the instructions of the car to know which cable where to connect.
The speakers need to be placed where they will be best audible. A part of the body between the front glass and the door is ideal for this. The power of the entire system will be carried out from the rear lamp of the machine.
Installation of parking sensors involves pulling wires under overlays. In this case, the emitter can be displayed in the left rack. More traditional is the placement of belts under brackets.

At the end, the whole system is tested. If everything is in order, it means that the installation of Parktronic has passed successfully and can be tested in real conditions. Nevertheless, it is not necessary to leave immediately on the track better try the new device somewhere near the garage.
RESULTS
Installation of parking sensors allows you to get a desired gadget that will allow you to park even in the most difficult places. Moreover, advanced models are able to simplify maneuvering and secure the vehicle from colliding with other cars. The main thing in the installation is attentiveness and scrupulousness. Special attention should be paid to the wiring.
Parktronic is one of the most convenient inventions that significantly facilitates the parking of your vehicle. Now there are many cars on the roads of most major and small cities. Among such chaos you need to be able to properly park, and the parking sensor with the rear view camera will be your indispensable assistant in this case. Places are very small, and an inexperienced driver will not be able to competently park without the use of parking sensors with a rear view camera.
Views Parktronics
It all depends on individual preferences - you can use instruments with the function of forced inclusion or to prefer models with the possibility of constant functioning. If you carefully consider the types of parking sensors, then for urban conditions, it is best to choose the first option, otherwise you risks greatly tired - Parktronic indicators will constantly remind you of the threat that is not really not.

If you consider the indicators yourself - it is often either special video monitors or ordinary sound alerts. To date, many car enthusiasts prefer whole complexes in which monitor indicators and sound signals are successfully combined.

There is a huge number of sensors that can help the driver in different ways, everything will depend on his experience and skills. Manufacturers recommend installing parking sensors with multiple sensors - it allows you to maximize the potential client from unpleasant situations at the time of parking. In this case, I succeeded with a video monitor with sensors - the connection of the parking sensor of this type will allow the driver to always see all obstacles and accept verified solutions at the time of parking.
How do car parking sensors work on video:
Wireless parking sensors: the principle of operation of such devices
Wireless parking sensors is a completely electronic device that allows you to monitor the distance between the body of your car and various obstacles. If you risk hit the bumper about any obstacles or objects, the parking sensors will begin to issue warning signals.

The indicator allows the driver in time to understand the situation in time, take appropriate measures to avoid an unexpected collision.
This electronic system is equipped with a huge number of sensors and indicators, the more such parts, the less likely to break your car. These sensors operate on ultrasound. These devices differ quite sensitive design. It is very important to comply with certain rules when connecting parking sensors. After all, the sensor must be perfectly transmitted and receive a signal that is reflected from a variety of items.
Installation of front parking sensors
To install the front parking sensors, you need to properly prepare for work and only then proceed to further actions.
Installation of parking sensors with your own hands is quite interesting, but at the same time, a serious and responsible process. It is necessary to prepare a wire (approximately 10-12 meters). Wires will be used to connect sensors, the main unit and the Parktronic button. A potential client can order a special button, but he will have to take care of not to forget the corrugation for twisted pair, tape, contacts and plugs - without all these elements, the installation of parking sensors will not be able to complete successfully.
If your vehicle is already equipped with rear parking sensors, it will significantly simplify the task, you will have to set much less sensors.

To understand how to install a parking sensor, without contacting specialized car services, you need to understand some nuances of the installation procedure of this element.
- It is necessary to remove the trunk's luggage, all bumpers, as well as unscrew the headlights.
- After that, you need to get the dashboard, right subsidence and the main glove box. It is very important to do everything extremely carefully, so as not to harm your vehicle. For this, there is a special car scheme that allows you to take the necessary elements without harm to the vehicle itself.
- We stretch the wires before the dashboard starts, on the left side. Near the dashboard will go branches to buttons and front speakers.
- The next step is the wire broach right above the glove compartment when it turns out to be in a special plug, then it will need to create a special hole. It will serve as an excellent jack for twisted pair, then the wire is stretched to the headlight through the subsidence. For the winding of the wires is best suited to X \\ B of the tape, the ordinary looks bad enough and ugly.
Tips for installing parking sensors do it yourself on video:
Installation of parking sensors on the example of the model BEA 300
For those who are interested in how to install a parking sensor using alternative techniques, there is one such method.
For example, you can take a fairly popular, in demand and inexpensive device called BEA 300. The sensors of this device are often mounted in the bumper, and the parkingricronics itself will cost approximately 6000-7000 rubles.
1. Before starting work, you need to find all the necessary tools to not be off the process. It is best to keep the special cutters at hand, which are used to create specific holes in the bumper made of plastic.
2. You need to dismantle the bumper. Removing plastic linings that are in the trunk, is also a fairly important stage. You should also bend all the soft upholstery. It is necessary in order to see the bolts that are responsible for fastening the bumper.
3. Then remove the bumper lining, unscrew the bolts of the bolts from the luggage compartment, and also unscrew the screws of the mudguards. This uses a special key-star to 6. To mark places that are intended to install the sensors, you can use ordinary greasy tape.

It is very important to observe certain distances: 41 cm between each individual sensor, 124 cm is the distance between the first and last element.
4. You need to carefully check markup and make sure that you will be drilled in the right place. To do this, use special drills. It is necessary to use water as a cooler, so that the plastic does not damage the cutter.

It is best to use the services of a partner - he will be able to pour water into plastic elements, while you will work a drill. The minimum size of the holes is 18 mm, otherwise the sensor simply does not enter.
5. The bumper with drilled holes must be put on a soft litter from the fabric, pave all the necessary wiring. The surface must be carefully cleaned and dry. Next, you need to use a special bubble fluid to handle places for the fitting.
6. Printe all sensors. You need to install the bumper in your place, the wire stretch through pre-prepared holes.

7. Install the central control unit and connect it to the electrical circuit of your vehicle. It is best to install a squeak in such a place so that the driver will surely hear this sound.
8. After completing all the work, you need to test the entire system to make sure it is working.
Every year more and more motor vehicles appear on the streets of cities. At the same time, a natural problem arises with the presence, or rather, the absence of parking spaces. Drivers are increasingly forced to "crash", as a result of which the number of road incidents increases. Avoid unpleasant situations allows a special device - parking sensors. This gadget is a parking radar that allows the driver to navigate during parking, telling him how many meters left to the nearest object. Useful device is convenient and easy to use and is suitable for both experienced shocks and novice drivers.

Parktronic principle is the same for any device model. First, the sensors that can be from 2 to 8, determine the location of the obstacles due to the ultrasonic signal. Once the object is detected - the wave returns to the sensor and through the ECU (electronic control unit) transmits a sound, visual or integrated signal about the risk of collision to the driver. Some models have LCD displays that are equipped with parking sensors rear with a video camera. Such devices are more expensive, but they allow you to see everything that happens behind the car, and also indicate the driver, for what trajectory it is better to move to fit in a narrow space.

Parktronic Installation can be entrusted to the wizard from the car service, but if you want to save money, you can make installation yourself. For this, no specialized equipment or special skills will be required. So where to start?
What will take to install Parktronic
Before installing, you will need to prepare the following:
- parktronic himself;
- mill (it often comes with a device);
- drill or screwdriver;
- a set of keys;
- marker, insulating tape or clamps, tester and roulette.
Before you start drilling holes for the sensors of the purchased model Parktronics, make sure that the device works. To do this, connect the computer and sensors using wires. If the device will make the corresponding signal when approaching the obstacle, it means that everything is fine.
Also familiarize yourself with the installation instructions, as depending on the model of the machine or the device itself, you may need additional tools. After that, you can move to practical work.
Install the rear parking sensors
First of all, it is necessary to determine where you plan to install the ECU. Most of the car owners put these elements in the car trunk, but some prefer to place a control unit in a niche under the trim, dashboard or on the wing of a vehicle. There is no special difference, so choose the most comfortable, in your opinion, place.
As for the motion sensors, they are installed on the bumper of a car, which is better to wash thoroughly before installing parking sensors.
After that we turn to the next steps.
Marking
On the washed and dried bumper make marking under the sensors. Suppose the parking sensors are equipped with 4 sensors (by the way, this is the optimal amount). 2 elements need to be dissected on the radius parts of the bumper, after that the distance between them must be divided into three equal segments for the remaining two sensors. If there is more sensors in the parking sensors, then the distance between two extreme elements must be divided into a larger number of equal parts.


Tip! Marking is better to make a marker, as the pencil can be labeled and you "mishash". Traces from the marker are easily removed with alcohol, which does not harm the paintwork of the bumper.
If we talk about the height on which the sensors must be placed, then 50 cm from the ground is considered optimal. But this parameter may differ depending on the selected model, so be sure to look into the instructions to the device.
Holes
After you checked the correctness of the markup several times, you can proceed to drowning holes.

Important! Holes are drilled strictly perpendicular to the surface of the bumper. Sensors must "look" on the world in a horizontal position.
Using the mill, gently drill holes in the places scheduled earlier. After that, on the outside, install the sensors so that the sensors look out and skip their wires inside the bumper. From the reverse side, the elements must be fixed with locking rings (come in the kit). If you fear that the parking sensors will jump out of the holes, it is possible to reinforce with glue or silicone.


Tip! If your machine bumper is equipped with an additional lining - damper, then in order to enjoy the wires, use a wire, nail or seer.
Another important point - the sensors must be installed in a strict sequence (from left to right). For convenience, they are denoted by letters A, B, C, D.

If the sensor differs from the bumper in color, then do not be afraid to repaint it. This will not affect the performance of the sensor.
Installing a control unit
As mentioned earlier, the ECU can be installed in the most convenient place for you. We will look at the installation of the power supply in the car trunk. To do this, first of all it is necessary to remove the trunk's ligation and wind the wires from all sensors along with the help of isol or homutics. After that, they need to be carried out under the bumper in the trunk through a special technological hole, which you can drill yourself. Next, pour the wires with a sealant to protect and fix them. After that, the bumper is installed on its rightful place.

Tip! The signal processing unit must be securely secured on the surface (for example, on double-sided adhesion) so that it does not break through the load.
Connecting wires
Parktronic Connection with your own hands is almost completed, it remains to power the ECU from the reverse lamp, while observing the necessary polarity. First of all, decide on the rear lamps and find the "plus", which is most often the red wire. If you doubt - use the tester.
There are two ways to connect wires:
- Verified method "Dedovsky". To do this, you need to remove isolation from two wires and twist them together. The location of their connections tightly wrap the insulating tape. You need to do the same with the rest of the wires ("plus" and "minus").
- The modern method for which special rivets are used. When they are compressed - contact between wires is created. At the same time, nothing will have to cut, as well as to remove isolation.
On the "plus" wire of the reverse lamp, wear a rivet, and connect the wire from the power supply to the second hole. Pliers press the jumper penetrating both wires, thereby creating contact between two cables. After that, in the same way, connect each wire to the block, each connector of which will be marked accordingly.

Installing Display
The display is better to fix in the most convenient position for you. In this case, as well as for the ECU, you can use bilateral tape. If you decide to set the display in the back of the cabin to see it through the rearview mirror, do not forget to install it in the correct position, since in the mirror image the right is changing to the left (D, B, C and A).

After that, secure the wiring with the help of clamps or tape and test the parking sensors. To do this, turn on the ignition. If the screen caught fire, then you did everything right.
Installation of front parking sensors
If you coped with the installation of the rear sensors, then you will not have problems with how to connect the front parking sensors. The procedure is no different, as in this case, you will need to drill holes in the bumper and place the corresponding sensors in them.
The only difficulty lies in the fact that the front sensors will constantly work in traffic jams, so consider where to place the switch for them so that you can always turn them off if necessary.
In custody
Parktronic is a very convenient gadget that will save your car from unforeseen damage. If during the installation you will have difficulties, then you will help you the video installation of parking sensors, where every step is clearly demonstrated.
Photos taken from a video clip posted on a video blog Made in garage . Many thanks to the author!
Read 9 min. Views 720.
Full-time ultrasound radars in cars warn the driver about discovered obstacles during parking in cramped space. But this equipment is installed by manufacturers not in all models of machines. The owner can perform the setting of parking sensors with his own hands, for this it will be necessary to neatly drill the bumper and conduct switching cables through the car body.
Required tools
To install equipment on auto, the following tools will be required:
- special milling mill for plastic (the diameter must correspond to the size of the sensor housing);
- electric drill or rechargeable screwdriver;
- wrench kit;
- screwdrivers with flat and cruciform sting;
- a set of keys with head type TORX (required for European production machines);
- test device;
- malyary Scotch;
- roulette and level;
- pencil or marker.
How to install Parktronic
To independently put the parking sensors, you need to mount the sensors in the bumpers of the car and install the warning module in the cabin of the machine. The installation scheme includes a separate control unit, which is connected to the onboard network of the car. Details are connected by cables included in the kit.
Before starting installation work, it is recommended to check the performance of the components of the parking assistant. Details are connected in accordance with the factory mounted circuit, then switching the DC source 12 V, calculated for current to 1 A. To test the sensors, a cardboard sheet is used, in which holes are drilled to install products. Then, before each of the sensitive elements, an obstacle is installed, the accuracy of measurement of the distance is tapered.
When installing sensors, it is necessary to take into account the orientation of parts in space.
At the rear, there is an inscription UP, which is complemented by an arrow pointer. When installing, the device is located up the upward arrow, but it is allowed to deploy a 180 ° sensor if the bumper is located at an altitude of more than 600 mm or when the bumper surface is tilted upwards, which worsens the sensitivity of the ultrasonic device.
Scheme
The installation scheme provides for the placement of ultrasonic sensors in the front and rear bumpers. The sensors are located on the end plane, as well as at the corners of the bumper, providing an extension of the controlled zone. A parking assistant can work in conjunction with the rear view camera, displaying the image on the Magnetic screen or a separate display. The control unit is mounted under the trunk lining or in the cabin (in the zone protected from moisture exposure). The information panel with the buzzer is placed on the instrument panel or embedded in the mirror.

Installation of the rear parking sensor
Installation of the rear parking sensors begins with the markup of the surface of the bumper. The accuracy of the assistant's work depends on the quality of the markup, so it is necessary to study the manufacturer's recommendations in advance. With an erroneous installation, the "dead" zones are formed in which an obstacle may be.

Sequence of actions when installing rear ultrasound sensors:
- Apply a markup on the plastic lining of the bumper and stick at the location of the sensors of the segment of the painting of the painting tape. In the equipment set, there may be melo, allowing the owner to place the surface of the bumper and install the sensitive elements itself. Equipment manufacturers recommend setting sensitive elements at an altitude of 550-600 mm from the soil.
- Determine the location of the centers of the holes with a roulette and a hydraulic or laser level. Ultrasound sensors should be placed symmetrically at one height.
- Distribute channel centers with a thin seer so that the cutter does not slip. For drilling, use the tool attached by the Parking Assistant manufacturer. The diameter of the opening must correspond to the size of the sensor housing to prevent slipping the elements during operation.
- Secure the mill in the cartridge of the electric tool and proceed with drilling. The cutting tool must be perpendicular to the surface being processed, the horizontal position of the cutter is simultaneously monitored. It should be borne in mind that under the plastic shell there is a metal beam, which can break the tool.
- Install in the resulting openings of the sensor housing with switching cables. If a foam damper is installed in the machine design, then it is necessary to neatly drill the part, the resulting channel is used to output connecting cords. If work is carried out on the removed plastic shell, the cables are laid on the inner surface to the input point in the body.
- To lock the sensors using the mounting rings from the set, letters are applied on the parts of the parts to determine the purpose of the sensing element. It is prohibited to change elements in some places, since the accuracy of the device is disturbed. At the rear of the case there are explanatory tags (for example, arrows), indicating the correct position in the bumper.
- Conduct cables from sensors through a rubber compact ring of the standard wiring or plastic plug into the luggage compartment. If the input is carried out through the plug, the location is closed by a layer of sealant. Cables are pulled by a piece of rope or elastic wire.
Parktronic is a device designed to help motorists in vehicle parking. Drivers, as they say, are divided into two types - those that never recognize such a device and those that without it simply cannot park. Since it is carried out by installing it, which you need to know about the Parktronic scheme - read about it below.
[Hide]
Parktronic work scheme
If you made a decision to put the parking sensors with your own hands on the body or the bumper of the car, then first will understand the device's work scheme. Its main purpose is to signal the car enthusiast with the help of sound and light pulses that the vehicle is too close to the obstacle. To date, there are many types of such devices, including those equipped with cameras, displaying a picture on the Magnitole display, a separate monitor or even the windshield.
So, if you decide to install a parking sensor, then read its work scheme below:
- The circuit is equipped with several sensors, which, after connection, make it possible to identify obstacles using an ultrasonic pulse.
- When the regulator detects an obstacle, a wave returns to it.
- The regulator transmits the pulse about the available interference to the control unit, which subsequently processes the data obtained.
- As a result, if the connection and configuration were made correctly, the driver is notified of the interference. This may be a beep, visual or complex. A distances to the interference object can be displayed on the magnetol display or the device itself. But in fact, our motorists usually perceive only sound impulses.
Installation of parking sensors
How to install a parking sensor how the holes are drilled and connect the device to the bumper? Can I also need to paint, what color should paint, how to do everything right? Installation of parking sensors with your own hands and its setting is not a particularly difficult procedure. You will need time and, of course, a standard repair kit.

So, the installation of parking sensors implies the right choice of the device itself - in this case you are oriented with your preferences, as well as the budget. So that you have not had to constantly make repairs, decide in advance what model you want to purchase. To do this, use the monitoring of feedback on the network to understand the devices of which type of other motorists are choosing and how they behave.
By choosing the device, you remain to carry out the drilling holes in the bumper, install and paint the device into the appropriate color. Consider the fact that each vehicle has certain features in terms of design, as a result, the drilling of the bumper can take a certain time. Accordingly, if you do not want to receive a pulse from asphalt or sky, you need to immediately know how to properly carry out the bumper holes and the installation in general on your car model.

Included for parking sensors should go instructions for drilling a bumper, connection and configuration, from which you can fully understand how this procedure is performed. In the event that the instructions on how devices are installed, no, then it is better not to stop your choice on such devices. In this case, you can simply be able to acquire a flashing device from which there will be no sense, no matter how you could adjust it.
So, if you do not want to face repairs, then stop your choice only on high-quality parking sensors. In general, the procedure for drilling the bumper and painting the device to the appropriate color is universal for all types of parking sensors. If the manufacturer has proven its products as high quality, not only the instruction, but also the cutter in the size of the regulators will be included. This mill will allow you to correctly select the holes for drilling the vehicle bumper (the author of the video - Avtoden TV).
How to install and connect the device?
How can I install the device in the bumper of the car, how to adjust and how painting is done in the desired color - we will tell about it further:
- First, it is necessary to properly prepare a place to mount the instrument. The electronic control unit of the gadget is mounted in the luggage compartment, you need to select the installation location itself. You can mount the device under the plastic trimming of the trunk or in the free space under the wing. It does not matter, the main thing is that moisture and other external factors do not affect the control unit.
- Now you can proceed to the preparation of the bumper itself and first of all it must be carefully flushed. After that, given the number of regulators that are included in the device, this element of the body should be correctly placed. As a rule, modern gadgets are equipped with four sensors, according to this number, you can correctly place the bumper. As a rule, the extreme two regulators are spread to the side, radius parts of the bumper. That distance left can be divided into an appropriate number of parts, depending on the number of regulators that are included in the kit.
- As for directly markup, it can be done using a marker or marker. In order not to spoil the color of the body, the marker is in the future is flushed with alcohol. It should also be noted that the markup is made in accordance with certain parameters of the gadget, that is, it is necessary to consider the performance of the device marked in the instructions. In most cases, the level of height from the ground is half the meter.
- Using the cutter, you must drill the corresponding holes in the bumper, after which the regulators in them are mounted. In most cases, regulators are installed without problems in the seating places, but for greater confidence that they will not fall out, they can be placed on glue.
- Before painting controls in the desired color, they must be connected to the control unit, as well as to the monitor. To do this, use a scheme that comes in the kit. Next, you need to paint the sensor conclusions so that they are in the tone of the bumper. In principle, conclusions can not be painted, it all depends on your preferences.
- The final stage will be diagnosed and testing the working state of the gadget, while testing should be carried out with obstacles.

In general, the process of installation of the gadget is not particularly difficult, in principle, if anyone will be able to cope with this procedure. If you have doubts about this, then it is better to pay and trust specialists once, but to be confident in the performance of the device.
Video "Installation of parking sensors at home"
As with your own hands, install such a device on the car - step-by-step instructions are presented on video (the author of the video is made in the garage).