How to check the tightness of the valves? Eliminate the leaks of the valves with your own hands! The microcracy in the GBC is unpleasant, but correctly checking the CFC to crack.

An experienced motorist knows that the work of the car depends on the efficiency of the engine. And one of the main motor assemblies is the head. How to check the GBC on the microcracks and what are the signs of the appearance of cracks on the head? You can learn more about this here.
[Hide]
Signs of cracks in the head of the cylinder block
In most cases, the motor wear occurs in its upper part, that is, on the head. The reasons that affect the failure of the block are set. Western is the overheating of the motor, when antifreeze flows from the cooling system. This happens as a result of incorrectly tightening pole pins. This is the wrong operation of the temperature control device, it may cause the deformation of the plane of the GBC.

Consider signs and symptoms that indicate the appearance of cracks on the CCC and the need to repair the unit:

Diagnostic options for the problem
To make repairs and eliminate microcracks, you need to be completely confident in what they are. Consider several diagnostic options that can be held at home.
Magnetic Powder Diagnostics
The method is the most prompt type of repair in microcrack detection. It is as follows: install magnets from all sides. The GBC is topped with a metal chips from above, it will begin to move to the magnets, remaining on cracks and dents. So, notice the cracks will not work.

Diagnosis with liquid
To check the GBC for the presence of defects with this method, you will need a special color liquid.
- Wash the head thoroughly, to do this, use acetone, kerosene or other type of solvent.
- Special fluid to apply on a cleaned surface and wait a few minutes.
- Then a clean cloth wash the residues of the liquid. If there are defects on the GBC, they will be visible to the naked eye.
Pressure check
The method can be implemented by several methods: with immersion of the head of cylinders under water without it. Make inspection with immersion in water:
- If you decide to diagnose with the immersion of the cylinder head into the water, then you need to tightly close all channel circuit channels of the upper part of the unit, then put it in the container and pour hot water there.
- Then in the contour of the GBC to serve compressed air and where bubbles will appear, microcracks will be.
 Pressure diagnostic equipment
 The method without immersion of the block into water is carried out to search for holes in pierced tires:
- it is necessary to hardly close all channel circuit channels.
- After that, on the surface of the head cover, pour a soap solution.
- In the contour you need to submit air. Where a defect will be detected on the head surface, soap bubbles will appear.
Water checking
The method does not differ from the previous one. The only difference is that the head does not need to be lowered into the water, and water should be pouring into it:
- All holes are hermetically closed.
- In the canal pour more water.
- Then, using the usual pump, you need to pump air into the channel to make a pressure of at least 0.7 MPa.
- After you need to give to the head for several hours. If the water is gone, it indicates the defects of the head. So, without repair can not do.
 Argon Surface Welding
 Repair of defects
The repair of the block of the block is preferably carried out with welding, this method is most efficient and reliable.

Video "Repair of microcracks"
Cylinder head - main node power aggregate vehicle. The emergence of problems in its work will lead to serious consequences, up to the failure of the engine and the impossibility of operating the car. How to determine the microcrack in the CCC and how to independently repair a malfunction, will be described below.
[Hide]
The reasons
Determine the microcrack in the CCC is not easy. Before diagnosing the appearance of problems, we recommend to understand the reasons for which the head of the cylinder block can crack.
Excess temperature difference
Often cracks and defects in the GBC appear as a result of a violation of the process of combustion of the fuel and air mixture in the chamber. This may occur due to incorrect operation of the fuel component or incorrectly installed ignition. Such problems will result in an increase in the temperature in the engine for 200 or more degrees compared to the standard. As a result, microcracks will appear on the thinnest walls of the head of the block. We are talking about holes for sprayers, glasses of nozzles, etc.
"Man-made" mechanical impact
In the GBC 406 or another block of the block, the problem may be due to mechanical action. For example, there will be a gap of the planting hole for the valve seat in place next to the nozzle socket. This happens as a result of a hallery of the nozzle itself. In this place, the thickness of the metal head is no more than 2 mm. It is possible to identify such microcracks, but their repair is usually inappropriate.

The problems of such a plan can be avoided, given the following nuances:
- Before installing, new washers should be heated on the stove either above the gas. Details are heated until the formation, after which they fall into cold water and cooled. These actions ensure the softness of the washers.
- Under the nozzles it is impossible to put copper washers and other types of seals used earlier.
- Before making the installation of new washers, their condition should be checked with a magnet. There is a possibility of buying outlined parts.
- After taking into account these moments, nozzle is allowed, while it is important to comply with the regulations set car manufacturer. If these actions did not help achieve tightness, it is recommended to refer to specialists.
The appearance of microcracks in the GBC of the car VAZ or other machine is often due to the installation of the guide sleeves into thin-walled heads. When installing, it is necessary to carefully check the dimensions of the outer diameter of the sleeve, as well as the dimensions of the opening for its fixation. Installation technology cannot be broken - in the heated block of the block, the sleeve cooled in the liquid nitrogen is compressed. If this rule does not follow, this will lead to the appearance of radial defects from the external diameter of the guide sleeve.
Factory defects
The need to determine damage in the head head occurs due to defects made in production. The GBC itself has a complex configuration, and the walls in it are characterized by different thickness. In the manufacture, errors can be made that will be allowed to launch a metal in certain places and a violation of its structure. As a result, it leads to the appearance of small voids and an increased rust formation rate in them. When subsequent operation, the surface of the water shirt and combustion chamber will be connected, or there are cracks due to a serious attenuation in thin places.
In violation of the metal structure, the intermolecular bonds of the GBC strongly weaken. Because of this, the material will become more fragile, which will lead to the appearance of defects. In practice, the malfunction of such a plan is usually found in jumpers between the holes for the saddle and the nozzles. Cracks appear in the channels located behind the valves.
Typical Frame Education Places in GBC
Determine the microcrack in the CFC - the task is difficult for an experienced specialist. After all, damage is not formed in the same place. However, it is not so difficult to find them. Especially if you have a list of places that you can see Visually:
- Between the valves of the engine. The defect will be visible immediately. Usually it appears under the saddles of the valves located next door.
- In diesel power units, microcracks can go from the valve to the forkamera. Such a flaw is easy to find, but it is problematic to see it, because it appears directly under the forkamera and does not go out.
- Cracks are often formed between valves and candles. You can see such a malfunction without problems.
- Sometimes damage is formed under the valve guides. Here faults are not visible. The valve channel is dark enough, and the defect itself is usually covered by the guide sleeve. Therefore, visual diagnostics is not suitable here.
Signs of presence of cracks
Detection of damage on the cylinder head housing can be carried out according to the signs. Let us consider in detail the symptoms that will allow you to check and determine the presence of microcracks.
Oil system
The first feature is mixing motor and coolant. As a result, an emulsion is formed in the power unit. A foam with a white tint appears on the oil surface. In an expansion tank with coolant, a film made of lubrication is formed. The same features indicate damage to the gasket of the GBC.

Liquid leak through a crack in the head of the cylinder block
Intake canal
When cracking in the head of the block in the inlet canal will enter the coolant. Because of this, the pistons of the power unit will be washed almost to the brilliance. You can see them, looking through the candle hole. When antifreeze in the intake canal, from the muffler will go white smoke. But this sign is not always observed.
Channel release
If the crack appeared in the release channel, the refrigerant will pass through the tube in the form of steam. After warming up and before the power unit will produce steam, but visually see it will not work. Expendable material leaves expansion tank. There will be no smell from spent gases.
The combustion chamber
Through the resulting defect, part of the consumable material will flow into the combustion chamber, but its volume is usually insignificant. This is due to a big pressure difference. During the operation of the engine, the fuel-air mixture is combustion. This contributes to the occurrence of high pressure. Because of this, spent gases will flow into the cooling system. As a result, the pressure will be higher.
This will lead to an increase in the volume of the mains of the cooling system. And from the expansion tank will begin to commemorate the smell of exhaust gases. While the cooling system is present high pressure, consumables Can get into the combustion chamber. There will be a vacuum and airborne bed. As a result, a large difference in pressure, the coolant enters the combustion chamber. The main feature is the purified pistons, the smell in the expansion tank, an increase in the hose volume. At the same time radiator heating system It will be cold due to the appearance of an air traffic jam.
How can you check?
Before making repairs or replace the GBC, it must be checked. Below we consider ways that will detect the presence of damage on the head of the cylinder block at home. Video on the diagnosis of the GBC on the subject of microcracks is removed by the channel repair hydraulics.
Magnetic Powder Diagnostics
This method is the most fast option Learn about the presence of defects. The essence of the method is to install magnets from all sides of the cylinder head. After they are installed, the block of the block should be sprinkled with a metal chips. This will lead to its move to magnets. And on defects, the chips will remain, which will eliminate damage.
Pressure check
You can detect a crack in the GBC in several ways: to immerse the head under the water or do not do it. Method for diagnostics with immersion GBC:
- Remove the cylinder head from the engine. We will not describe the removal process because it is individual for each vehicle.
- Tightly close all circuit channels at the top of the device.
- Immerse the block head into the container. Pour hot water into it. Capacity should be large so that the GBC is completely immersed in it.
- After that, in the circuit of the device, feed compressed air. In the place where bubbles appeared, there are defects and cracks.
You can not immerse the GBC into the water:
- Firmly close all channels on the device circuit.
- Prepare a soap solution, for this mix soap with water.
- On the plane of the cover of the GBC pour the resulting solution.
- Feed compressed air into the contour. In the place where soap bubbles appeared, there are microcracks. Video about the diagnosis of the GBC under pressure was removed Pavel Shilin.
Water checking
This method is performed using water. Only the head of the cylinder block should not be lowered into it, the liquid is poured directly inside. For diagnostics you will need a pump:
- Tightly close all available holes.
- In the channel of the device pour fluid.
- Take the pump and pumped the air into the canal. It is desirable that the tool is with a pressure gauge. Air supply pressure should be at least 0.7 MPa.
- After that, the GBC should stand 2-3 hours. If water leaves it, it says about the presence of microcracks on the case. Accordingly, more detailed diagnosis and repair will be required.
Diagnosis with liquid
How to check the GBC for the presence of microcracks using the coloring fluid:
- First, the surface of the device must be fully rinsed. For cleaning, use acetone or other solvent. Can be used kerosene.
- After it is necessary to prepare a paint liquid. It is applied to the surface of the head of the block, then waiting for 3-5 minutes.
- Then you need to use the rag for flushing the residues of the liquid. You need to look at the GBC housing - if you have cracks, you can see damage.
Repair damage with your own hands
The appearance of defects on the head of the engine cylinder block is a serious problem. But it can be solved if there are insignificant damages.
In what cases do you need a replacement?
Changing the cylinder head is necessary in case of serious damage. If the cracks are large and they cannot be eliminated, the GBC is subject to replacement. But before do it, the device can be repaired.
Preparation of the head for welding

Surface stripping for repair of the power unit of the power unit
Before performing welding, the defect must be divided. Using the milling machine, the metal on the design of the cylinder head is dried along the damage length. As a result, the groove should be turned out, the depth of which will be 6-8 mm. Approximately the same must be its width. As for the form, it is better to make it a wedge-shaped, it will make it possible to more effectively peak the metal. To cut the cracks between the saddle, they must be dismantled and then cut.
When the preparation process is completed, the CPC of the power unit is heated to a temperature of about 230 degrees, but not more than 250. Otherwise, the device may be a story. Heating is performed to reduce stress in steel, which appears during welding. To perform this task, it is desirable to use a furnace or a burner. The use of a soldering lamp is not allowed because it will quickly overheat the design.
Cylinder head head welding
The welding process is performed as follows:
- A metallic piece is prepared corresponding to the dimensions of the block damage.
- Welding procedure is carried out using gas installation. You must have additive materials on your arms. Practice shows that the best effect gives argon-arc welding. Connect the mass to the design of the device. It is necessary to ensure the burning of the arc between the GBC and the electrode, here to put the carved metallic piece used for the sealing of the defect. In detail the process of welding the head of the power unit of the power unit by welding is described on the video (the author is the Yutubbny channel).
After the process is completed, the work surface is subject to stripping and crimping. In the absence of damage to the plane, which will lay down to the GBC, it is necessary to produce milling. It is necessary to achieve the surface to be as smooth as possible.
Alternative methods
there is alternative methodsallowing to repair the head of the cylinder block. Consider them in detail.
Epoxy pasta
When using this method, the GBC is cleared on both sides. This uses a metal brush. In the place of damage it is necessary to drill holes with a diameter of 3-4 mm. A thread is cut into them. The plugs made from copper or aluminum are screwed flush. Damage is subject to processing throughout the perimeter with the help of a chisel or abrasive circle. The tool is used at an angle from 60 to 90 degrees, the depth should be not more than 70% of the wall thickness.
- There are notches with the use of chisel around damage. They are made of chisel at a distance of up to 3 cm, this will allow the surface roughness. The plane is degreasing, for this, fuel or acetone is used.
- Epoxy paste is prepared. Using the spatula, apply the first layer of substance and immediately the second, the thickness of each should be at least 2 mm.
After that, wait a day, not more than 28 hours. During this time, the substance hardens. If you want to achieve a quick effect, the GBC design can be heated to 100 degrees. Then the hardening will take three hours. When the head of the block is ready, its surface should be cleaned with a file.

Drilling holes around damage in block head
Epoxy paste and patchwork from fiberglass
Patch thickness is 3 mm. The preparation process is performed in the same way as in the method described above. The difference is that for each layer of substances it is necessary to impose a fiberglass patch. It is so impregnated with paste, for better fixation is rolling with a roller. The total distance from the extreme part of the patch to the edge of damage to the go of the defect should be at least 15 mm. After fixing, the next layer is set. It must overlap the patch installed before, by 10 mm at least on each side. It is allowed to use no more than eight layers. After installing the last surface is covered with paste.
Staging pin
- For their installation at the ends of the damage on the head of the cylinder block of the power unit, the holes with a diameter of 4-5 mm are drilled. On each side of the defect.
- The drill of the same diameter drill holes at full length of damage. The distance between them will be 7-8 mm.
- Cutting thread and copper rods are installed. The depth of their installation corresponds to the thickness of the wall surface of the GBC. After mounting, the twigs should be trimmed with a hacksaw. The ends are left for 2 mm above the plane of the block head.
- At the next stage, holes are drilled between mounted pins. They have to overlap the previous ones per 1/4 diameter.
- Thread is performed, rods are installed and cut off. As a result, you get a strip from the pins, screwed into each other.
- The ends of the plates are hammered with a hammer, the blows are not strong. This threads threads and make a large seam. For reliability, the surface is covered with epoxy resin.
- Upon completion of the repair, the head of the cylinder block is performed.
Photo Gallery
Photo microcracks are shown below.
Video "Repair of cracked GBC with their own hands"
For example car Nissan. Sunny 1991 release Familiarize yourself with the process of repairing damage and defects of the power unit of the power unit (the material is removed and published by the RUSN SAVSIAN SAVVY channel).
Was this article useful?
Thank you for your opinion!
The article was helpfulPlease share information with friends
Evaluate the benefit of the article:
Comments and Reviews
Anatoly
Alexander
Specialist avtodvig
Specialist avtodvig
Specialist avtodvig
Specialist avtodvig
Alexander
Alexander
Vladimir
-
VISUAL CONTROL
After the parts are fully cleaned, it is necessary to examine them for defects. Detect small defects helps magnifying glass. The most responsible parts should be tested for the absence of cracks with special instruments of magnetic and penetrating flaw detection. Internal details, such as pistons, connecting rods and crankshafts, when detecting cracks to be replaced. Cracks in the cylinder block and cylinder head often managed to repair. The repair technologies of such defects are described in the subsequent sections (Fig. 10.10).

Fig. 10.10. To verify that the trail on the wall of the cylinder is a crack, a soap solution was applied to the coolant shirt and a soap solution was applied to the surface of the cylinder. Air bubbles confirmed that the trail on the cylinder wall is undoubtedly a crack
Magnetic flaw detection of cracks
The method of verification for the presence of a crack using a magnetic field has a generally accepted name - magnetic powder defectoscopy. The visual inspection is often impossible to detect cracks in the cylinder block, the head of the cylinder block, crankshaft shaft and other details. It is for this reason that special methods for inspection on the absence of cracks of all responsible engine parts are widely used at repair enterprises and engine-building factories.
The control method using the magnetic field is most often used to control steel and cast iron parts. Metal engine part (for example, the cast iron head of the cylinder block) is brought into a magnetic field created by a powerful electromagnet. The power lines of the magnetic field are easily permeated with cast iron. The concentration of power lines of the magnetic field increases at the edges of the crack. The surface of the checked part spans the fine iron powder, which accumulates in the place where the concentration of the power lines of the magnetic field is higher - along the edges of the crack (Fig. 10.11-10.14).

Fig. 10.11. This crack in the cylinder block of the old eight-cylinder V-shaped engine Ford 289 was made, apparently, an auto mechanic, too diligently trying to unscrew the plug from the block. He would have to warm up before this cork and soak the carved paraffin - not only to facilitate her work, but also to protect the engine from damage

Fig. 10.12. Magnetic powered control performed at a large repair enterprise

Fig. 10.13. Light iron powder concentrates along the edges of the crack. This photo shows a crack in a graduation valve saddle, detected when checking the head of the cylinder block.
Control by penetrating dye
Control by the penetrating dye method is used for flaw detection of pistons and other parts made of aluminum or other non-magnetic material. First, a dark red penetrating dye splashes on the surface of the surface. After cleaning on the test section of the surface, a white powder is sprayed. In the presence of cracks through the white layer in the place of the defect, the trail of the dye sticks out. Although this method also applies to control of parts made from cast iron and steel (magnetic materials), but usually it is used to control only products from non-magnetic materials, because the methods of magnetic flaw detection for their control are unsuitable.
Control by penetrating fluorescent substance
Fluorescent penetrating composition glows when irradiated with its ultraviolet rays. This method is applicable to control the parts made of steel, cast iron and aluminum. The generally accepted name of this method - Zyglo It is a trademark of Magnaflux Corporation Corporation during ultraviolet lighting in those places where there are cracks, bright lines are visible.

Fig. 10.14.. Device for magnetopowel flaw detection (a). It looks like a crack in the cylinder wall after a fine iron powder was applied on the wall (published with the kind permission of George Olcott Company) (b)
Control of high pressure
The heads of the cylinder block and the cylinder blocks are often experienced for the presence of leaks iodine compressed air pressure. All cooling channels are sealed with rubber corks or gaskets and a compressed air from the compressor is supplied to the water jacket (s). The head checked or the cylinder block is immersed in water and air bubbles indicate leakage sites. For greater accuracy of the results of control, water should be hot. Under the influence of hot water, the casting expands about the same as in the engine running.

Fig. 10.15. Control of increased pressure of a block of cylinders of an eight-cylinder V-shaped chevrolet engine Using hot water. The cylinder heads are also checked under pressure on similar equipment. Under the action of hot water, metal parts are expanding and male leaks are detected easier than in the case when cold water is used when controlling increased pressure.
The alternative method is to pass through a cylinder or a hot water unit with a dye dissolved in it. The leaked water indicates the places of cracks.
Defectoscopy. Cracked

Il. 19.1. To check the cast iron head of the cylinder block for cracks, a powerful electromagnet is used. The head of the cylinder block must be carefully cleaned and installed on the desktop, providing good observation conditions.

Il. 19.2. The electromagnet is turned on with a switch located on top of its housing, and a fine iron powder is sprayed between the magnet poles. The concentration of the power lines of the magnetic field at the edges of the crack above, and in this place, around the crack, the concentration of iron powder will also be higher

Il. 19.3. Especially carefully checking areas around and between valve saddles

Il. 19.4. In this head of the cylinder block from two valve saddles, cracks are diverged. This head will have to either replace, or repair
Frantishek Caper,
Engineer maintenance Federal Mogul (USA)Yuri Chapel,
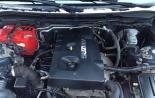
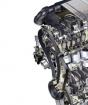
Leading expert of the company "Mechanics"Automotive engines - gasoline and diesel - from year to year become increasingly powerful, economical and satisfy increasingly stringent environmental standards. These characteristics are determined primarily by the efficiency of fuel combustion in cylinders, which, in turn, largely depends on the design and parameters of the head of the cylinder block (GBC), from the health and coordinated work of the elements of the gas distribution mechanism. Sooner or later, it is necessary to repair this important engine assembly.
There is a wide variety of GBC design solutions, and in each case the algorithm for removing the unit from the engine and its disassembly has its own characteristics. However, there are some general rules.
Before disassembling the head of the cylinder block
Before disassembling the GBC, it is necessary:
- Remove all holders, sensors and other attached electrical equipment. If you are dealing with a GBC diesel engine with electromagnetic nozzles, they also need to be dismantled (pump-nozzle pump optional).
- Before removing the head from the block, it is necessary to ensure the visibility of the labels used to adjust the gas distribution mechanism. If it is impossible, the details of the gas distribution mechanism should be melted accordingly.
Further actions are described on the example of the GBC with the upper arrangement. distribution Vala. (OHC):
- Loosen the fastening bolts of the block head cover in order similar to the order of their tightening when mounting. Remove the GBC.
- Denote the bearing caps (if applied) of the camshaft to determine their correct position when assembling.
- Remove the camshaft bearings covers, slightly turning them.
- Remove camshaft and bearings.
- Remove hydrocomathers and pushers (depending on the design of the block head). If it is assumed to be used to use them, then note the jobs of each.
- With the help of the appropriate device, squeeze the springs of the valves and remove the crackers, the springs plates and the springs themselves. Put the details in the order of their dismantling.
- Remove oil pulp with valve rods (if installed).
- Turn over the head, remove the valves, noting the places where they were installed.
- Save all components until it is accurately set to match the size of all new and replaceable parts.
Then make cleaning the head of the cylinder block. The assembly needs to be carried out in the reverse order.
Cleaning
For cleaning the head head, the following methods can be used:
- sandblasting;
- "Cold" flushing;
- "hot" flushing;
- cleaning with ultrasound.
More often than others applies the car wash in water using special detergents. Need to follow to detergents They did not contain chemical elements capable of damaging the parts of the GBC. Special attention requires cleaning of the components of the aluminum head of the cylinder block.
During purification using abrasive components from surfaces of parts of the head, a layer of material is removed, so care must be taken - an excessively intense or prolonged impact may result in their damage.
The most frequent defects
The most commonly encountered defects of the parts of the cylinder head include:
- valve's start as a result of the inconsistency of the shape (material) of the saddle and the valve or strong wear of the saddle;
- damage to the inner surface of the cylinders, pistons, piston rings and engine bearings caused by detonation combustion or premature ignition fuel mixes;
- the deformation and progress of the clerk plane of the GBC as a result of the leakage of exhaust gases or coolant due to the effects of temperature above the maximum permissible, violation of the normal mode of operation of the combustion chamber or cooling fluid circulation;
- damage to the gasket of the GBC as a result of its improper installation, including due to the use of inappropriate moments or violation of the order of tightening bolts;
- poor-quality mechanical processing of cabbage planes and engine cylinders block before replacing the gasket;
- damage to the surface of parts as a result of electrolysis or chemical reactions, as a result of the use of abrasive material;
- the destruction of the material of the details due to the defect of the injection system.
Methods for finding defects CBC
Many defects can be identified visually and decide on further repair, without resorting to expensive diagnosis. Carefully inspect the node on the subject of the rogar, the cracks between the saddles. On the diesel engines Under the conditions of operation, shallow cracks are allowed between saddles, not disturbing tightness. If you plan to use former cams, guides, hydro pulls and other parts, it is recommended to mark the places of their installation on the engine.
For accurate and fast diagnostics of the GBC, several uncomplicated, but reliable ways are used. One of them - magnetic Powder Detection (Only for cast iron GBC). The essence of it is as follows.
From different sides, the GBC is installed magnets and the iron powder pour on the head surface. Powder particles under the action of a magnetic field will be located in cracks, sinks and other damage with greater density, making them easily noticeable.
Detect cracks and cast iron, and in aluminum heads can be used painting liquid. On the carefully cleaned surface of the head of the cylinder block, you need to apply in painting liquid and wait for about five minutes. After removing the surplus "paint" cracks (if, they are) will become naked eye. As a "developer" defects, you can also use chalk.
Pressure test method Designed to determine cracks in the cooling / lubrication system of the GBC. It can be implemented in two ways: with immersion and without immersion of the unit into water.
In the first embodiment, the block head is installed in the device, hermetically closing all channel circuit channels of the checked system - the coolant system or the lubrication system. Then air is supplied to this circuit, and a soap aqueous solution is supplied to the surface of the aggregate. The air bubbles are determined by the place where there is a crack. If necessary, the tightness of the channel channels of another system is also checked. This method is not absolutely reliable, since in some cases the cracks are manifested only after installing the head to the cylinder block.
In the second version of the CFC with hermetically closed cooling fluid / oil circuit channels immersed in a hot water vessel. A compressed air is supplied to the circuit and the air bubbles determine the place where there is a crack. If necessary, similarly check the tightness of the channel channels of another system. The advantage of this method is that it makes it possible to check the GBC under conditions of different temperatures. However, it is not absolutely reliable, since in some cases the defects give you to know about yourself only after installing the head on the cylinder block.
About fast way Crack detection in GBC - with a vacuum tester. The method allows you to identify the presence of a crack, but does not make it possible to determine the specific place of the defect.
In addition to the lack of mechanical damage, it is necessary to check the geometry and purity of the railway plane of the GBC and the cylinder block: straightness in longitudinal and transverse directions, roughness and waviness. With a minor deviation from the norm, if the manufacturer involves the mechanical processing of the plane, the defect is eliminated by milling or grinding. If the deflection of the GBC is more permissible plant, they replace the part.
Defects of the valve mechanism parts
After the visual inspection and the tests described above, the valve diameter of the valve mechanism are monitored to diagnose the valve mechanism, the body side of the valve plates, the height of the valves installed, the height of the valve rod.
The most frequent valve defects (their probable causes):
- defects of the Support Surface (too large clamping valve spring force, excess of the maximum permissible rotational speed crankshaft, overheating of the engine, the use of parts from materials that are not compatible with unleaded gasoline);
- the formation of "cups" on the valve head (engine overheating along with an excessively strong plugging force of the valve spring or high speed landing of the valve head in the saddle);
- jamming the rod in the guide valve (too small gap between the valve rod and the guide sleeve; excessive oil pollution; engine overheating; incorrect adjustment of the exhaust valve);
- valve rod breakage (strong guide wear and, as a result, a non-uniform fitting of the valve in the saddle; excessive wear of the guide sleeve also leads to increased flow oils, an increase in the volume of harmful emissions, which increases the risk of damage to the saddle);
- mechanical damage (contact with a piston or other component of the valve mechanism; too large valve spring force force; strong wear of the guide sleeve);
- balance of the valve end (incorrect adjustment of the valve mechanism as a result of the installation of worn superstars and other components);
- nagar on the valve head (too early ignition, oil getting into the combustion chamber).
Over time, in the process of operation, the valve material is generated, as a result, the geometric shape of the part changes, which leads to various violations of the normal operation of the valve mechanism. The consequences of minor wear are eliminated by grinding the valve. Strongly worn item is replaced.
When inspecting the springs of the valves, the following parameters are checked:
- deviation from perpendicularity (should not exceed 1.0 mm per 25, 4 mm. Spring lengths);
- the maximum deviation of the free length of the springs in the set (should not exceed 1.5 mm).
The springs of the valves should not have damage, corrosion traces, cliff, or general signs of wear. The surface ends of the spring indicate work with vibration or rotation as a result of its low length or insufficient stiffness. Such a spring should be replaced.
The most frequent defects of the valve saddles are the deviation from the magnitudes of the angles and the width of the edges determined by the manufacturer. From these parameters, first of all, the angle of landing, the area of \u200b\u200bcontact and, ultimately, the density of the adjustment of the valve head is dependent. The valve guide bushing directly affects the accuracy of landing the valve head in the saddle.
The prerequisite for the effective operation of the valve system is to ensure the concentricity (alone) of the four elements - the heads and the rod valve, the saddle and the guide sleeve.
Defects of the camshaft
Malfunctions of the camshaft (most likely reasons):
- Nagar on the cam and rocker cam (Too strong heating of parts as a result of insufficient oil supply or blocking oil channels).
- Strong wear cam (polluted butter, too small pusher gap or too strong plug-in valve spring force).
- Premature wear of one or more cams and pushers, concave contact surface, damaged edges (The discrepancy between the geometry of the contact surface of the cam and the pusher, for example, due to the installation of new pushers along with the "old" camshaft (or vice versa), as well as insufficient lubrication due to blocking channels or reduced oil pressure.
- Cutting the camshaft (Deformation of the camshaft or cylinder head, including as a result of an incorrect sequence or exceeding the allowable torque of the fastening bolts).
- Coupler fis (excess load as a result of piston jamming, piston contact with valve; insufficient clamps with a camshaft; weak valve spring, too high load of hydrocomathers, incorrect installation Capper valve, breaking the belt of the gas distribution mechanism, the incorrect setting of the valve mechanism).
- Blue painting camshaft camshafts, bearings and rocker (engine overheating).
- Occasions on the surface of cams, bearings and pushers (Too high axial movement as a result of wear wear, incorrectly installed phases of gas distribution).
- Mechanical damage to the camshaft bearings (Solid particles in the engine lubrication system).
Defects of hydrocompensators
The most common "disease" of hydrocompensers is an excessive tension that can lead to a piston and valve contact. The reason for the defect, as a rule, is fatigue or breaking the springs of the valve or clogging safety valve Mud particles that are in machine oil.
In most cases, the hydrocomathers do not require replacement, it is necessary to set them strictly to the places from which they were dismantled. When examining hydrocomathers, it should be verified in the absence of damage (in the case of using movable hydrocompensators). If necessary, it is necessary to carry out the mechanical processing of the reference surface of the compensator without disturbing its hardness. Then it is necessary to clean the items thoroughly, collect and check the hardness of the hydrocompatator based on the manufacturer's data. In the absence of such data, the plunger return time can be considered at the starting point after compression by 3.0 mm in the range of 10-60 s.
Selection of gasket GBC
In conclusion, a few words about choosing a cylinder head laying. At first glance, a simple question is of particular importance when a noticeable change in the degree of compression occurred as a result of mechanical processing of the CCC. If you leave everything, as it was, that is, put the old gasket or the same new one, it may disrupt the normal combustion process in the cylinders, which means deteriorate the traction and power characteristics of the engine, will increase the content harmful substances In the exhaust gases. To restore the initial compression size, you can use a thicker gasket of the cylinder head or washer, however, there are gaskets not for all types of engines and only a certain thickness range. Therefore, make sure that the desired laying is better before making a decision on machining.
The required thickness of the gasket or the washers is easy to calculate, knowing the size of the GBC before processing and after it. If the engine is installed "recessed" valves (for example, as on the Peugeot Xud7 car), it is necessary to take into account the volume of the protrusion of the valve and in the catalog to find the corresponding value of the thickness of the cylinder head gasket.
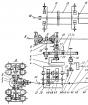
If your head of the cylinder head led to overheating and you had to grind it, then take it just a metal line and attach it to the edge to the plane of the cylinder head in length, width and diagonals as shown in the figure.
In each of the actions, adjusting the ruler to the head of the cylinder block for the entire length, take the dipstick 0.1 mm and check applying it to the ruler as shown in the figure

If the head of the cylinder block was grinding due to overheating of the engine, the block head will not immediately check on the tightness of the cooling system. Since when overheated by the head of the cylinder block, microcracks very often appear and then problems begin in the form of cooling fluid care, pairs of exhaust pipe, motor turbine ... etc. Checking the head of the cylinder block at home.

So far, all disassemble the workout on the cervix valves and the guide valves themselves. If necessary, make a replacement of parts with a defect. Check the valves to their saddles and after they are installed and drumming the springs, check for the intake and exhaust valve, bay into the inlet and exhaust holes in the brake fluid / kerosene / diesel fuel. If liquid seeps, then make the launch again.
Do not forget to clear the oil-feed channels after all the works, from the residues of the abrasive and the complicated metal.
Check the cylinder head in principle and not so difficult.
Clean the GBC from dirt, oil, chips. Carefully examine the head on all sides to ensure that there are no shells and cracks.
In specialized workshops, the block head plane is checked by a special template.
At home when this template is not, you can check the flatness with a metal wide long line. It must be applied to the plane of the head of the head, the figure shows where to make applying

And check the gaps of the dipstick. The clearance is checked throughout the perimeter ideally - the gaps should not be. But if the clearance is no more than 0.01 mm, then it is allowed.
I will emphasize and highlight: a new or polished head of the cylinder block, the clearance is precisely NO MORE 0.01 mm.
Because with the gaps of 0.1mm left (in some repair instructions, it is precisely this typo) that will be a high probability of breaking the block of the block head. And this is again the analysis and repair of the GBC, or even the engine, up to its replacement.
The head of the cylinder block must also be checked for tightness. This can be done for example the cerosene bay in the cooling cavity, shutting the fluid feeding hole. Cooking is made also with compressed air about 1.5 - 2 atmospheres, but it certainly needs a compressor, bath, that is, certain conditions.
When the head is tested passed, and is again tested for flatness, on tightness, then you can install the valve, pre-rapidly, and after the assembly, also check them on the kerosene. If kerosene does not proceed for about half an hour, then it is already well the valve prortes.
Cylinder block is clear, too, do not forget to clean from a car, rinse from dirt, clean and blow all channels. Wash the crankcase, the admissions of the oil pump, make sure the performance of the oil pump itself. Well, you can proceed to the final assembly of the motor.
Aleksey76.