Installing the new head of the Chevrolet Niva cylinder block. Cylinder head on Niv Chevrolet: Purpose, Design, Removal and Installation
Complexity
PM / Estakada3 - 6 h
Instruments:
- Dynamometric Key
- Shrinking cross
- Waspberry flat
- Passatii
- The key on 8.
- Key on 10.
- Caid key on 13
- Horn Key at 17 2pcs
- Caid key on 17
- Caid key on 22
- Torch knocker
- Extension of the oven voice
- Head for oven turns on 8
- Head for the ends of the turn on 10
- Head for a mechanical turn on 13
- Head for the ends of the turn on 17
- Head for the ends of the turn on 13 E-TORX
- Ratchet key
Scraper
Details and consumables:
- Gasket head block
- Laying valve cover engine
- Laying tensioner chain
- Sealant
- Cooling fluid on topping
- Stopper washer of the camshaft
Emery skin at 180-240
Note:
The cylinder head gasket is replaced with damage.
Basic signs of damage to the block head gasket:
Insufficient compression (below 1 MPa (10 kgf / cm 2)) in one or more cylinders;
Gas breakthrough into the cooling system (drilling, foaming fluid in the radiator, the rapid drop in the fluid level in expansion tank in the absence of external leaks);
Choosing a coolant into the lubrication system (emulsion on the oil level index, the bundle of oil fused from the oil crankcase is especially noticeable in transparent capacity);
Output in the cooling system (oil film on the surface of the fluid in the expansion tank).
1. Remove the cylinder head cover as described.
2. Drain the liquid from the engine cooling system, as described.
3. Reduce pressure in the power system, as described.
4.
Disconnect the throttle valve cable from the throttle and receiver.
5.
Remove the bearings housing along with switchgear With the cylinder head studs, for previously setting the labels with a ratchet key and removing the camshaft star, as described. 

Ratchet key.
6.
Remove the valve drive levers, remove all hydrophopores of the levers from the holes of the cylinder head. 
7.
Remove the oil supply ramp to hydraulic plants. 
8.
Disconnect the wiring knob from the sensor, the throttle position. 
9.
Disconnect the wiring harness from the sensor, the idle regulator. 
10.
Disconnect the wiring harness from the sensor, the coolant temperature of the engine control system. 
11.
Disconnect the nozzle wiring slot. 
12.
Disconnect the wire block from the detonation sensor. 
13.
Take the engine harness to the side. 
14.
Disconnect the wires from the spark plugs. 
15.
Slide the protective cap and disconnect the wire from the coolant temperature pointer sensor. 
16.
Disconnect the receiving tube from the exhaust manifold. 
17.
Remove the upper fastening bolt of the inlet pipe and, weakening the bottom bolt of fixing the strut, turn it away. 
18.
Loosen the fastening clamp and disconnect the throttle to the adsorber purge hose from the throttle. 
19.
Loosen the fastening clamps and disconnect the cooling system radiator hoses from the cylinder head pipe. 
20.
Loosen the fastening clamp and disconnect the thermostat lower pipe hose. 
21.
Loosen the fastening clamp and disconnect the thermostat sidelock hose. 
22.
Loosen the fastening clamp and disconnect the hose of the fluid to the heater to the heater radiator. 
23.
Unscrew the fuel tubes nuts and disconnect the fuel supply and fuel plum. 
24.
Remove the upper bolt for fastening the back strut of the intake pipe, loosen the lower bolt of the strut and remove it to the side. 
25.
Remove the two nuts starter fastening nuts. 
So there are nuts fastening the heat shield. 
26.
Take the shield to the side. 
27.
Remove the chain tensioner. 
28.
Disconnect the steering power pump bracket from the engine and remove it to the side along with the pump. 
29.
Remove the chain from the camshaft. 
30.
Gently put it on the tensioner shoe. 
Make sure the chain does not come out of the engagement with an asterisk of the oil pump drive shaft. It is best to bandage the chain with a wire.
31.
Remove the ten cylinder head fastening bolts. The heads of the bolts are turned turnkey "E-TORX", but if necessary, you can use the head "to 13". 
32.
Remove the head of the block. To remove the head of the block more convenient to the assistant, as it is rather heavy. 
33.
Remove the laying located under the head. 
34.
To determine the reason for the failure of the gasket, carefully inspect it. On the edging of the layers of laying, traces of the slot between the combustion chambers of the adjacent cylinders will be visible. 
35.
between the combustion chamber and the cooling system shirt channel. 
36.
or between the combustion chamber and the lubrication system channel. 
37. Carefully clean the surface of the block from the residues of the old gasket.
Helpful advice:
It is better to clean the old gasket with a pointed subject, for example, a scraper, but do not make scratches.
After cleaning the gasket, the block should be surface at 180-240, until the surface does not acquire a matte uniform shade.
38.
Remove extraneous deposits from the cooling system shirt channels (if available). The photo shows the extraction of an old sealant. 
39.
The order of tightening bolts fastening the head of the cylinder block. 
40. Install the cylinder head cylinder head, centered by two guide bushings, screw the bolts of its mounting and tighten them into four receptions in a specific sequence (according to the picture):
Pre-torque 20.0 N · m (2.0 kgf · m);
- "11" bolt finally reach the point of 31.36-39.1 N · m (3.2-3.99 kgf kgf)
The rest reach the moment 69.4-85.7 n · m (7.1-8.7 kgf · m);
Pull over an angle of 90 °;
Finally trust at an angle of 90 °.
Note:
Tightening Block Head Bolts, Beddistribution Vala , starsdistribution Vala Perform using a dynamometric key, the desired torque.
The article lacks:
- Quality photo repair
The cylinder head gasket is replaced with damage.
Basic signs of damage to the block head gasket:
- insufficient compression (below 1 MPa (10 kgf / cm2)) in one or more cylinders;
- breakthrough of gases into the cooling system (drilling, foaming of the fluid in the radiator, the rapid drop in the level of the fluid in the expansion tank in the absence of external leaks);
- getting a coolant into the lubrication system (emulsion on the oil level index, the bundle of oil fused from the oil crankcase - especially noticeable in transparent capacity);
- getting oil into the cooling system (oil film on the surface of the fluid in the expansion tank).
You will need: a dynamometric key, screwdriver, passage, keys (ordinary and end) "on 8", "at 10", "at 13", "on 17", the head "E-TORX".
1. Remove the cylinder head cover (see "How to replace the GBC CHEVROLET Cap Lid").
2. Drain the liquid from the engine cooling system (see "Replacing the coolant").
3. Reduce the pressure in the power system.
4. Disconnect the throttle cable from the throttle and receiver.

Remove the bearing housing along with the distribution shaft with the cylinder head stuffs (see "").

Remove the valve drive levers from the holes of the cylinder head all the hydrophopores of the levers (see "Replacing the Hydropor of Valve Drive Levers") and ...

Remove the oil supply ramp to hydraulic plants.

Disconnect the wiring harnesses from the throttle position sensor, ...

Idling regulator, ..

Cooling fluid sensor engine control system

Disconnect the nozzle wiring slot.

Disconnect the wire block from the detonation sensor.
![]()
Take the engine harness to the side

Disconnect the wires from the spark plugs

Slide the protective cap and disconnect the wire from the coolant temperature pointer sensor.

Unscrew the four fastening nuts of the receiving pipe to the cylinder head
Disconnect the receiving tube from the exhaust manifold.

Remove the upper bolt for fastening the inlet tube strut and, weakening the bottom bolt of fixing the strut, remove it to the side

Loosen the fastening clamp and disconnect the throttle of the adsorber blow hose from the throttle

Loosen the fastening clamps and disconnect the radiator hoses of the cooling system from the pipe of the cylinder block head

Loosen the fastening clamp and disconnect the thermostat lower pipe hose

Loosen the fastening clamp and disconnect the thermostat side hose

Loosen the fastening clamp and disconnect the hose of the fluid to the heater to the heater radiator.

Unscrew the fuel tubes nuts and disconnect the fuel supply and fuel plum.

Remove the upper bolt of fastening the rear strips of the intake pipe, loosen the bottom bolt of the strut and remove it to the side

Unscrew the two header heat shield mounting nuts

So there are nuts fastening the heat shield

Take the shield to the side.

Remove the chain tensioner (see "Replacing the tensioner of the camshaft drive chain").

Disconnect the steering pump bracket from the engine (see "Replacing the camshaft drive chain tensioner shoe") and remove it to the side along with the pump.

Remove the camshaft chain
Gently put it on the tensioner shoe.

Make sure the chain does not come out of the engagement with an asterisk of the oil pump drive shaft.
It is best to bandage the chain with a wire.

Remove the ten cylinder head fastening bolts.
The heads of the bolts are turned turnkey "E-TORX", if necessary, you can use the head "on 13"

Remove the head of the block.
To remove the head of the block more convenient to the assistant, as it is rather heavy.

Remove the laying located under the head.

To determine the reason for the failure of the gasket, carefully inspect it.
On the edging of the openings of the gaskets will be visible traces of the slot between the combustion chambers of the adjacent cylinders will be visible

between the combustion chamber and the cooling system shirt
![]()
or between the combustion chamber and the lubrication system channel.
Carefully clean the surface of the block from the residues of the old gasket.

Remove extraneous deposits from the cooling system shirt channels (if available).
The photo shows the extraction of an old sealant.

The order of tightening bolts fastening the head of the cylinder block.
Install the cylinder head, centered by two guide bushings, screw the bolts of its mounting and tighten them into four receptions in a certain sequence (according to the picture):
- pre-moment 20.0 N · m (2.0 kgf · m);
- reach the moment 69.4-85.7 n · m (7.1-8.7 kgf · m);
- Blast at an angle of 90 °;
- Finally trust an angle of 90 °.
For nothing, which is in Kazan. In the spring of 2009, he first put on OKU 52 Val. with a modified head and magnified sizes valves 39x34 mm. The machine then issued an amazingly smooth shelf of the moment and 47
Forces, which for 52 shaft was a certain revelation that caused hot spores and a wave of natural interest in 52 shaft. You can read more in this report.
Seeing (and feeling) The result of the work, Dmitry promised that in the summer she would bring his Chevrolet Niva to the revision. The promise kept restrained, however, so far spare parts were prepared and all the work options were worked out, the summer passed, and the car appeared in Naberezhnye Chelny in October 2009.
Dmitry - Active Club Participant "Chevrolet Niva".
Club Website: http://www.chevy-niva.ru
Dmitry, Dmitry actively "ventilated" the tuning question and in every way promoted the acceleration of the process - a positive way, of course. In particular, thanks to him, three cars came to Chelny - "Snow" Dmitry with a tuning camshaft, and two chevy -phones with a fully standard engine. It was possible to configure the equipment and make a measurement of the entire serial engine, so that we have a "point of reference".
Also, the Wedh of the Shevi-Niva Engine with a lower tuning camshaft Master Motor 03. The shaft was standing in the serial head, the chip tuning was also made. The schedule showed that Dmitry - on the right track.
Now we'll tell you a little about the car with which it was to work. Engine VAZ 21214, volume 1.7
Litra, mileage 60 thousand km. On the 20th thousand, the valve, the "official" in Kazan was repaired by the head (the valve replacement was performed and masonry Caps). After repair, the officials soon took the replacement of oil-challenged caps.
At 42 thousand, hydrooporas were removed - the source of constant problems and headaches from the owners of the NIV. Instead, they installed ordinary mechanical adjusting bolts, tuning 03 camshaft "under the mechanics". Also removed the hydraulic equipment of the chain - they say there are cases of spontaneous beaming of the tube of the oil pipeline. Instead of the hydraulic, installed a simple and quite reliable mechanical tensioner "Pilot".
The oil was used - synthetic Castrol, the replacement interval of 7400-7600 km. Next, it will be seen from the report that the oil even with such a reduced interval could not stand. Closer to 60 TKM Dmitry switched to the synthetics Neste..
Machine in configuration LC - Equipped with air conditioning.
Initially, we wanted to limit ourselves only to the refinement of the head of the block and chip tuning. The car is completely fresh. It was assumed that with the block - everything is in order, and Dmitry did not complain about anything. There were many options on the head. The objectives of tuning Chevrolet-Niva differ from the goals that put car owners in front of the tuning passenger cars. The operation of Shevi-Niva implies off-road, important torque at low and medium revolutions. Engine power, as such, is not an important goal of tuning. Chevy-Niva is not a street race car for racing from traffic lights.
There were few conditions in this way, but they were quite complicated - at least, to save the moment on the nizakh, as the maximum - to raise it. The task of raising the engine power on top, where 03 shaft was already ridiculous.
Long selected camshaft, mostly the choice was between 14 Vallar I. 44 . Eventually stopped on 14 The shaft, deciding that the tops will deliver the head refinement, as it happened repeatedly on the grassroots shafts. Ordered in Ufa Shaft 21213 Dynacams -14 (under mechanical bolts).
Even more time and nerves took the choice of valves. The easiest option is not to change the sideline and put the modified mass sized valves 37x31 mm. But I wanted to try enlarged valve, especially earlier on the classics we have already set the original size valves 41x34 mm. However, the supplier of these valves has ceased to work in the Russian Federation, the ability to order them - disappeared. Many "tunungists" go along the simple way - they take the cargo valves, shorten the rods, cut the chamfers under the crackers - and Ida. Money will take, and then the owner - flour, none of these "tuningists" does not think that the end and grooves under the crackers hardened in the manufacture of tvch!! And they - the harsh stop cutting the entire quenching the longer and put the rayomyatin !! What is the result?! Such valves - a penny price and a zero of the resource, crackers wear out, the ends are spawned and fall apart in pieces, how many cars come with such valves, here, examples:
1) breakdown of the barded valve
2) Tuning and repair of VAZ-21128 (1.9 l), RS451 camshafts + VSh
Why do the "tuningists" do that? Due to the difficulties associated with the selection of increased valves - you need to observe the length of the rod, the location of the groove under the crackers relative to the end. And not all suitable valves are still suitable for the price, or you can order them in the Russian Federation.
We had a great option - perfectly suitable valve length, head diameter 42x34 mm. Rod - 8 mm. Unique feature of these valves - three grooves under the crackers. The fact is that the classic groove is single, and the crunches are installed according to the "open scheme", which interferes with the rotation of the valves. Everyone knows the "illness" of the classics - the unwilling valve, which leads to the ditch rockers on the knives of the valves, the lock of the valve plates. People in different ways solves this problem - someone gives the motor to "please" on high revolutionsThrowing that after 4,000 of the valve starts to rotate, someone recommends that the valve is dedicated or put the modified plates, reducing the preload of the springs and changing the position of the rocker swing axis. But no one sees that the valves do not give such. Perhaps it was the reinsurance of FIATA designers, rigid springs could quickly wear crackers made from low-quality steel. This happens on 21083 engines when installing rigid springs and "raw" domestic superstars.
In our case, apply imported crackers with 3 ductssimilar to the breadcrumbs of 21083 engine. Sugari work on a "closed scheme", i.e. Do not block valves - they rotate almost constantly. The quality material of imported supersers gives a guarantee that they are not extended.
In the end, we have waited for the renewal of the supply of valves we need in the Russian Federation, and immediately ordered several sets. The only refinement that we have completed - finalized the valve plates. Thus, rods, and grooves for creak - remained factory, with the factory handling.
Now the car could give green light.
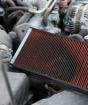
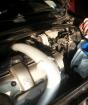
Podcast space is quite close. Condes with GUR restricted access to some nodes. Motor clean, washed, work nice. We begin to disassemble the top - remove the air duct, with the filter. Our task is to remove the head for its further refinement.
Judging by the length of the intake path, the plant tried to pull out the "bottoms" from the motor with all the ways, including a long inlet path. This may not help fall the power drop in high revs. See how inlet channels are spinning around the receiver - natural "brands horns" ...
Remove the receiver. First alarming bell - The intake path is noticeably grilled, inside the receiver - oil, the collector also "floats".
|
|
|
|
|
|
|
|


Let's see that under the valve lid. Dmitriy for a long time Lil Castrol, motor inside "designer", it was the reason for the transition to Neste synthetic oil. We have an exclusively negative experience (there is such a sign of such a sign - "Shell poured or Castrol - Wait for Kapitals").
Yellow falling, of course, there is, but in general, everything is clean.
We inspect the chain, the starring. On an asterisk - a marker for a phase sensor, which is in the side of the head. Before something "unfamming," we understand with the engine labels.
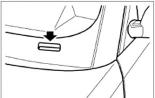
The NMT label on the crankshaft pulley is a small risk, must be exactly opposite the crankshaft position sensor (DPKV). It is most convenient to look at the bottom, for which you need to remove two protective flaps and intricate the pallet protection.
The place where to look at the crankshaft pulley is shown in the red arrow.
On the starring - a small hole on the reverse side, should stand opposite the tide on the bed of camshaft. Do not confuse with a large moon near the fastening of the phase sensor.
|
|
|
|
|
|
|
|
|


Check how it is camshaded relative to the crankshaft. And it is worth it - with a displacement, about the crawl. For clarity, paint the chain of paint, above the hole. Here you already need an adjustable asterisk, for accurate camshaft settings.
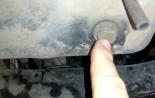
We look further. We detect the torn cap of the cylinder bolt of the GBC. Ay Well done, Kazan officials, ah how cool pulled the head after repair - threw the bolt, and go away, let the following will be loved by this bolt and you are especially. The owner of the official, of course, did not say anything.
Pleasant little. All bolts were stronger than torn. The key, of course, scrolls on it.
Remaining service goblin, so unsuccessful bolt head, we prepare the "operating". The bolt is completely next to the chain, it is necessary to avoid falling sawdust in the engine crankcase. Well, what can I say, we believe that the "nameless soldier of the wrench and screwdriver" was burned on that day. Drills broke, the bolt resisted long. It was possible to drill it enough deeply thin drill. Bulgarian - not to get suite, aluminum head is very close. It is necessary to drill on small circulation, otherwise the drills are stupid and break. Armed with heavy artillery - a low-speed drill, 1 kW, a drill of about 18 mm. Started "there is" a hat. Slowly lamely, eaten a hat, and the boil broke away from the bolt.
Head - removed.
|
|
|
|
|
|
|
|
|


So many times told - well, why AvtoVAZ upgraded the bolts on the classics! They made some kind of nonsense with a solid washer, the head of the bolt is small, weak. Whatever this is to do that, would never contact these bolts anymore? We looked at the bolts, stumbled, and came to mind the idea that was implemented in the future - put the finalized bolts from another engine! But about it - in more detail, we will not run forward.
Head removed. On the rockers there are some wear, not critical, but once to do, so high-quality, and therefore - Rocker will change to new, necessarily cast iron (there is also steel rocker).
Head removed assembly with intake and graduate manifiers - so easier. Antifreeze, of course, merge.
Call number two sounded when examining cylinders. In the 1st cylinder, Hon did not remain at all, the "pot" is absolutely "bald". In others, Hon still has. In all cylinders - strong double-sided zadira. In the third cylinder, the jackets are so strong that they are well felt tactically fingers and a nail. Work stops, there is a coordination of further actions with Dmitry. We do not know - broken rings and partitions, or they are whole. Remove the pallet and check - unreal, interferes with the bridge, dispensing. If you put the head, and do not touch the bottom, no one will guarantee that such a motor with cylinder loans will not be horn in very soon.
The fact that due to the scum throws oil through the ventilation of the crankcase into the inlet - fact. And in the future - it will be only worse. At the edges of the cylinders and on the pistons - the thick oil naiga is clearly visible.
But the car is fresh, 60 thousand km run, the removal of the engine was not even implied. But the "Consilium" of experienced motors makes a verdict - you need to remove the engine and make a overhaul block with a boring and Honing. Unforeseen work and unforeseen costs, but nothing to do. Forcing a motor with such cylinders - for yourself more. Dmitry gives good to remove the block.
|
|
|
|
|
|
|
|
|


What, then we will make a complete overhaul block. Head will take place later (according to the report chronology).
To begin with, you need to dismantle and remove the engine from the machine. Remove the decorative grille of the radiator, unscrew the fasteners of the gur's coil, we take it away. The serpent will not remove the snake, which means that the GUR does not have to pump. But the air conditioner radiator will have to take off. Discover the tubes suitable for the radiator. Freon, together with freon oil, the fountain rushes outward. It was necessary to cover this fountain something, did not guessed, and a large green oil stain remained on the ceiling. True, in a few days it disappeared without a trace.
The hood was also removed.
|
|
|
|
|
|
|
|
|
|
|


We fold the radiator of the air conditioner and we find a mouse nest. The space between the radiator of the air conditioner and the engine cooling radiator half filled with garbage - branches, pile, seeds. We collected all this with a vacuum cleaner, clearing radiators.
The engine cooling radiator can be pulled out only in the direction of the decorative lattice, because From the reverse side interferes with a hood lock fastening plate. Work is inconvenient. First unscrew the fans, then pull out the radiator. The designers who made the inverse nuts on the stapper of the hood of the hood castle reverse nuts on the plank of the boot of the hood lock) - unscrew and twist the bolts that fastening the removable bar - uncomfortable.
|
|
|
|
|
|
|
|
|
|
|
|


From everywhere climb "Atavisms" carburetor Engine, on the basis of which the injector engine of Shevi-Niva was made. Instead of a traver - a plug, a hole in the block for the pusher pusher - closed by an aluminum generator bracket. The two-meter belt for 30 thousand km already requires replacement - all in cracks. Kondeya Belt B. good condition, but also replace for the new one. Everything stretch rollers - Ina firms, plastic on them is worn out. Under the replacement in a circle.
The gur pump is unscrewed from the bracket and leave hanging on the side on the nozzles. The gur system does not disappear, it does not interfere. Radiator Gur (serpent) disconnect from fixing brackets and assigned to the side.
|
|
|
|
|
|
|
|
|
|
|
|


Next, disconnect the air conditioner. Fucked on long bolts on a heavy cast iron bracket. The bracket is attached to the cylinder block and to the pump. Do not envy those who will have to change the pump on Shevi-Niva with air conditioning. Such work will be very difficult. We find a small backlash pump and make a decision to change it preventively to the new, the production of TZ ("factory"). The "barrel" of the air conditioner is not disconnecting from the tubes, but only assigned to the side, it does not interfere with the block removal. After disconnecting the unit from the box, it is ready for the lifting.
|
|
|
|
|
|
|
|
|
|
|
|
|
|
|


"Vira Main" - a block on the winch drove up. Gently display a block of a motor compartment.
|
|
|
|
|
|
|
|
|
|
|
|


Designers, which would transfer the generator to the top, transferred the oil filter - for this, the aluminum bracket was built, simultaneously closing the carburetor atavism - a window for a pusher pusher.
There was a problem with the selection of the key for the native pulley nut. Due to the additional air conditioner belt, pulley is wider. No standard key for "classics" is not suitable.
|
|
|
|
|
|
|
|
|


What remains under the hood - in the corners hanging condo, GUR.
Open the block. The problem with the key for the indigenous bolt pulley was decided simply - bought a high head under the gate. The crankshaft for his 60 thousand is still good, only one neck at the bottom of the tolerance is noted - but, given the enormous labor intensity of all work - not having the right to make a mistake, kneel to grind in a circle in 1st repair by 0.25 mm. And we, and the client so calmer. Pistons in extremely poor condition. Abundant lacquer and slurry deposits from oil, on skirts - strong incisions (just in those places where there were cylinder jackets) - all signs of oil starvation of the piston group. And as otherwise, the connecting rod is long, the block is high, the stroke of the crankshaft is 80 mm, no oil supply system in the zone of the piston plant is not provided - there are no nozzles or holes in the connecting rods. You can, of course, hope for oil fog and spraying oil from connecting rod \\ indigenous necks, but this is completely insufficient - that the results of the defective and showed. Such a motor is initially notiable and will not have a high resource on the cylinder block. Considering the small turns on which the car is operated in off-road conditions - the block resource will be catastrophically small.
|
|
|
|
|
|
|
|
|
|
|
|
|
|
|
|
|
|


The chain was replaced with a new, stars of the oil pump and crankshaft are also new. The unit was wrecked in the repair size of 82.4 mm (more - further in the course of the report).
|
|
|
|
|
|
|
|
|
|
|
|


It was decided to set the cooling nozzles with oil pistons. The nozzles were embedded in indigenous crankshaft supports. Now the cylinders and pistons will receive an additional portion of the oil, which will significantly increase the engine's resource, completely levels the negative phenomenon of oil starvation with piston on small and medium turns. The pistons will be cooled, which means that there are smaller thermal loads, in the end, the pistons will serve longer, they will not "swim" in size under load.
|
|
|
|
|
|
|
|
|
|
|
|
|
|
|
|
|
|


And now, one of the most pleasant parts of the report. Next will go talk about the piston group for the Chevrolet Niva engine. From the very first day it was decided - no domestic pistons to use. You can argue on this topic for a long time, it is enough just to say a brief - the material in all "our" pistons is disgusting, the quality of manufacture and geometry of the sizes is bad. Wave on skirts instead of barrels, curves of holes under the fingers (about the fingers themselves and there is nothing to say). Something more or less can of course pick up, but it is like reasoning about what kind of grade .. GM, livestock waste is better for the agriculture ...
We have long been using excellent American pistons. United Motors (USA) For engines of front-wheel drives Vase. Any motorist, who held them at least in his hands, will understand everything at first sight. Chip not only in appearance, in geometry, but also in the material. It is different and noticeably different from low-sortes used in "our" pistons. We tried to make circuit and shorten the vaza pistons (from factory engines) - the material is viscous, lipnet on the mill and cutter. When hitting the hammer - the pistons are bend. And pistons Um.they have a firm and hard material, perfectly processed and cutting and milling, give good purity of the cut. It seems that pistons look like forged, they are tougher and harder, although made by casting - there is an inner tightening steel insert. With a strong impact - the material is cleared, but not bend. Race - has an interesting structure. Explaining doubts - we note that in any engine with these pistons did not break the jumpers.
Another quality indicator - putting the pistons on the table, easily knocking on the skirt with a small metal key - the Um piston makes clean and high ringing, and "our" domestic piston is dirty and deaf sound. At the factories, the experienced production officers can immediately determine the quality of castings in the sound - thrown onto the metal floor and listen.
Company United Motors. Releases pistons and for Niva.
Self top scores Applications Um-Ny Pistons are obtained in combination with piston cooling nozzles.
In the pistons deepened the circuit (hereinafter in the photo can be compared with the serial piston). The kit also goes the piston fingers (the quality of manufacture - excellent, the fingers are suitable for all pistons from the set, who picked up the domestic fingers to the domestic pistons - knows well if 1 finger of a pair of dozens will fit to the piston), as well as locking rings of fingers.
Piston rings - set, Goetze.
On the pistons indicated the mounted gap - 0.06 mm. It is such a gap and gave the block after the boring block during the Honinovka. Although the opinions of the bitters on this issue are diverged - many give a gap as on the front-wheel drives, i.e. 0.025-0.045 mm (usually at the bottom boundary), thereby correcting the motor to the short life. This motivated by the fact that the pistons of the Niva are made according to the sample of the pistons of Samara, and therefore the gap must be made as small.
After the boring, the nozzles of cooling pistons were embedded (see), and the block was laundered from dirt, oil and abrasive.
|
|
|
|
|
|
|
|
|
|
|
|
|
|
|
|
|
|


The rear crankshaft pedestrian for 60 thousand has already been practically jammed. For removal - you can make the simplest puller, it is also convenient to extract bearings from CATER CARTERS. New bearing - VBF.but added lubricants to him ( Hado).
For repair injector Niva A good set of pads is for sale - it is advisable to buy it precisely what to make the collection of the piece of the piece.
When buying shoes of the chain's calmrs in a large serious store, they tried to slip fake - it was given a low-quality casting with an elevation, blurred fuzzy marking, as well as - cracked in plastic! The high-quality factory shoes of tensioners managed to find only on the market (!!!), in a person who values \u200b\u200bhis reputation. Pay attention - the marking is clear, clearly visible, plastic itself is smooth, without rubbing and burrs. And there are no cracks near the holes (in a large store tried to assure that it is not cracks, but "such a molding form"). Do not buy a fake when repairing the engine!
|
|
|
|
|
|
|
|
|
|
|
|
|
|
|
|
|
|


In general, with spare parts for Chevrolet-Niva there are certain problems. What is - is more expensive (pump, for example). Much can only be found with great difficulty. An example is indicative - in a large store with a sign of "Spare Parts for Chevrolet-Niva" there was no detail from the multi-page list of spare parts that needed to buy. The original plastic clamps on the wiring (at the same time and the clamp, and the clips holder) were impossible to find, picked up from analogues.
Clutch from the plant is worth Valeo. - For 60 thousand runs, it was still in good condition, but the springs in the disk had already begun to stagger, somewhere wear - after consulting with the owner of the car - decided to change assembly to a new set, which would then not climb into this node again . Clutch Valeo. I managed to find, but with great difficulty.
Both drive belt replaced new - Gates. and Masumi..
|
|
|
|
|
|
|
|
|


Block assembled, put in place. After - fastening the fastener, the suspension of the auxiliary units and equipment.
|
|
|
|
|
|
|
|
|
|
|
|


Preparation of the head of the cylinder block.
Working with the GBC went parallel to the work on the block, but not to mix everything into a bunch, lay out photos and description in a separate chapter of the report.
The head is more convenient to remove from the engine assembly with collectors. Next - disassemble the head, the detail defect. At the end of the valves, the wear of wear - the valve is practically not rotated. This is a well-known disease of classical engines. With her many struggle with different methods. Many "sentences" are known, but do they work in practice? Dmitry knew about this problem, and periodically twisted the motor on turnover more than 5000 other to rotate the valve. As you can see in the photo, in fact this advice does not work. There are tips to reduce the dissolution of springs - sinking the saddle or increasing the length of the valve (with a concomitant reduction of the preload). It is hardly helps.
Why? But because all the advisers forget about one important feature of the head of the "classics" - the crackers of the valves in it are made on the "torn pattern" - there is a big gap between the halves of superstars. By contacting the plate (spring force), the crackers squeeze the valve and do not give it to rotate. Thus, except without the cardinal change of the entire valve mechanism, it is impossible to solve this problem. We have decided, but about this more further.
The photo further shows that the graduation collector laying has already managed to burn.
|
|
|
|
|
|
|
|
|
|
|
|
|
|
|


In the course of a long discussion of the project, we decided to put a large valve, with a plate diameter 42x35 mm (serial valve 37x31 mm). Sydla cut out of special cast blanks. The material is extremely good for the saddle - is well treated with cutting, while it has high rigidity and strength of the saddle. Some masters cut out the seats from the camshafts - to do it categorically, the material is not suitable, the sideline is very soft and "sit down" even on gasoline.
Sydla, carved from such blanks (production of Samara) - go perfectly, and not "sit".
Sydla pressed using liquid nitrogen.
After replacing the saddle on the enlarged, the channels were wrecked. Here, the cornerstone was the desire of Dmitry to preserve and add a torque on low and medium-sized turns - "Lighter" with a bad burden on the bottom was not needed.
Through this, the configuration of the channels and the choice of their diameters were extremely carefully.
|
|
|
|
|
|
|
|
|


The guide valves set bronze. Next, you can see photos of the modified channels.
|
|
|
|
|
|
|
|
|
|
|
|


|
|
|
|
|
|
|
|
|


Let's publish some help information.
Before disassembling the block, we measured some parameters of the piston group. Source data (factory): piston stroke 80 mm, connecting rod 136 mm, cylinder diameter 82.0 mm, engine volume 1689 cm3 (1.7) compression ratio 9.3: 1
According to our dimensions (Chevrolet Niva 1.7i):
Nearby piston: 0.7 mm
The volume of the combustion chamber in the GBC: 30 cm3
Volume of combustion chamber in piston: 12 cm3
Estimated compression ratio: 9,15:1
Thus, the compression ratio obtained on the basis of measured volumes is slightly smaller than the plant gives in passport data.
After improvements, and milling head plane, received the following:
The misfortune has not changed.
Volume of combustion chamber in GBC: 29 cm3
The volume of the combustion chamber in the piston: 13 cm3
Estimated compression ratio: 9,15:1
Thus, the compression ratio was left at the same level, without increasing.
Valve stem seals - Goetze (VW \\ Audi). Well, now, the most zimus in our valves 42x34 is the rods of the valves, or rather, the grooves under the crackers. They are not alone, as in the classics, and three, as on the front-wheelwater vases. We didn't touch the rods and did not refund (only plates). It is very important because the ends of the rods and grooves have factory hardening, many make the handicraft valves on the classics by trimming the ends and cutting the grooves - they are cut off the strengthened layer, and the rawer on the end is quickly sprinkled - such a hacktur does not go. Our valves have a fully needed rod length and grooves located at the desired level relative to the end.
SUCHIs are used imported, analogue of crackers from the VAZ 21083 engine. Sugari is not "torn", as in classics, but closed. Now the valves are not interfere with rotating in all modes of engine operation. The problem is "holes" - removed completely. It is very important to use imported superstars, because Our "Our" is not suitable for the quality of the material and processing.
We have installed special Durable springs plates made in their production. Hybrid plates - platforms are made under classic springs, and a cone - under 21083 crackers. Preload springs reduced on 2 mm.
The valve is finalized in plates, while we did not seek to put records by weight. Reliability was put in the head of the corner, therefore, the margin of the strength of the valve plates - is left quite large.
There was an option to put rigid single springs, but, given the operating modes and the lowered narrow-phase camshaft - left native, classic.
|
|
|
|
|
|
|
|
|
|
|
|
|
|


The head is assembled and ready, it's time to collect the engine. The intake manifold was finalized. Laying collectors with a follower - the joke of the designers was rated.
|
|
|
|
|
|
|
|
|


Now let's go back to the beginning of the report and remember the progressive bolt, and the promise is to put other bolts for fastening the head. The promise was kept. What bolts are the strongest and best in our opinion? Of course, it is an old sample bolts from the VAZ 21083 engine - under the inner hexagon. Such bolts thoring - it is necessary n.
-Not to promote \\ tighten them. In length, they are slightly longer, and put with separate washers (Chevy-Niva has a bolts with washers as a single integer).
The task is not good - bought new bolts, carefully rooted the rods on the lathe (the aesthetes are sawn by the grinder, but we are not from their number), they dugged the washers and set. All bolts stretch exceptionally well, according to the scheme for front-wheel drive engines.
|
|
|
|
|
|


Rocker put new, cast-iron. There are still selling steel, but they are undesirable to put them, they are cheap, but they work louder (the cast iron is soft, and the oil is also in its structure).
Camshaft installed lower narrow phase Dynacams 14. (under mechanical adjusting bolts). Detailed technical data on it.
|
|
|
|
|
|
|
|
|
|
|
|


Installed the split asterisk and adjusted the position of the camshaft at the point of the NMT. In the photo further, the asterisk is shown next to the serial, for comparison. Landing the crown on the hub is carried out "on the cone" - to adjust you need to weaken the bolts, unscrew them into several turns and light hammer blows through a wooden spacer to knock the crown from the hub. Next, the position of the camshaft is regulated by turning through the hub fastening bolt.
In photographs you can see the implementation of one of our ideas - 4-round holes at the top of the camshaft are made in the camshaft bed. For what? For the convenience of adjusting the position of the camshaft and the valve clearance, and it is visually more convenient to evaluate the status of the cams. A small refinement, does not affect the speed, and there are advantages.
The pulley adjustment is somewhat complicated by an uncomfortable location of two bolts near the mark for the phase sensor. They are located so close to the check mark that the cape or the key-tube is not suitable, and you can only turn off the wheelchair key, and then, in a certain position of the pulley. To do this, you need to turn the crankshaft there and here. Why does the manufacturer not improve or not upgrade the design of the pulley, taking into account these factors - the bolts could be a bit from a marker, or a small round cutter gently choose the wells in the check mark so that at least thin forow heads can be used.
|
|
|
|
|
|
|
|
|
|
|


To scroll through the crankshaft for the root nut (for adjusting the gaps), I had to shorten the head (shown earlier in the report) so that it was placed in the engine compartment. Thusolny nozzles at Shevy - their own, hardly managed to find a couple of pieces to replace radiator pipes. A separate story - how to spin the clamps. It is extremely uncomfortable. To wrap up the upper clamp, it was necessary to use this small square hole next to the paper sticker, a forssic extension cord and a small head was breaking there.
Motor assembled! Everything operating fluids Spilled, filters - new, butter - new, we turn!

Motor started from the starter. Primary run-in idling was about 4 hours. During running, the engine worked all the smaller and quieter - the friction pairs were developed, the Bosch controller passed self-study.
On the car drove about 100 km around the city and on the highway, in Wimide the initial runoff, then they wrote (the controller Bosch 7.9.7).
Chipovka should be said separately. Few chipovers can pay a quality bosh 7.9.7 - It is easier for them to "dilute" the client to the installation of a simpler January. But Bosch has a number of their advantages, he works on mathematical modelhas more advanced algorithms. In this case, the work was performed at a decent level. The torque limiter was removed, the fuel feeder was optimized, worked with ignition angles.


Available video!
Video # 1.: Engine operation on XX during run-in after the first launch, a fragment of a trip around the city, a piece of track of the Chelny-Kazan (4th transmission, the speed of about 100 km \\ h), the test of the elasticity of the engine in the secondary road (increased transfers on small revolutions). To chipovka.
Analysis of VSh graphs (power, cr. Moment)
From the moment of working with the machine before the publication of the report passed about a month. The car wounded kilometers in Kazan, statistics were gained. I was made a measure of VSh through 100 km after assembling the engine and chipovka, and through 4000 km (After running), Dmitry came to Chelny on the measurement of the VSh.
Initially (before the overhaul), Dmitry has already installed in the lower 03 shaft from the master motor, in this way, at our request, there were two serial chevy-Niva on the measurements. It was necessary to statistics (graphs) on serial motors, which would use them as a starting point for setting up equipment and to compare the results of work.
Next, we publish a series of graphics of the VSR measurement, preceding them by comments. Blue schedule - torque, red - power. Horizontally - axis turns.
Click on the picture to enlarge (opens in a new window).
Graph # 1.:
Zhh's measure of fully serial Chevrolet-Niva, engine mileage order 100 TCM, All standard, camshaft on hydraulic plants. I gave the car for the measurements of Dmitry (while I climbed into the box - I managed to cool down several times - after 03, the shaft is absolutely impossible to touch or go, the motor is "no").
And not surprisingly. Motor issued his passport power - strictly 80 hp At 5,100 about (the plant declares 80 hp at 5000 ac). But with a torque - trouble. Pick moment - 11.5
kilogram 4600 Ob. (The plant declares 12.7 kg at 4000 ac). Come on with this missing kilogram, but let's take a look at the graphics. What kind of moment failures in the interval 1500-1800 OB and 2500-2800?
And ok, only it would be on 2000 Ob. Motor issues only 7.8 kilograms of the moment - Approximately as a Chinese 1 liter engine engine. Of course, Dmitry could not normally trone with such a motor - up to 3000-4000 about this motor - completely dead.
Absolutely unsightly picture for the SUV of this weight. You can, of course, a lot of guessing to build - and the mileage is large (for the machine price from 400 thousand rubles?!), Perhaps the catalyst has been hammered, or the chain screamed, the phases left ... maybe not the best firmware at the Bosch controller 7.0 - everything is possible, but the fact itself (measurement of the WSU) is evident. Riding on such an engine - will be torment for the owner.

Graph # 2.:
The report was ready for publication, and data was already obtained from the measurements of the Dmitry engine after 4000 km of run, but the report was postponed - there were doubts: well, there can be no measured serial engine so bad, maybe a bad instance caught? In order not to sit down in the puddle, I threw the cry on the forum " Shevi-Niva Club"- invited Chelny Chevinivovodovodov with serial engines for free measurements VSH.
Yuri responded (Nick on the forum - Filin).
His car has a fresher - mileage 59 TCM, the motor has long been "revealed", the controller is more modern - Bosch 7.9.7,the same as Dmitry. The engine is completely serial 1.7, camshaft on the hydraulic plants, the program is also serial. Yura gave consent to any limit revisions, this was chosen a range of 1100-6100 about (further by revolutions would not allow the factory cut-off of the VSh).
Motor again issued power out of autowne - 80 hp at 4900 obl. With torque business better - 12.6 kg at 4700 (Let's remind, the plant declares 12.7 at 4000 ac).
We look at the graphics. Again we see two characteristic failure of the moment in the ranges of 1500-2000 and 2400-2800. This time the dips are smaller, apparently new factory calibrations and a new Bosch controller 7.9.7 smoothed congenital engine flaws. Judging by the breakdown, which the program gives for each thousand revolutions, for 2000, the engine gives everything 8.6 kg
Graph # 4.:
And here - a chart of measuring Chevrolet-Niva engine, with a low-row camshaft installed Mm03. (Head - serial), Standard asterisk. Hydroporas are replaced by mechanical adjusting bolts. The mileage of about 60 TKM, the catalyst is removed, the controller chipovka was performed in Kazan Bosch 7.9.7 (Subsequently, in this program, our chipover will find a number of flaws that cause questions).
So this engine was before overhaul and refinement.
In the power of the motor lost - here 75 hp at 4800 oblbut for Shevi-Niva power is not important, for her the main thing - torque on the nose and middle. And here, from the bottom and middle, everything is fine. Torque peak - 12.7 kg at 3500 vol. Already in 2000, the engine gives 11.5 kg of moment! From the two failures of the moment there is almost no trace, except that there is a small "rudiment" in zone 2300-2700 about.
A typical picture for lower torque camshafts is an increase in torque on small and medium-sized turns, the price of power loss at high.

Schedule # 7.:
We begin the analysis of the results of the overhaul, with the complex refinement of the GBC (valve 42x34 mm), with the lower Ufa camshaft Dynacams 14.. The engine after the assembly passed everything is about 100 km. Oblique is still not really a result, the result is lowered, due to increased mechanical losses (drop down after running, when the engine "will reveal"). Only the controller chipovka is made Bosch 7.9.7
We rarely publish additional information,but in this case it is necessary, to understand the need to run and its influence on final result. Add a mechanical loss graph to the power and torque graphics - a green line. This is an invariant value. Compare this graph of mehpoter with the following measurement.
In the meantime, let's seeon the power line and the moment.
Motor's "Ramibable Spots" - two failures of the moment on small revolutions - completely disappeared. Instead of them - even hump of moment, starting from Niza himself.
Do not appreciate the numbers yet, but send the machine to run into Kazan.
We look at the following chart.

Schedule # 8.:
The machine ran 4000 km, on the mileage of 2 TKM, the rope oil was replaced, valve gaps were checked. Dmitry came to Chelny on the measurement, to obtain objective data on the VSR after running.
The engine was transformed. Mehsphoteri after runningout decreased, compare the green lines on this and previous graphs. The motor after running is added by power and torque in the entire range. Modified Engine Power - 85 hp at 5,300 c. But once again I remind, the power for Chevrolet-Niva is not the main thing! If we wanted to get high power rates, it would not be any problems - would put 680 or 780 shropery trees and admired "parrots". We had another task - to raise the torque on the bottoms and middle turns, and the finalization of the head and the large valves - to "pull out" from the bottom camshaft all possible "top". Those. It was necessary to combine incompatible - get everything at once! The hardest task that demanded a long preparation, which is why Dmitry waited six months before the car arrived in K-Power.
Motor torque peak gives 4100 about - there are 12.6 kg of moment.
The bottoms are very good - 11.4 kg at 2000 o, 11.9 kg at 3000 vol. In one machine, it was possible to combine two engines - the grassroot and the trapped to drive through off-road and the forest (Dmitry engaged in geodesy) and a good powerful motor for a comfortable ride on the highway - for fast and safe overtones A wide power hub is available in the range of 4000-6000 vol. The moment on top is enough - 12.8 kg at 4100 o'D and 12.0 kg at 5000
Results of work
Let's summarize, analyze some conclusions received after working with the Chevrolet-Niva engine.
Standard gas engine Shevi-Niva volume 1.7
Litra has a number of constructive flaws. As a result, a small torque on low and medium-sized turns, which is extremely unacceptable for the SUV.
The engine also has a number of features associated with operating modes that negatively affect its resource. First of all, it is an insufficient lubrication of highly loaded friction zones of pistons in the cylinders, which leads to the appearance of jackets both pistons and cylinders. Considering the small turnover, which the car is operated in off-road conditions - the resource drops very much. This problem It was solved by the installation of oil oil cooling nozzles. In addition, high-quality pistons are applied United Motors (USA) and set rings Goetze. All this will allow significantly increase resource Cylindro-piston group until the next overhaul.
A lot of work was done along the block of the block, to a large extent linked to the requirements and wishes of the car owner - by any means to maintain and increase the torque in the low and medium revolutions zone. Based on this, chose the lower narrow phase camshaft Dynacams 14.. The ideology of the preparation of the head was to not lose filling on small revolutions, but the "reveal" the potential of the engine and the lower camshaft at high speeds. We have already brilliantly performed on the front-wheel drive engines of VAZ 21083 \\ 2110, when deep refinement of the block head allowed to obtain high performance and torque from the lowest camshafts.
For lovers of a large number of "parrots" - once again we repeat, the task to remove the maximum power from the Chevy-Niva engine did not stand - in fact, it is easy to perform. But significantly increase the torque on the bottoms and the middle, and even reveal the motor at high speeds ( without changing the volume of the engine!) - This is an extremely difficult task. We believe that with all the tasks k-Power Workshop Copened.
Another estimate of our work will give the owner of the car - Dmitry. Watch out for information on the Shevy-Niva Club forum and the announcements on the site's main page K-Power.
Thanks to Dmitry and Yuri (Filin) \u200b\u200bfor granting the VSh serial cars Chevrolet-Niva!
AD. In workshop K-Power Ready to perform any scope of work on the revision and tuning of the car engine Chevrolet-Niva:
1) motor overhaul (possibly with an increase in volume)
2) Installation of tuning camshafts in serial GBC
3) refinement of GBC under tuning camshafts Any level of complexity, with serial size valves, or increased 42x34 mm.
4) Chip tuning engine controllers after the above work, measurements of the VSH before and after work.
It is possible to prepare engines for any operating conditions - with high power and torque in the middle and high speed zone for operation predominantly on the highway, medium-moderate options for modes city \\ route, and low-level engine options (with an increase in or without a predominance with a predominance in Operating off-road.
Work on the car was performed in October 2009
The article is written: December 1, 2009
Update: December 3, 2009
Article author, photo-video materials: © quasar
Forbidden without written permission of the author: Reprint of the article entirely or partially, reprinting and using photo-video materials, as well as their change and editing for further publication on third-party sites.
A very large number of requests and questions to tell about the GBC Niva as spare parts. Quality of casting, material, execution. What you need to make the final buyer to get a normal spare part from the factory semi-finished product. Immediately make a reservation that this article discusses the standard GBC, which is set by standard parts (guides, valves, etc.). Variants of tuning and refinement, this is a completely different story. I remind you that the GBC Niva and the Niva Chevrolet are the same.
Problem
Everything as usual is "factory quality" and that marriage that the plant has brought off the conveyor and called spare parts. Why what came directly from the plant, in the factory package, do I call a semi-finished product ?? Because we have a detail on our hands, for which we paid not one thousand rubles, but which cannot be immediately allowed to assemble, but it is necessary as usual to "modify the file". In the photo, I tried to photograph the offset of the central opening of the guide valve.
Defective guide valve
This is not a photomontage. This "passage" is present in almost every GBC plant. In the article dedicated to directions, I will describe this separately. Here, I will only say that with such a defect to continue working with the GBC. In addition to this defect, you can add that the factory directions are not distinguished by a good resource of the work. Factory valve guides are subject to removal. German and only after that the CCC can be perceived as a normal spare part for further work.
GBC Niva, donor
In order not to play the lottery for a fake, we order the GBC directly at the factory, naturally in the number of several pieces at once. Now there are two options for the development of events. It is to buy and modify the GBC from the classics or immediately buy the GBC Niva, of course only a new sample. The head of classics costs 1000 rubles cheaper. Why is this option inexpedient? To digest poor gasoline on the expanses of our immense homeland, the designers increased the combustion chamber, thereby reducing the compression ratio. The engine has become a bit deformed, but it was possible to eat bad gasoline. To bring this GBC to the Nivovo degree of compression, from the plane you need to remove about 1mm to reduce the volume of the combustion chamber. And if we take the initial price for the GBC of Classics and add the cost of processing on the milling machine, we will receive the price of the new Nivovo GBC. How best to act, decide for yourself.
Orders
The price list shows the price of standard CFC Niva with pressed German guides. But "not deployed." That is, there will be a scan to do a motorist who collects the GBC. The final diameter depends on both the tool and the accurate size of the valve stalk. For further work with this GBC, if we are talking about the standard, you need to hold next work:
- Valve selection and measurement feet valve
- Sweep guides
- Milling Saddles (Machine Operation)
- Vacuometer valve trigger (control of the previous operation and valve quality)
- Assembling GBC.
Perspective
It is quite possible further the topic will develop. CHBC NIVA can be calculated with different levels preparation. For example: with scanning guides, cutting seats of valves, cutting channels, milling saddle and fitted valves. This will depend only on the level of interest in this issue.
Question answer
We did not have time to disperse in Russia and a dozen GBC, as our people began to think about "bad", asking the next question. * And how do we learn that in the GBC you pressed the German guides of the valves, and did not leave Vazovsky? *
Answer. For those who doubt and seek catch, recommend reading an article about, where in the photo it is very clearly seen that the part number is knocked down. This is only on the "Germans". So if someone has a desire to "get up to truth", dismantle the guide from the GBC and look at the circuit. An exception may be the moment if Metelli guides were used for installation. They are without distinctions.
Updated 01.06.2018
Replacing the gasket GBC Niva and Chevrolet Niva Need if:
- the car begins to boil with a good cooling system, the reason is a breakthrough of gases from the combustion chamber into the cooling system;
- an emulsion in oil appeared, the reason - antifreeze in oil;
- the oil in the expansion tank appeared, the reason is the ingress of oil into antifreeze;
All this testifies to damage (reflux) laying the head of the cylinder block. Gybz gasket never burns without accommodation, and the most frequent - engine overheating. As a result, the head of the block "leads", it ceases to fit tightly to the cylinder block, and the gasket is roasting.
That is why we strongly do not recommend changing gasket GBC. without repairing the head itself. Most likely, after a very short time after replacing the defect will appear again. It is possible that the problems will appear immediately after assembling and running the motor, if there are microcracks in the GBC.
If you insist, change without repair GBCbut warranty will not give. If the GBC is with a crack, you will have to pay for disassembly and assembly, as well as all disposable spare parts. Such an operation costs 5.000r, but we repeat: we strongly do not recommend that way.