Ignition coil resistance Lancer 9. Mitsubishi Lancer IX: Contact group replacement
Checking the ignition coil for Mitsubishi lancer 2.0 MT is carried out after it has been removed.
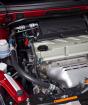
Removing the coil
To remove you will need: socket wrench "10". To check, you need a tester or ohmmeter.
1. Disconnect the wire from the "-" terminal of the storage battery.
2. Disconnect the wires from the low voltage terminals of the coils. 

3. Disconnect the tip of the high-voltage wire from the lead of the ignition coil.
4. Remove the high-voltage wires from the holders on the coil body.
5. Remove the two bolts securing the ignition coil to the cylinder head cover ...
6.… and remove the ignition coil from the vehicle.
7. Disconnect the busbar from the ignition coil ...
This is how the ignition coil removed from the car looks like. Pay attention to its marking in order to purchase the same when replacing.
8.… and measure the resistance of the secondary winding by connecting an ohmmeter to the high-voltage terminals of the ignition coil. The secondary resistance should be 8.5-11.5 kOhm.
9. Carry out a similar check for the second ignition coil.
10. If the resistance of the secondary winding differs from the specified, replace the ignition coil.
11. Check the primary circuit of the ignition coil by connecting a DC power supply to terminals "2" and "3", and an ohmmeter to terminals "1" and "2" of the ignition coil. The resistance value should be 20-30 kOhm.
The question of the selection of spark-generating elements is interesting not only for beginners. Experienced motorists also do not disregard candles on Mitsubishi Lancer 9. If earlier it was possible to be content with installing ordinary nickel SZ, which were sintered after the first unsuccessful refueling, today it is recommended to pay attention to modern options with a longer resource.
The "life" of nickel or conventional spark-generating elements in domestic conditions is shortened for reasons beyond our control. It is enough to fill up with low-grade gasoline once, and the replacement of candles is not guaranteed. Question: Are the more expensive iridium varieties, which are even recommended by the manufacturer (although for some reason only for the 2-liter versions of the Lancer 9), are they able to withstand low-quality fuel? After all, their declared resource is twice as large.
Often one additive is added to Russian fuel, which kills any candles. It increases the octane number. It contains a substance that leaves a harmful residue on the electrodes and causes a short circuit. Brick-colored deposits are visible to the naked eye.
 The additive kills SZ (brick-colored deposits)
So how to be. If the additive kills all the candles, what's the point in buying expensive iridium ones. For this reason, many people use conventional products at a low cost. If problems arise with sparking, they replace them with new ones. Drivers of a different category (there are fewer of them) buy expensive candles, hoping for their high quality. In most cases, they do not fail, they wear out only after a decent run. It turns out that both options have their pros and cons.
Varieties
Without a good spark, the normal operation of the machine with gasoline engine unthinkable. The task of the SZ is simple - to convert the current that it gives into a spark. The latter must be of such strength that the mixture is easily flammable.
Candles for Mitsubishi Lancer 10 and 9 are consumable material. They are subject to indispensable renewal after a certain time. According to the manufacturer's recommendations - after 30-60 thousand kilometers. The specific resource depends on the model of the spark generator - iridium ones last longer (4 years).
Classification by electrode type
Models are classified according to different parameters. One of them implies a difference in the electrode.

Difference in heating number
In the manual for Lancer 9 cars, it is indicated that you need to use elements with a glow rate of 20 and above. It is advisable to follow these tips.
So the items are classified like this.
- Hot, the indicator of which is 11-14.
- Average - 17-19.
- Cold - 20 and above.
 Cold SZ Denso
 Video: description of spark plugs
Difference in material
Candles, or rather their electrodes, are made from different materials.

Top manufacturers
The most famous on the market are Denso, Bosch, Champion and NGK. The latter is known for being the first to receive permission to release iridium candles.
It is not worth relying on any one firm. All of them are equally good at doing their job, they have no special advantages in their class. Are decisive technical indicators.
Obviously, the world's best candles are mercilessly counterfeited. And here the car owner should be on the alert. Models should be bought only in large and well-known outlets, taking into account the cost of the original products. For example, if you know that the original SZ from Denso costs 300 rubles, then the option for 100 rubles should immediately arouse suspicion.
Replacement
If you do not know how to replace candles on Mitsubishi Lancer 9, then we give instructions to help.

To make it easier to unscrew, the key should be with a plastic or magnetic lock. Then it remains only to remove all the other SZ, and insert new ones in their place.
Choose candles wisely for your "lancer". Remember that expensive doesn't mean the best, and cheap isn't always the worst. Try to choose elements with a large number of electrodes, soldered from precious metals. Give preference to products from well-known companies.
Over time, almost all owners of the ninth Lancer have the same problem - when the key is turned to the START position, nothing happens, i.e. all devices go out, but the starter does not even think to work, therefore, the car will not start. In the first, this situation happens extremely rarely, but over time it begins to worsen. You have to look for a specific key position to make the starter rotate.
But one fine day I got tired of all this and I decided to eliminate this misunderstanding, especially since it costs 750 rubles and 30 minutes of free time. For this we need a contact group ( Mitsubishi MN113754), Phillips and flathead screwdrivers.
Why is this happening? Over time, the plate and the pin itself in the contact group wear out, therefore, when the key is turned to the START position, they do not touch each other. Initially, I tried to repair the old contact group, restoring the necessary plate, but this was enough for only a couple of weeks, then everything started over again. Therefore, if suddenly someone wants to restore the contact group with the help of solder, you can not do this, the currents pass there rather big, so after a while there will still be nothing left of the solder.
Here are the disassembled photos contact group... Wear on the plate is clearly visible (right, 9 o'clock position).
Larger: 
Attempting to restore contact with a soldering iron and solder: 
So, the contact group has already been purchased, let's proceed directly to its replacement.
1. The first step is to remove the steering column cover ... 
To do this, use a Phillips screwdriver to unscrew 3 self-tapping screws: 
2. Using a flat screwdriver, carefully pry off the top cover and remove it. 
3. The bottom cover cannot be pulled out immediately, therefore it is necessary to unscrew the two self-tapping screws from the bottom in the area of the driver's feet and unfasten the bottom panel. 

4. After that, the lower steering column cover can be easily removed: 
5. And we have a view of the contact group: 
6. Remove the block with the wiring harness and unscrew the contact group: 
7. I did not succeed in disconnecting the bottom pads from the contact group in the normal way, so I had to make a little effort, and the groove located on the contact group just broke off. In the photo below, the plug is still secured with the terminal block. 
8. Install the new contact group in the reverse order of removal.
22. ... and disconnect the sensor from the ignition switch housing.

23. Remove the protective rubber band.

24. Remove the screw securing the contact block ...

25. ... and remove the contact group.

26. After inserting the key into the lock, use a thin screwdriver to sink the locking pin ...

27. ... and remove the lock from the switch body.

28. With the finger of your left hand, move the bolt of the locking device for locking the steering shaft to the right inside the switch housing, holding the spring of the bolt with the finger of your other hand ...

29. ... and remove the deadbolt from the switch body.
NOTE
The crossbar of the locking device simultaneously serves as a transmitting link for controlling the contact group.

30. Removing the housing of the ignition switch (lock) from the steering column in operation is usually not required, since the switch can be completely disassembled directly on the car. If necessary, it
removal (for example, when replacing the steering column), drill out the heads of the two screws securing the switch to the steering column.
NOTE
The drilling of the first screw is shown in the photo, the second screw is symmetrically located on the left side of the clamp.
31. Install all removed parts and assemblies in the reverse order to removal.
IGNITION SYSTEM
Removal, installation and check of ignition coils
You will need: a socket wrench "for 10", a tester or an ohmmeter.
1. Disconnect the wire from the "-" terminal of the storage battery.

2. Disconnect the wires from the low voltage terminals of the coils.

3. Disconnect the tip of the high-voltage wire from the lead of the ignition coil.

4. Remove the high-voltage wires from the holders on the coil body.
See also:
The ignition coils on the Mitsubishi Lancer 9 last long enough, provided that the spark plugs are replaced in a timely manner. Unlike other cars, where each cylinder has its own coil, the Lancer 9 has only 2 coils for 4 cylinders. In addition to the coils themselves, the tips can fail, as well as the candle wires, which over time can begin to "punch".
Signs of malfunctioning ignition coils
The exact fault can only be determined using computer diagnostics which will point to faulty parts, however, by the characteristic signs, you can determine yourself what has broken.
For example, with a smooth movement, after hard pressing on the gas pedal, the car starts to twitch and what is called "blunt" without developing power. In some cases, Check may light up on dashboard... These signs indicate that there may be a problem with the ignition coil, wires, or lugs.
The engine may be triple or unstable on idle, this can also be one of the reasons for the malfunction of the ignition coils.
Which coil to choose for replacement
The original coil (MD361710) was installed from the factory. Its price at the moment is more than 5,000 rubles per piece. You can, of course, purchase it and replace it, or you can choose a cheaper analogue.
- Delphi GN10450-12B1 from 1900 rub
- Denso DIC01-07 from 3900 rub
- ERA 880.190 from 1500 rub
- Masuma MIC300 from 1700 rub
- NGK 48 225 from 3200 rub
All of the above coils are analogs of the original one. However, before buying coils, we advise you to check with the seller once again if the coil is suitable for your motor.

- Mitsubishi MD342893 - high-voltage spark plug wire from 900 rubles. thing.
- Mitsubishi MD365102 - high voltage wire candle set 2 pieces from 1600 rubles
- Mitsubishi MD342894 - spark plug wire price from 900 rubles a piece.
After dismantling the old coil and wires, we advise you to check them with a multimeter. In general, the ideal option is to dismantle the old coil and wires, check them, and only then, after identifying faulty units, buying and replacing them. Of course, if you want to change everything completely, then verification is not necessary.
How to check ignition coils and wires

In the picture below detailed instructions for checking coils and wires. All you need is a working multimeter and some free time.

Instructions for self-replacement of the ignition coil Lancer 9

So, we disconnect the pads of wires from the two coils. Pads gray to disconnect from the coil, press the latch and pull the block towards you.


We carefully take out the tips with wires from the wells. Now you can either change everything completely, or check the coils and wires with a multimeter.
We assemble in the reverse order. New wires can noticeably be worn on the spark plugs - this is normal. Also new wires are often a few mm thick. longer than the original. There is nothing wrong with that.