Removing the gearbox do it yourself. Removing and installing gearbox
If during the movement you noticed unusual high level Noise automatic transmission, gear shift is difficult or observed spontaneous or not entirely clearly inclusion if you find oil leaks through gaskets and seals, it means that your box can refuse to work at any time. Do not wait for it. A timely eliminated small will help to avoid large breakdowns, expensive replacement of the aggregate.
Moving to the service center? If the machine is new and warranty not expired, it is obvious that the repair is the responsibility of the car service. Otherwise, you can try to make repairs yourself. Removing and installing gearboxIf you thoroughly understand the question, not such a difficult event.
Features of dismantling-installation automatic transmission | General advice
All work we carry out in places equipped with a lift or observation pit. To avoid damage to the unit, you need to use a transmission jack or another similar tool.

Removing gear
Disconnect all the nozzles, traction, connectors, highways from the aggregate. Filling the oil is not necessarily, but it is recommended to make it easier for yourself. Put automatic transmission Back will be easier. When disconnecting the nozzles, if the transmission fluid is not solid, you need to put the plugs;
Unscrew bolts securing the hydrodynamic transformer (GDT) to remove it complete with the box. This operation can be quite painstaking, as the mounting schemes different marks Auto differ. But the operation is necessary. The removal of the ACAP bodies without GDT may damage the slots primary Vala And you have to break your head, how to put a gearbox back;
Check again, whether the unit is released from all connections, connections, connections. And only after that you can remove the automatic transmission. In the process you need to hold the GDT so that it does not jump from the shaft slot.
Removal and installation of automatic video
Installation of PPC
So, the box is serviced, problems are eliminated, everything is cleaned, washed. Installation automatic box Transmissions It is carried out in the reverse order in compliance with the sequence.
Lubricate the centering sleeve, check that all rings are in regular places. Both on the box and on the engine block. Ensure that the GTD is assembled with automatic transmission.
Check for on the crankcase on the docking flange of two pins. Installing gearbox With their absence, prohibited!
Clear thoroughly, rinse all internal cavities of the unit, trace so that there are no foreign objects and particles after repair.
Cement the clutch disc.
Preparation was carried out, now slowly carried out installation of PPC. Watch all the fastening bolts, pipes, highways, attach traction, connectors. It is important not to confuse one with the other, follow marking marking. Do not forget about the torque converter.
Box at a regular place. What's next?
We found, how to install gearboxNow the final strokes.
- We carry out adjustment work in accordance with the instruction manual.

- Pour oil to the desired level, run the engine, wasting, fill the oil. We make the first check-in a few kilometers, we give a car cool and check the level again. transmission fluid. If necessary, pour. Thus, we fill in all cavities and voids of hydraulics.
Any motorist faced the fact that I had to dismantle the gearbox. So, on the VAZ-2114, this is done Identically the first generation "Samara-1". It is mainly due to repair and restorative operations. So, the article will tell how to remove the CAT from the car, and will also take on some nuances and the intricacies of the process.
Video of the removal of the checkpoint on the VAZ-2114
The video footage will tell how to dismantle the gearbox from the car, and will also lead about some nuances of the process.
CPP device
Gearbox in the removed and a bit disassembled
Before transferring to the process, it is necessary to study the gearbox structure, as well as its device. This is necessary in order to determine the reasons why disassemble the node, as well as determine the planting attachments.

CPP device diagram
1 - clutch shutdown bearing; 2 - guide sleeve; 3 - primary shaft; 4 - roller bearing of the secondary shaft; 5 - secondary shaft; 6 - stop ring; 7 - Satellite axis; 8 - drive speedometer drive gear; 9 - Transport plug; 10 - wheel drive oil carriage; 11 - roller tapered bearing differential; 12 - gear of the semi-axis; 13 - satellite; 14 - Differential box; 15 - Carter clutch; 16 - driven gear gear; 17 - plug plug; 18 - adjusting ring; 19 - driven gear i transmission of the secondary shaft; 20 - synchronizer I and II transmission assembly; 21 - driven gear II transmission of the secondary shaft; 22 - stop ring; 23 - Stubborn semiring; 24 - driven gear III transmission of the secondary shaft; 25 - synchronizer III and IV transfer assembly; 26 - driven gear IV transmission of the secondary shaft; 27 - needle bearing gears of the secondary shaft; 28 - ball bearing of the secondary shaft; 29 - Stubborn plate; 30 - driven gear V transmission of the secondary shaft; 31 - synchronizer V transmission assembly; 32 - Nut; 33 - Stubborn washer; 34 - leading gear V transmission of the primary shaft; 35 - Rear CARTER CARTER CARTER; 36 - Ball Bearing of the Primary Shaft; 37 - Carter gearbox; 38 - Roller Bearing of the Primary Shaft; 39 - Sapun; 40 - primary shaft seal
Transmission process
When it became a clear design of the element, you can go directly to the transmission process of the checkpoint. It is worth noting that this procedure may be associated with the repair of a node or auxiliary operations, such as, for example, a clutch replacement. So, consider the sequence of actions:
- First, you need to install the car on the observation pit, because the gearbox is removed down.

View of the car from the observation pit
- Remove the "terminal-minus" to de-energize the car.

We carry out the disassembly of the battery terminals
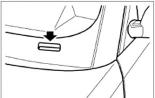
- We dismantle the protection of the OBS from below, if it is present.

Remove Carter's defense
- Remove the front wheels.

We dismantle the front wheels
- Disconnect the speedometer cable and clutch drive.
- Next, you need to turn off the drive of the scenes.

Remove the stem cardan
- From the gearbox, you must remove the engine pillow.

Remove the engine support VAZ-2114
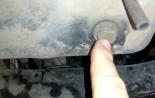
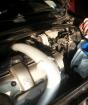
- Now that the preparatory operations are passed, we turn to the removal of the required node. We drain the oil with the checkpoint.

Drain the oil with the checkpoint
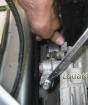
. - By dismantling the mounts, disconnect the gearbox from the engine.

Remove the gearbox
- We carry out the disassembly of the node completely.
- If necessary, the assembly is carried out in the reverse order.

Take out shoes with gearbox
Causes of dismantling

Gear selection mechanism shot with gearbox
As mentioned earlier, the gearbox is dismantled for repair and restorative operations. Perhaps this is the main reason, but it is worth considering the removal of the node in more detail:
- The first cause and the main one at which the transmission of the gearbox will be required - this is the repair of this node directly. .
- Replacing clutch Become the second main reason for dismantling the PPC.
- Along with the previous reasons, the removal of the node will be required at full dismantling the main power unit .
- Other reasons For which it may be necessary to disassemble the gearbox, such as: repair of the front of the body after an accident, stripping work, repair, and other.
conclusions
Dismantle the gearbox on VAZ-2114 for most motorists, since the design is not complicated, and the process itself will take a maximum of 5-6 hours with preparatory operations. Of course, if the process seemed sufficiently difficult, you can always contact the car service where everything will be done for big money quickly and efficiently, but the real motorist will reach everything.
Transmission Change Box (PPC) is one of the most important knots of the car. Depend on it driving performance cars. Owners domestic cars (Classics) is a little easier than other motorists, they can repair and maintain the gearbox of their cars on their own. And those who have no experience of such work, we have prepared a special article that will help them in this "difficult act."
The procedure for performing the shift of the gearbox
So, by installing a car on a pit or aleacade, proceed. The first thing we do is remove the cardan shaft.
Second, it takes off some elements graduation system (silencer, "pants" and T D).

You can, of course, only disconnect the "pants" from the resonator, but if the work is carried out without helpers, it will not be particularly convenient.
The next step is the removal of the working cylinder of the gearbox (it is also convenient to remove it from the pit).

The cylinder is easily unscrewed by a cape on 13, two bolts are required to unscrew. The adjustment of the gap does not violate. The following "goes" the process of unscrewing the bolt of fastening the mass of the mass.

By reloading the working cylinder of the clutch and the mass of the mass, we remove them to the side so that they do not interfere with us. You do not need to clean them completely, just fix the side. Then remove the "chips" terminals of the lantern switcher rear stroke.

It remains to disconnect the speedometer cable, which is fixed on the checkpoint.

Do not forget about the clutch crankcase shield, it is fastened with four bolts (some of them remained only two).


After that, "shrinks" the lever itself with the scenes. To do this, make a caprook ring with some sharp object.

After removing the lever, rubber seals will remain on the coolers, and it is better to replace them with new ones, after purchasing Remkomplekt Kulisi.

After the completion of the "upper" preparatory work, we again go down to the pit, we will have to carry out the main part of the work - free the box from the main fixtures is the four bolts that fasten the "bell" of the gearbox to the engine (the first point of attachment).

The lower bolts are unscrewed easily, we tear them with a cape. But the upper bolts are more "problematic". To unscrew them, it is better to use the gorge with the head well, or he will suffer from ordinary cape, but it should be done from above.
Important! Before removing the CAT KULISE, install on the 5th gear. If the box is 4-speed, then on the 3rd. Otherwise, it will be inconvenient to remove the checkpoint.
Now we liberate the gearbox from the second point of attachment, it is its rear support, the so-called "swallow".

They hold on the nuts on 13, which are pre-lubricating WD-40, as they often zakuat, and they can be disruptable.
After all these procedures carefully examine the "bell" of the box. It is necessary to make sure that we disconnected all the wires and unscrew the bolts and drives.
Tip! If the engine is standing, it is preferably laid a wooden bar between it and the palter palter. This will help keep the engine at the initial position, which will simplify in the future joining the box to the motor.
Now proceed directly to the removal of the box. Reliably holding hands for the CPT housing and slightly first rear partTo bring the scene, move the box back, removing it from the slots.

 First of all, if there is an opportunity, put the machine on the pit and enlist the help of another person, because it is extremely difficult to remove the box, although it is possible. However, here we will present a way to remove the PPC without a hole. Then, you need to drain the butter or not, and before removing the starter and the battery - you can now begin to the gearbox itself.
- Initially, disconnect the clutch cable. There is nothing complicated here, we simply weaken the tightening of the first and the second nut and remove it easily.
- Then it should be proceeded to unscrew the fastening nut. As soon as it is unscrewed, it's time to remove the cable from the bracket on the checkpoint.
- Squeezing spring clamps, disconnect the wires from the speed sensor.
- After you can unscrew two bolts, with which the gearbox is attached to the engine and one bolt, the ignition bracket is last attached.
- Then remove the reactive craving, unscrewing the fastening bolts and weakening the clamp, after which they simply pull it back.
- Then it is important to remove the left drive of the wheel - the right touch is optional.
- After unscrew all the bolts on swivel fist, on the lower right to fasten the gearbox, unscrew the bracket nut, the clutch crankcase bolts and the bolt of the left lower fastening.
- After that, you can already post the engine and secure it well.
- Then we will see already extreme attachments - they are also removed.
- After unscrewing two more nuts of the rear engine support.
- Now you can shift the gearbox from the guide bushings and do not forget to hold it.
- Shifting it as much as possible in the left side of the car, you can completely remove the checkpoint from your VAZ-2110.
After the box is completely removed, you can carry out all the necessary manipulations over it: repair, adjustment, replacement parts, or even replace to a new one. The assembly is carried out in reverse order. The main thing - you can not forget to adjust.
Before starting the main work, you should raise the front of the car by jacks and remove the two front wheels.
We learn from the battery terminals. Remove air filter And we learn the wire from the starter.
Turn off the terminal from the speed sensor.

Now unscrew the clutch cable from the gearbox.

With the bottom of the car remove the protection of the crankcase.
We produce a drop of oil from the gearbox VAZ 2110.
We fold the terminal from the sensor, which is responsible for the backlight when the rear velocity is turned on.

We unscrew the lid on the clutch crankcase.

Now from the gearbox, unscrew the bracket of reactive thrust.


We make the rear pillow.

At this stage, you need to leak the wheel drive. In principle, it can be done like this: right to remove the entirely, and on the left just pull out of the hub. Consider in more detail:
Unscrew the outer cut and the ball


Under the hood, burning the fastening of the flags.

Now on the left. Remove the protection of plastic.

If your pit is not big, then it is more convenient to remove the gearbox VAZ 2110, you can unscrew the left lever and ski.
Remove the eggs by unscrewing.


Well, finally, removing the lever, reloading it before that.