Operation and repair manual 469. Personal experience of small repair
Many owners of this model have a personal experience in repairing the body UAZ 469 with their own hands. The creation of the auto plant in Ulyanovsk has long been legendary on the expanses of the post-Soviet space. UAZ has, despite its apparent soldier clumsiness, weighing positive qualities, among which - increased patency.
It is known that in Soviet times the car was used to transport field military commanders, so it was endowed with excellent ride qualities - practically not killed chassis. But, like any unit assembled from iron, and this machine has problems with the body.
Personal experience Body repair UAZ 469 with their own hands binds to several factors, the reasons for which must be relevant work. First, it is a fairly aggressive operating environment (it's not a secret that the car is chasing mainly on the wild off-road). Secondly, the importance is also the fact that many of the copies in private ownership are already quite older cars, which, with the entire body of the physique, begin to grow slowly.

About the types of body repair
Such a repair is usually divided into small, performed even without the help of a welding unit, and a global, large, which requires quite large costs (when they change all the wing, for example, or, more complicated, carrier parts of the body).In principle, under certain skills, both and the other - it is possible to produce in the conditions of a personal garage, would be an appropriate tool at hand. But still, large repair work It is recommended to produce beginners under the guidance of an experienced master in order not to disturb the geometry of the body (otherwise your car will not look too aesthetic at the end of the procedures).
Personal experience of small repair
Removing the old layers of painting with a comrade from our fishing and hunting UAZ (they decided to make a fashionable spotted camouflage color), found corrosion sites and even several holes in the body body. Of course, a little was upset. With places where rust, it is clear that: read it up to metal, processed, as it should be, waspiled and stuck. Everything turned out smoothly and unnoticed. But what to do with holes? Not to change the same due to several slopes all the wing: And there is a chade, and, frankly, in our plans to carry out such global work.
Kum advised to close holes (each of which in diameter was from a centimeter to two) fiberglass and putty. This repair, of course, is simple enough, and for the means he is the cheapest, perhaps. But I read somewhere that such a way in specialists is considered short-lived, something like a temporary fireplace (although we sometimes do not have anything more permanent than temporary). Because, by actively exposed to moisture (and the car is operated in the field), soon the place begins to bubble, swell, which leads to the expansion of the affected areas. And the hole as a result is even greater than it was. And who needs it?

After consulting again, they decided to establish more durable patches on the bodywork (made of metal). Metal took from the remaining cuts of the sheet, pretty good and durable. In the thickness - just thicker than the body's body (well, just such a trim took at hand). Cut with a baccle of patch in size, measured in advance (with a reserve, so that the holes overlapped well). Initially, the parts were pretty polished and laid them to the locations of the dislocation. Then they took a powerful soldering iron and irradiated the place of the joints.
Pretty latch was dried by a soldering iron and put on the planned irradiated place. Gentively soldered so that the surfaces did not have protrusions. A little sentenced with a hammer. Waited for some time and checked for the strength of the solder. Crasted tightly! From above, once again squeezed additionally.
So, our watch turned out to be roveling, and not acting on the overall surface of the wing. The same procedure was made with the next hole in the body. Everyone was done by the established scheme, so the procedure took even less time.

Then places where they put the lats degreased, put a putty, lost, sabrely, once again inflicted, corrected and polished scored. Next - as according to plan (but before that, it was further viewed with a close entire body for possible flams: pah-pah, in the other places everything was fine everywhere) - the primer, painting in the main tone, the imposition of stains of several colors related to the gamma. And here is our dream in the flesh: will dry - we will go right away!
As you can see: Everything is not so difficult, as it seemed at first glance. So do not be afraid immediately, and our personal experience in repairing the body UAZ 469 do-it-yourself, I hope, will help you in acquiring self-confidence!
UAZ-469, UAZ-469B General Information (UAZ 469, UAZ 469B 1972-1985)
Disassembly of the front bridge
1. Install the front axle assembly on the table with prisms, unscrew the Sapun and drain plugs Carter of the main transfer and crankcases of wheel gearboxes. Merge. Wrap the plugs in place.
2. Slip and unscrew the bull-pin tip fastening tip nuts to the housing lever swivel fist. Press your finger from the lever.
3. Slip and unscrew the nuts of the fastening of the ball fingers of the tips of the steering trapezium to the cast levers of the casing of the swivel fists. Press the fingers from the levers
4. Spend the wheel hub with brake drum assembly on the left side.
5. Unscrew nuts with spring washers, remove the axle assembly, gasket, brake assembly (pre-unscrewing the tower fastening nut on the bracket of the swivel fist) and the gasket.
6. Unscrew the bolts with spring washers fastening the cover of the wheel gear to the casing of the swivel fist and disconnect the cover with the shaft assembled from the casing of the swivel cam, remove the gasket.
7. Cress in vice cover of the wheel gear with the shaft assembly for the shaft neck. Remove the bearing fastening nut. Press the lid with the bearing assembly from the shaft. Remove the shaft, cover assembled with a bearing with vice. Remove the nut and the cover assembly from the shaft.
Note. Nut of the left shaft has the left thread.
8. Press the bearing out of the lid.
9. Click shaft with a slave gear assembled in vice. Take the absorption of locking plates, unscrew the bolts.
10. Remove the casing of the swivel fist, the hinge of equal corner speeds, ball support, disassemble a hinge.
11. Repeat transitions 3-10 for the other side of the bridge.
12. Unscrew the nuts with the fastening of the housing cover to the main transmission card.
13. Disconnect the cover and crankcase of the main transfer, remove the gasket.
14. Remove the main gear from the crankcase the lead gear, bearings, a differential box with a slave gear assembly.
15. Severe the amplification of locking plates and unscrew the bolts connecting the left and right lids of the satellite satellite of the differential.
16. Disconnect the Differential Satellites Box, remove gears and semi-axes with support washers and satellite axis with satellites.
17. Rinse kerosene details of the front axle.
18. Check technical condition details.
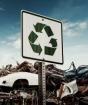
Under the conditions of poor roads, the UAZ becomes exactly the means of movement that helps to get out literally from anywhere. Only, these SUVs are susceptible to wear and require repair. Most of all the negative loads are experiencing parts and spare parts that are closest to the Road Lot. From the article we will learn how to repair the body of the domestic car.
Repair as inevitability
ATTENTION! Found a completely simple way to reduce fuel consumption! Do not believe? Auto mechanic with 15 years old also did not believe, until he tried. And now it saves 35,000 rubles per year in gasoline!
In the commoner "Bobik" (UAZ 469) - automotive Chairpersons of large Soviet collective farms, and today there are expanses of Russian depths. Another prototype, "Bukaka" is a real minivan, successfully operated on off-road.
Both cars are subject to fast wear body parts due to the rigid operation, permanent contact with the moisture medium, etc. On the bodies and Uhabin shakes the chassis, the elements of which, too, come into disrepair, whatever good quality They were neither.

Well what domestic cars It can be repaired even in a clean field, having a pair of spanning keys. If you repair in the garage with all the required equipment, the result will be impressive.
Holes in the body
Special, removing the LCP layer from the body of the used UAZ, the owners find big holes on body spare parts. This problem Those who do not have a welding machine are solved by the 2nd way: either the specs are called, or UAZ is carrying on a hundred. If there is a device or a familiar welder, everything can be solved on the spot. Also, you can do on your own if the hole is small, the size of the matchbox.

So, in addition to welding, it will help to make a hole putty and fiberglass. This repair can not be called effective or super efficient, as it has shortcomings. On the other hand, to ensure at least the monthly operation of the car this method is capable. After you can show the UAZ to the body repair specialist.
You can close the hole in other ways. In particular, by installing a metal patch. To do this, you will need a powerful soldering iron, sheet segment (closing hole completely) and acid.
The algorithm for conducting this method is as follows:
- Before putting the latch, it is necessary to irradiate the seat of the joints;
- Put the latch on the hole (it must completely close the hole);
- Skip to the metal body using a powerful lamp.
It is necessary to do everything so that the surface does not have protrusions. The shortcomings arising from anyway at the newcomer are corrected by the hammer and the final operation with the shtlock.
Repair "loaf" on video
Grinding and painting
Inserting body irregularities is a popular repair operating. Of course, only real specialists, the most experienced masters can cope with this work, but you can do something.
Preparation of the body detail - this is the first thing you want to do. Worked spare parts must be perfectly even and clean. Also, they should be degreed.
Helpful advice. Beginners of body repair masters it will be interesting to know that to detect small defects parts, the processed area is matured for the deposit of putty. To do this, abrasive p 240 is applied to the body part.

After the surface of the part degreases, it should be repaired and degreased. To eliminate existing rust, it is necessary to use special needs to effectively prevent corrosion that is subsequently.
The assortment of putty today is incredibly wide. They are sold with a hardener or without it. In any case, it will be necessary to correctly apply the composition on body parts, heating is pre-metal in the sun. In addition, it is necessary to put several layers of putty.
The next stage of work implies grinding. The surface treated surface will need to be carefully polished to a smooth state, using another abrasive - p 120.
Important. Conducting partial repairs, it is necessary to accumulate the place of operation by painting scotch, eliminating damage to entire parts of the part.
If in the process of grinding the layers of putty in some places, the metal is trembling and taken off, the composition is applied again.
There is such a concept as the finishing layer. it special composition Putty, which is applied at the final stage, after careful grinding surfaces parts. After drying the finishing composition, the surface of the spare parts is re-grinding, changing the abrasive by 240.
Painting can be started only after all the procedures described above when the part of the part is perfectly smooth. If the body details were replaced, and it is necessary to paint them to match the total tone, it is usually difficult for difficulties. It is recommended to choose the right to choose the paint, using either the color code or the services of a professional colorist.

If painting is carried out on the Body of UAZ, survived repairs to eliminate dents or rust, will have a lot to sweat, again, with a selection of shade.
Note. Be sure to start painting before starting painting, it will be necessary to apply a layer of primer. This is the basis of the procedure. Due to the fact that the Metal surface of the UAZ is prone to oxidation and rapid rust, the primer is better to apply directly after the spit. The perfect option is a 2-component acrylic soil or phosphate composition.
An independent painting algorithm will look like this:
- Initially, a layer of phosphate composition is applied;
- After that, you should apply a layer of acrylic soil;
- Grinding the surfaces of the soil is carried out by an abrasive circle planted on a grinder or hands;
- They are applied after this paint, it is better several times, giving each layer to dry carefully.
Overhaul of body UAZ
It will be interesting to know how the capital is carried out, full repair of the UAZ body in order to modernize and tuning. Here, as everything looks stages:
- Initially, the parts of the body are sacrificed;
- The arches of the wings are cut and the places increase so that here instead of factory wheels put large;
- Cutting the corrosion sections of the body are cut;
- Thresholds of doors are cut, steps, if they are in a bad condition. Usually these body spare parts Quickly rot.
Note. In some cases, in order to modernize fuel tank Installed on UAZ to the salon. This makes it possible to get rid of uncomfortable lateral gas tanks, as well as increase the distance from the road surface to the thresholds.
- Again, in order to upgrade instead of thresholds and steps that are cut off, strong metal profiles are installed with a size of 30x60. They can be folded in three rows, and turn into a powerful platform;
- The rear Ove of Wing is also, in many cases, cuts off. In truth, it periodically reveals or bends. For this reason, it is recommended to strengthen the profile of 25x25, qualitatively formed at the place;
- The inner cores of the rear wheel arches are also replaced, because they are not at most of them because of corrosion;
- All welded seams of parts are pretty cleaned, body parts are collected.
You can, at will, you can conduct an elected body of body and suspension, rolling back / rolling of springs, installation of new tires, shock absorbers, etc. Conduct you can also overhaul bridges, brake system etc.
Read more about body repair in other articles of our site. To learn useful information You can also via video and photos - materials published on the site.
-
 How to purchase a car in another region: detailed guide to the renewal of the car in another region
-
 Rules for transportation of children in the bus
-
 Is it possible and how to properly remove from the traffic police to the former owner of the car sold under the sale contract?
-
 Explained by the Supreme Court