Decorative lighting for cars. LED interior lighting lamps
Every driver who spends a lot of time behind the wheel will not refuse improvement interior lighting your car. However, you don’t always have the time or desire to go to a car service center for this. Moreover, you can have beautiful light in the cabin. And high-quality interior lighting made with your own hands will be no worse than service lighting.
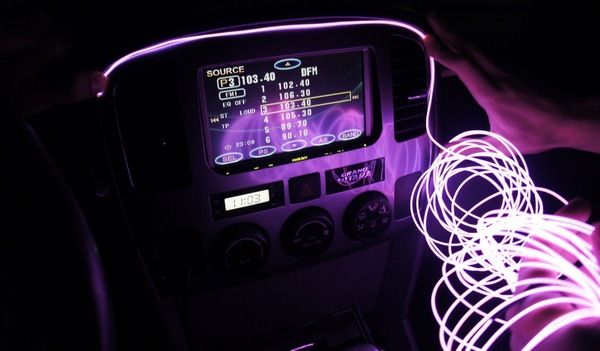
LED car interior lighting
First you need to decide on the location of the backlight. There is no point in going overboard here; aesthetics are paramount. It’s better to choose the classic version and illuminate the floor under the front seats and under the dashboard.
You also need to determine what kind of light will be - monochromatic or multi-colored, with the ability to change colors using the control panel. Let's consider possible options separately.
Option No. 1. Multi-color lighting, powered by a cigarette lighter.
The method of generating electricity from a conventional one is the simplest. With this option, you do not have to interfere with the electrical circuit of your car.
The video shows what the car's LED lighting looks like:
What you will need for this type of connection:
- RGB LED strip 4 pins;
- a controller of such a tape with a control panel, it is with the help of these devices that you can;
- 4-color wire, stranded, about 5 meters long. It is better that the wiring in it has the same color as on the controller;
- 4 connectors (terminal clamps);
- soldering iron and soldering material, such as solder and rosin;
- silicone transparent sealant.
Before purchasing everything necessary for installation, you need to carefully measure the places where the light will be attached. diode tape, as well as the entire perimeter along which the wires will pass. First, we measure the distance under the dashboard, on the passenger side, where the tape will be attached, then the distance under the front seats. Then we measure the perimeter along which the stranded wire will pass, starting from the glove compartment, then through the right passenger seat To driver's seat and finally to the car pedals. We leave a little in reserve.
The result should be 4 pieces of tape and 7 pieces of wire. The lighting connection diagram on both the left and right sides, starting from the glove compartment, will look like this: tape - wire - connector - wire - connector - wire - tape. Such a circuit is connected to each other by a wire passing between the upper connectors. The upper pair of terminal clamps is located under the instrument panel, the lower - under the seats.
The video shows multi-colored LED interior lighting:
When buying a diode strip, you need to remember that you can cut it into pieces only in certain places, strictly along the line running between the metal flat contacts. You also need to remember that the controller can withstand no more than 12 watts, so you must first calculate the total power of all the bulbs in the strip and, if necessary, reduce its length .
When everything you need has been purchased:
- we cut the tape and wire into the pieces we need;
- We clean the wire sections from plastic about 1 cm on both sides;
- solder the required section to the tape, each wire to a separate contact;
- then we insulate the soldering areas with silicone glue so that the wires do not break or touch.
We fasten the tape with wires into place using double-sided tape or other material. We start in the place under the glove compartment. We pass the wires through the terminal clamp, attach the controller to it, and make sure that each wire matches the color on the controller. We are finishing the installation of lighting under the car pedals.
We try to hide all the wires under the casing. All that remains is to connect the controller to the cigarette lighter. We use regular car charging for mobile phone. We disassemble it and run the wires along the way, bypassing the voltage stabilizer, this is necessary in order to increase the charging voltage from 4 to 12 watts. We solder one of its wires to the fuse, the other to the leg of the right metal ear, bypassing the stabilizer, i.e. to the “minus”. and plug its plug into the controller, and the charger into the cigarette lighter. Having learned how to connect the LED, all that remains is to master the remote control and enjoy the light and music.

When using this option for connecting light in the cabin, you need to remember that the backlight will only light when the ignition key is turned or when the car is running.
Option No. 2. LED backlight powered by battery.
For installation you will need:
- LED strip for 2 contacts;
- a wire consisting of two cores, for example red and black, about 5 meters long;
- soldering iron and soldering material;
- sealant;
- toggle switch with “on” and “off” positions.
We cut the tape and wires as in the 1st option. We solder the wires to the contacts of the tape, each to its own pole indicated next to the contact. Solder the red wire to positive contact tape, and black to the negative contact. Terminal clamps can be used, or you can do without them. We already know how to use them. It is better to install them anyway, since in the future it will be easier to replace failed sections rather than changing the entire tape.
Then the black wire must be pulled to , stretching it under the carpet and trim of the car. We connect it to the battery. We connect the red wire to the toggle switch and then pull it to the positive terminal of the battery and connect it to it. We place the toggle switch in a convenient place where it is easy to reach with your hand.
This backlight option will work as long as the toggle switch is in the “on” position.
Since the advent of LED lighting, it has been actively used in all cars.
At the same time, in addition to replacing conventional lamps with diode ones, many craftsmen have found various ways to use LED strips. Moreover, even in those places where there has never been illumination or illumination.
Lighting places in the car
You can install additional lighting in a car in several parts and units:

Here you can get by with very short sections that you have left after repairing the lighting in your house or apartment.

Another fairly common use is door lighting. It lights up when they are opened and illuminates the exit from the car.

This type of lighting is also called “angel eyes”. Just run the tape around the perimeter of the headlights, and not necessarily around the entire circumference.
In addition to design, this will also improve low beam. Some expensive foreign cars already come with such tuning from the very beginning.
But our cars will have to be completed independently. Just keep in mind that the headlights, unlike the interior or body, can be illuminated with white or yellow LED strips.
There shouldn't be a multi-colored RGB rainbow here.

The tape is mounted on the bottom or sills. The result is the effect of a car floating in the air above the road.
Just do not glue the LEDs where the jack is installed. Otherwise, it will be a one-time illumination, until the first lifting of the car during repair work. 
All these lights can be made with your own hands and connected in two ways:
- directly from the cigarette lighter or 12V wires
- via a separate power supply
The most important thing is to choose the right power source and the LED strip itself. 
Cigarette lighter connection
 The mains voltage in the car is 12V. At least, that's how it should be theoretically.
However, in reality, this value can easily exceed 14V or more.
The LED strip, which is initially designed for 12 volts, does not like overvoltage.
Because of this, LED crystals fail and burn out. 
Therefore, it is not recommended to connect such a tape directly to a car cigarette lighter, battery, or existing wires already laid.
Please note that various types of chargers for mobile phones from the cigarette lighter are also not suitable. Their output voltage is usually around 5V, but you need a stable 12V. 
Some try to get smart and artificially lower the tension. To do this, calculate the backlight consumption in advance and connect a powerful resistor in front of the tape.
The calculation can be done using the formula: 
In this way, a resistor is selected and soldered into the circuit. As a result, the supply voltage on the tape drops by two or more volts. After the calculations, this whole thing needs to be actually double-checked with measurements using a multimeter or tester.
This method has a number of disadvantages. In addition to the fact that this is a long procedure, the resistance will also heat up significantly.
Voltage regulator
That's why the best option- this is the use of a stabilizer. If you know a little about electronics, you can assemble the circuit yourself.
And through it connect all LED lighting sources. However, do not confuse the driver with the power supply. 
The main task of the driver is to stabilize the current. The voltage on it can either increase or decrease.
And the block is, first of all, a source of stable voltage.
To connect an LED strip in a car, you need a power supply.
Therefore, it is impossible to use microcircuits that are used for LED lamps. You can connect this unit not only from the cigarette lighter, but generally anywhere in the car where 12V wires reach.
Previously, such a stabilizer was assembled on a KREN 7812 type chip. 
The connection is quite simple. On the left is the positive input. Middle contact - total mass. Right - exit to the tape. 
However, due to constant overheating, pulsed sources are now being used. They no longer require huge cooling radiators, and they have more power.
Impulse power block
 It is recommended to connect power to both the stabilizer and the other via fuses.
If you are not a radio amateur and are not familiar with soldering circuits, and you don’t want to bother with this matter, you can buy a ready-made stabilizer.
Despite the fact that they are very cheap on the AliExpress website. Literally one or two dollars. They are a miniature box based on the "LM2596" microcircuit. 
You can find them in varied quantities.
Such a stabilizer practically does not require any setup, just solder the wires to the input and output and run them onto the tape.
It is designed for a current of up to 1.5A, which means you can connect LED strips with a power of up to 20W through it. 
If the RGB strip comes with the control unit, then the switching power supply must be connected in front of the unit.
By the way, with the help of such a block, it is better to supply not even 12V, but only 10V.
Believe me, this is practically unnoticeable to the eyes, but the service life of the LEDs will increase significantly! You can adjust the voltage with a screwdriver by tightening a special screw. 
If you are scared by all these difficulties with pulsed sources and power supplies, then you can do the simple thing and power all the lighting in the car from a battery. 
Tape selection
First of all, when buying, pay attention to the voltage. You need 12V models.
After all, there are also 24V-36V and even 220V. 
It is better to choose a one-color option so as not to bother with connecting an RGB controller.
And among the monochrome types, it is easiest to choose colors to match the body.
Almost all tapes are initially self-adhesive. So there should be no problems with its placement and fastening.
From model range There are two main options to consider:


The backlight power will depend on the number of LEDs in one meter of strip. 
And it can be very diverse:
- SMD3528 - 60,120,240 diodes per meter
- SMD5050 - 30,60,120 diodes per meter
The more diodes, the brighter the backlight and, accordingly, its power. Moreover, you can change these parameters yourself.
It is enough to cut the product according to the appropriate marks, thereby reducing the number of LEDs and the final consumption and brightness. 
The next parameter to choose is moisture resistance. Inside the car interior, you can use the tape without any insulation. This is IP20 protection class.
For headlights, buy backlights with IP65 protection. 
Well, under the body - IP68.
It is already completely sealed and is capable of any for a long time Operate normally when exposed to water and dirt.
For doors it is also better to use the IP68 option.
Where and how to mount and connect
First of all, measure the required footage of the tape. 
And cut strictly according to special marks. 
You may even have to drill a couple of holes. 
Connect wires to each segment. In a car it is best to do this using soldering rather than connectors. 
If your tape is made of silicone, then the contact pads will have to be cleaned and some of the sealant removed. 
All the tricks and rules for soldering LED strips can be found in the article below. 
When the tape is ready for installation, you should thoroughly degrease the surface on which it will be glued. Dip a clean cloth in the solvent and use it to clean future areas of illumination. 
The soldered wires are tucked into the hole. 
Peel off the protective layer of tape and press firmly onto the backing. 
As practice shows, adhesive tape alone is not enough. Firstly, the surface is not perfectly flat.
Secondly, our temperature changes have an effect. From minus values to plus ones, sometimes within several hours.
As a result, even high-quality tape eventually peels off. Therefore, it is recommended to apply regular hot glue around the edges. 
When organizing body lighting, glue is unlikely to help. On the bottom, under the thresholds, it is better to use a profile with plastic clamps for fastening. 
It also wouldn’t hurt to fill the places where the protection was removed from the contact pads and the wires were soldered, with a thick layer of glue. 
In a similar way, the LED strip is mounted in any part of the machine. If you want to increase the brightness and the power supply allows you to do this, then you can stick two tapes side by side at the same time. 
Select the wires in advance of such a length that they can be pulled to one common point from several lights at the same time. This is where the 12V power supply will occur. 
By the way, before sealing the casing, it is advisable to check the entire circuit for operability from a small 12V power source. For example, you can take an A23 battery. 
One of the most common types of car modifications is additional lighting. With its help, you can create a unique, completely individual image that will undoubtedly attract the attention of others.

Of course, you can choose many ready-made options, or seek the help of professionals. However, if you have certain skills, creating your own additional lighting in the car will cost significantly less, and besides, it will allow you to do everything exactly the way you want. Therefore, we will talk about creating lighting in the car interior with your own hands.
Types of interior lighting
Do-it-yourself lighting in the car interior should begin with the choice of lamps. Each of these options has its advantages and disadvantages, but LEDs are being used more and more today. And this is explained by the following advantages:
- Safer than neon lamps - cannot cause a fire if damaged, stronger, do not contain mercury;
- They consume less electricity;
- More convenient to install and further use;
- The light can be directed in the desired direction.
- In addition, diode strips are becoming cheaper every year, which also contributes to their popularization.

Planning lighting for the car interior
Before you start implementing lighting in the car interior with your own hands,It’s worth at least roughly estimating the installation scheme for additional lighting. This is one of the main advantages of creating car lighting with your own hands - the ability to do everything based on individual wishes. Think about where you would like to create additional lighting, how you plan to power it, etc.
Most often, lighting is placed in the following places:
- Under the front passenger's glove compartment;
- Under the driver's dashboard;
- In the luggage compartment;
- Near the rear seats of the cabin.
The LED backlight can even receive power from the cigarette lighter, and of course you can connect it directly to the battery.

It is quite important to remember that in such things the main thing is to exercise some caution so as not to overdo it with the intensity of the light. Creating beautiful and “polite” interior lighting with your own hands requires a good sense of taste and moderation.
In addition, it is necessary to think about ways to turn on the car interior lighting. The most popular are the following three options:
- Switch on by button;
- Turn on when opening doors or trunk;
- Activation of the backlight when the ignition is turned on.
What do you need to install interior lighting yourself?
After you have chosen the layout of the LED strips and chosen their color, you need to ensure that you have all the tools and materials that you will need to create the backlight for your car with your own hands, namely:
- Pliers;
- Soldering iron 220V;
- Rosin and tin;
- Stationery knife;
- LEDs;
- Glue for securing the tape;
- Surface degreasing agent;
- Indicator;
- Multimeter;
- Cable;
- Switch;
- Screwdriver Set;
- Terminal blocks for fixing wires;
- Tubes, heat shrink, electrical tape for cable insulation.

DIY interior lighting installation
To begin with, you need to measure required quantity LED strip and cut it according to special marks. Next, you need to solder the diodes to wires of the required length, the resulting contacts need to be insulated and terminals placed on them. For additional protection of the wires, it makes sense to place them in flexible tubes.
The next step in creating polite interior lighting with your own hands is to install LED strips in the right places. To do this, you first need to degrease the surfaces to which you will glue the diodes; after applying the degreasing liquid, you need to wait three to five minutes. Most LED strips have an adhesive backing, but it is best to use additional glue.
When installing LED strips, it is extremely important to monitor exactly where the light will be directed. The lighting should not hit the driver's eyes, and the resulting result will depend on the direction of the light. Therefore, before gluing it, it makes sense to experiment with the location of the diode strips.

The wires must be laid under the floor of the vehicle. You can connect to the standard wiring in different places, such a place could be the fuse box. In addition, power for LEDs can be supplied using existing flashlights, etc. In addition to connecting to the car battery to provide power, you need to connect the backlight to “ground”, that is, solder one of the wires to the car body (but only to clean metal without dirt, rust, paint).
In any case, when installing car interior lighting with your own hands, you must first take into account the features of the internal electrical wiring of your car.
Light in the cabin at night is the same necessary thing as, for example, air conditioning in hot and cold weather. Standard light, as a rule, is not enough to provide high-quality interior lighting. Quite often you need to find something, look at a map, etc. And driving in complete darkness is not very convenient. That is why many car owners are thinking about installing interior lighting in addition to the standard lighting. In addition, installing additional interior lighting is also a way to distinguish your car from hundreds of thousands of others, giving it a unique, original style. However, you often don’t really want to pay for it in a workshop. In addition, the installation is quite simple, and the car owner will have another reason to brag about the tuning he did himself.
Illumination in the car interior is not only convenient in the dark, but also stylish
Backlight options
Previously, neon lighting was used to tune the car interior. It is bright enough, thanks to which even one lamp illuminates a rather large space. However, neon is quite expensive, is very susceptible to mechanical damage, often burns out when turned on and off, and is also more difficult to install.
IN last years LED lighting is becoming increasingly popular. It has a lot of advantages compared to the previous version. It is quite easy to install and small in size. This makes it possible to illuminate the interior handles, steering wheel, cigarette lighter and other small elements. In addition, it is less afraid of any mechanical damage and burns out less often. In addition, with the help of LEDs you can achieve various lighting effects: from a smooth switching on of the interior lights to the possibility of periodic color changes when using RGB LEDs.
Both installation options are possible separately. Although it is possible to make a complex version, part of the interior is illuminated with neon, part with LEDs.

Where is the best place to install?
Standard additional light in the car interior is considered to be the area under the dashboard and glove compartment, car seats, doors, and door handles. Although in principle you can highlight anything, it all depends on your imagination. To tune door handles, ignition switches and other small elements, single diodes are most often used, but to illuminate everything else, it is more convenient to use diode strips.
Preparing for installation
Before proceeding with installation, you must purchase everything you need. If you are going to tune small parts, then you will need single diodes. To create lighting, instrument panel, etc., you can take LED strip per meter.
Before buying a tape, you must decide for yourself where you will install the lighting, take measurements, and only then calculate the required amount of material. If you decide to buy LED strips by the meter, then in addition you will need to buy wires (3-5 meters), heat-shrink tubing, or at least regular electrical tape, glue and a dimmer. There are also ready-made tapes for sale for tuning the interior with wires soldered around the edges for connection. Then you won’t have to worry about taking measurements, soldering wires and insulating them. Here you just need to secure the finished tape in the right place and connect it to power.
Installation on small parts
For tuning small parts, it is more convenient to use single diodes.
We prepare the diode for installation and connection. We take a diode, solder a resistor to one of its legs, then solder the wires and insulate the exposed wires with regular electrical tape. Somewhere at a distance of about 20 cm you need to make a terminal connection. So, the LEDs are ready for installation. Next, prepare the installation site. Let's consider, for example, how the lighting of the interior handles is installed. To do this, make holes near the handle in the place where you want to install the diode. They must be small so that the diode fits tightly into it. You can additionally secure it with glue. Next, stretch the wiring under the trim into the interior so that it can be connected later. In the same way, single diodes are installed anywhere in the cabin.
Installation of diode strip
DIY car interior lighting LED strip It's also quite easy to do. Decide on the installation location, take the necessary measurements, cut a piece of the required length from the tape. Please note that you can only cut where the soldering spots are marked. You can see them on the tape. And also, it’s better to cut off a slightly smaller piece than vice versa, otherwise there may be sagging and the tape will not stick well. After everything is cut, solder the wires to the edges of the tape. You check the functionality of the diodes by connecting them to the power supply, and after that you can proceed with installation. If you have an LED strip with a sticky edge, then remove the protective film and stick everything in the right place. If not, then you will need glue here. This way you can install lighting only on straight areas.

If you need to highlight areas with folds, then everything is done a little differently. After all, bending the tape even at an angle of 90 degrees is undesirable. Then, to begin with, also take measurements, cut off pieces of the required length, clean the edges and solder them at the folds. After this, insulate the soldering area using a heat-shrinkable tube (to do this, put it on the desired area and heat it up). To the edges through which the LED strip will be connected to the power supply, solder the wires, insulate them and then install everything in the right place.
Installation of combined lighting
For those who really like the glow of neon, you can make a complex lighting option. For example, neon lamps can be used instead of LEDs to illuminate the feet of the driver and passengers. There is less risk of mechanical damage.
For installation you will need: neon lamps, self-tapping screws, nylon clamps for fastening, an aluminum corner.
Often, many neon lamps have a connector for connecting to the cigarette lighter. You won't need it. Cut it off and clean the contacts. Next, take an aluminum corner and saw off a piece the same length as the lamp. Screw the corner under the dashboard, neon using clamps. Do the same under the glove compartment and below the rear seats to illuminate the space under the passengers' feet.
All wiring must be hidden and routed to the dashboard.
Connecting the backlight
There may be several connection options. Most often, LED lighting is connected to the cigarette lighter or to the interior light.
To connect to the interior lighting, you will need to remove the lampshade and connect the wires: positive is connected to white, negative to red. If the connection is made through the cigarette lighter, then for this you will need to connect the plus to the plus of the cigarette lighter, and the minus to any place in the car body.
If you need to create a smooth ignition and switch-off effect for the LEDs, you will additionally need to connect a dimmer.
Neon lighting is connected a little differently. As a rule, it is powered from a battery through a specially installed transformer.

conclusions
Thus, installing interior lighting with your own hands does not require special knowledge and skills. In order to do everything, you will need very little: materials, tools and a little patience.
Internal car tuning is very popular. And this is understandable, because any driver wants his car to impress not only pedestrians and other drivers, but also those who ride in the same cabin with him. And sometimes, you just want to please yourself with individual car interior lighting.
Installing lighting in the car interior with your own hands is not a difficult procedure. To do this, you need to purchase high-quality material and prepare tools, as well as think in advance about what exactly you want to emphasize with the help of light.
How and in what places is LED lighting most often installed? What is the effect, from an aesthetic and functional point of view, of additional LED lighting? You will get answers to all these questions in this article.

Before starting work, you need to choose a place to place the interior lighting, its type, and also take care of the activation mechanism. For example, appliances and/or door opening mechanisms can be controlled by remote control. Most best option- This is a combination of devices.
Today the market offers us two modernization options:
- Purchase of LED strip.
- Installation of neon lamps.
There is a clear advantage to first lighting a car's interior. This is the ease of installation of the tape. There is no need to purchase additional mounting hardware for installation. The LED strip included in the kit is simply attached to double-sided tape. Lamp standard sizes can be powered by a cigarette lighter and illuminate other small parts of the interior.
The positive properties of diodes include shock/strength and high tightness, as well as long-term operation in comparison with other interior lighting devices. It is important that the car's LED lighting turns on instantly. This allows you to create different lighting effects.
You can also create neon lighting for the car interior yourself. This will be a bright light, with the help of which a large space will be illuminated. Unfortunately, neon-based lamps are technically complex devices, and also very capricious in their operation. Neon lighting often burns out when constantly turned on/off, and is highly fragile.
Do-it-yourself installation of neon lighting in the car interior

Practice shows that it is best to start installing neon car interior lighting from the floor. We are preparing nylon clamps, an aluminum corner, neon lamps and self-tapping screws.
We cut off the connectors for the cigarette lighter and strip the ends. We prepare the corner, adjusting it to the size of the lamps, using pre-prepared clamps. We mount it under the interior dashboard. The driver's footwell is now illuminated.
Thus, we install additional lighting anywhere in the car interior. We hide the connecting wires under the mats, directing them to the dashboard from the driver's seat.
The wiring joints are insulated. The kit is connected to the door sensor and/or interior lighting switch. You can use the battery as a power source after removing the wipers.
Having finished the work, the wipers are installed back in their place. Now, before the car doors open, its passengers are waiting a pleasant surprise– nice neon lighting.
How to properly install an LED strip for car interior LED lighting?
Installation of a car with LED strip is carried out according to the standard scheme. First of all, you need to purchase a set of wires, heat shrink tubing, and tape.
It, like individual diodes, is purchased at automotive markets and/or in specialized automotive stores. You should not skimp on the quality and length of the tape; experts advise stocking up good LEDs. It’s better to buy more diode strip than to realize at the last moment that you don’t have enough.
In addition to interior design, diode strips are actively used to illuminate car wheels.
Step-by-step instructions for diode connection of car interior lighting
Arrangement of lighting in the car, with your own hands, should begin with the instrument panel vehicle. To do this, standard equipment is removed: instruments, panel lighting, and diodes are installed. The installation process is very simple, since the diodes have bases similar to factory equipment.
Then you need to determine the installation locations. Many people prefer to mount diodes along the entire perimeter of the ceiling, parallel to the car body pillars. The summer is laid gradually, and the remains can be cut off.
The cut points are clearly visible: they are marked with special membranes. After the procedure, do not forget to clean the ends of the cut and solder them together. We close the connections with bushings and heat them with a hairdryer. In this case, it is better not to use an industrial hair dryer, since there is a high risk of overheating; an alternative is a regular household appliance.
Switching on is carried out similarly to the circuit of neon lamps. You need to be especially careful at this moment and not confuse the polarity points that are indicated on the tapes at the cut points.
Essentially, this is where the workflow ends. There is nothing complicated. Only the installation must be carried out sequentially and be careful about small elements when connecting them.
An important aspect when working is the combination of lighting aesthetics and its functionality, which will be discussed below.
Aesthetic and functional components of lighting in the car interior

Vehicle interior lighting, which is done on your own, simultaneously solves a number of problems:
- a unique design is created interior design cars;
- the car stands out from the background standard equipment interior with originality and functionality.
Determining the functionality of lighting in a car interior is often somewhat more difficult. For many cars, installing additional lighting (tuning) is an opportunity to create comfortable conditions for passengers and the driver himself, which include:
- Installing the backlight in the car with your own hands can significantly simplify the search for objects in the car interior, be it gloves, water, mobile phone etc.;
- Getting into the car turns into a kind of ritual, rather than a standard, ordinary action. A useful and pleasant addition is to turn off the lights after closing the car door and smoothly reduce the brightness of the standard lamp;
- The ability to easily and simply find objects on the floor in the cabin;
- Speaking of the illuminated handles, this means they can be found quickly and make it easier to get in and out of the car.
It is also worth mentioning that the interior lighting can be synchronized with the subwoofer installed in the car's interior. This gives many interesting moments, in particular the pulsation of light to the beat of music, changing the color of the backlight, etc.
We can talk for a long time about useful functions, but we will focus on the above combinations.
Design aspect of lighting in the car interior

It is important to choose niches for car interior lighting and decide how to illuminate them. You can place and make lighting in the car interior in any place you like. But do not forget about the practical side of the issue. The most successful is the installation of lighting in the glove compartment, in the foot area and in the rear of the car, where passengers are located.
It's interesting that the lighting rear seat most productive. This applies to accessories and individual parts, including door handles. Car interior lighting as decor will look effective on air duct grilles and/or around the entire perimeter of the doors. You can combine directional light, or its individual elements, using a cigarette lighter or other electrical on-board network.
You can limit yourself to one-time activation and/or connect on an ongoing basis after dark.
There are no clear recommendations on the use of one color scheme or another. However, the lighting in the car interior should be “polite”, that is, not irritate passengers, not be in the eyes, etc.
The main thing is that the chosen color does not distract the driver from driving, and corresponds to the general concept of the car’s interior.
What tools and materials are needed for additional interior lighting?
Using one or another version of car interior lighting, you will need the most ordinary tools and Consumables. Including:
- Scissors;
- Soldering iron;
- Pliers.
From consumables:
- Solder;
- Rosin;
- Tips for “screw”;
- Wires of the required length;
- Locking button or toggle switch.
In operation, individual lighting components must be connected to each other using a multi-core cable. In this case, the useful area of the cores should be 1–2 mm. Those places where soldering occurred, as well as connecting contacts, must be covered with insulating material. In the process of verification and control correct installation To illuminate the car interior with your own hands, you need to use a multimeter.
What do you need to know about car interior lighting with cold neon?
You can add individuality to your car and make it stand out from the general flow of traffic using cold neon, which looks original and is very effective. Today, neon lighting is one of the most common methods of interior tuning. This option has the following advantages:
- minimal energy consumption. Neon is considered a practical option due to its long service life. Transparent material does not lose its original characteristics and does not fade. Despite its strength, it bends easily and cuts well when creating different light combinations;
- neon thread can be mounted in different parts of the car interior: on the pedals, dashboard, handles for opening the door and/or glove compartment;
- cold neon does not distract the driver from monitoring the road situation and is considered safe material for our vision;
- the light of flexible cold neon is distributed, evenly saturating the interior, which is very convenient in the dark and at night;
- When operating, do not turn on additional lighting devices, including standard equipment.
Do-it-yourself car interior lighting using cold neon is not only beautiful, but also practical. Such tuning allows you to protect you and your passengers, and provides a huge field for imagination.
By making lighting in the car interior with your own hands, you can get a single color light, or in different colors. color scheme, using different patterns, colors and combining their quantities. Arrangement with neon material is a minimum of costs and minor intervention in electrical system car, which does not affect stable work other (standard) vehicle systems.
Car interior lighting - a new option
We are talking about laser illumination, which appeared in our country relatively recently, gradually winning the hearts of car enthusiasts and chip/tuning specialists. For example, when you open a door, after installing laser illumination in its lower part, on the ground in front of the door, the logo of your choice is formed. This is what it looks like in the photo.