How is the replacement of the internal scrus of VAZ-2110
Typically, this repair is carried out as a result of the actual failure or after a certain mileage, which is nominally calculated by the Sls.
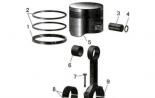
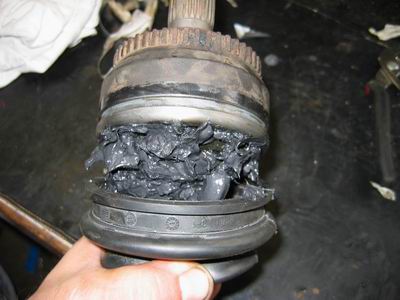
Replacing an internal scrum VAZ-2110
To extend the service life of this component, which significantly affects the level of security, you need:
- first, monitor the choice of initially original spare parts made of high-quality carbon steel, designed for long-term loads;
- secondly, it is necessary to pass regular something and independently inspect the functional nodes of the car.
The need and terms of these procedures arise from the manufacturer's recommendations and the functionality of the element under consideration. Sls can fail as a result of foreign objects and a significant constant load, loss of lubricant. Replacing the VAZ-2110 internal scrus will require a specific set of tools.
Please note that it cannot be repaired, it is possible only to replace. This can be done independently, without the help of the masters. We consider the question of how to do it without draining oil, as well as without a pit.
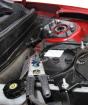
Equipment and tools for replacing a scrape
To replace a shruss, you need to cook the following tool:
As a tool, any set for motorists can be used without any other devices.
Replacing a shruss on the inside with a raising machine above the ground level
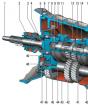
The main functionality of the hinge consists in the transmission of rotation from the checkpoint to the main shaft. Obviously, coherent work has a positive effect on the safety of motion, and, on the contrary, the failure of the system significantly increases the risks of the accident.
Strushing replacement - instruction
- Lock the car above the ground using the lift when you turn on 4 speed and tightening manual brakes.
- Install the anti-cancer clamps under the wheels.
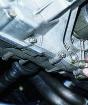
- Remove the protective cap, as well as by mounting, unscrew the hub nut.
- After dismantling the hub nut, unscrew the elements of the car wheel.
- Post the wheel with a jack.
- Find the screen and unscrew 6 bolts, in this case the hinge will be fixed only on the flange.
- Unscrew the fist fastening bolts (2 pcs.);
- Turn the steering mechanism to the most extreme position, after the stages of the hinge must fall into itself.
Stage 2. Dismantling:
- replace the boot in the upgraded structural solution;
- remove the lock ring;
- remove the hinge fixed with the splines of the shaft;
- perform equipment diagnostics;
- install all nodes, a new screen.
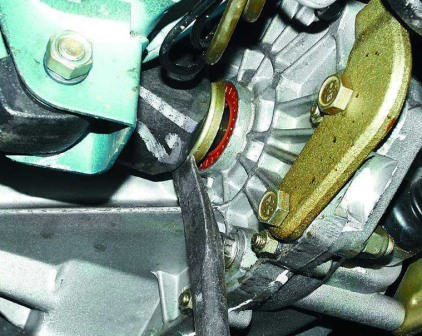
Installing a shrus at the final stage in detail
Take into account the following remarks:
- set the edge of the shaft plastic plug;
- the retaining ring is installed before mounting the hinge;
- before mounting a new script, the location of the installation is abundantly processed by lubricant to ensure a dense fit;
- after mounting the drive, the hinge must tightly "sit down" to the gear until complete fixation, which is done with a hammer.
Performance of this replacement of the functional element of the VAZ shaft does not require the experience of repairing the car. Replacement can be conducted, guided by the video structure. If you are not confident in your abilities, refer to the specialists to have a guarantee of the reliability of the hinge setting.
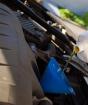
 Obviously, the internal hinge cannot be dismantled without lifting the car's design, as the dismantling of the wheel is required. It is realistic only when fixing the car on weight. Some masters recommend to drain the oil in front of such repairs, but should not do this. Replacing the instructions will allow to do without draining.
The replacement of the shrussa gland is also recommended to produce together with the hinge. Sls change separately without replacing the anther and the gland only in cases where there is a functional stock, and the wear of the screw is more pronounced than other structural elements. Usually the repair is broken into two stages if there is no possibility to replace in full. Do not forget to replace after the gland and the boot to keep all the variations in the preservation of the car safety level.