How to clean the ventilation of the crankcase. Cleaning Carter Ventilation System
With some delay, I fulfill the promise to post the report on cleaning the potter ventilation nozzles on partial loads.
As I already wrote earlier, unfortunately, this problem overtakes not only engines (M 111 EVO), as it was considered earlier, but also more common (), having a commercial designation "230 compressor".
Those., The problem is so, or otherwise concerns all 111th compressor motors.
Fortunately, there are no special problems with her solution, if only you did not have time to finally turn the flow meter.
So, the main prerequisite for the actions below is the combination of the flow meter.
In the control unit, the Code P 200B (004) "B2 / 5 (Hot Film Mass Air Flow Sensor", Plausibility Error Mass Air Flow Sensor / Throttle Valve "(" Thermoemometric Flow Meter B2 / 5 Malconforming Flow Meter / Throttle " )
Spare parts required for repair:
(M 111 E23 ML engine)
Laying intake manifold A 111 141 12 80 - 2 pcs. There is ELRING, Goetze and Reinz - to choose from. (№38 in Figure)
Check valve ventilation system A 111 010 00 91 (№122 in Figure)
Upper ventilation pipe A 002 094 01 82 (№116 in the figure) When installing, it cuts into 2 equal parts.
Lower ventilation pipe A 111 018 15 82 (№113 in Figure)
Filter fuel ramp A 000 074 60 86 (№8 in Figure)
When washing the oil separatorIt is strongly recommended to purchase:
CL ventilation hose. Covers A 111 018 16 82 (№77 in Figure)
Pipe from the housing air filter To the oil separator A 111 018 31 82 (№80 in Figure)
To access the nozzles you need to remove intake manifold.
Consider the least costly and easy option - without removing the fuel ramp And the need to replace the sealing rings into the nozzles.
Of course, if you want to separate the fuel ramp from the intake manifold, the sealing rings of the nozzles will need to be replaced with new!
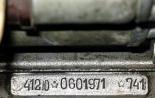
Bosch numbers: 1 280 210 711 or 1 280 210 752, it is necessary 4 things. (№47 in Figure)
To begin with, it is necessary to remove the front decorative plastic cover from the head of the GBC and disconnect all electrical connectors and vacuum highways.
Tracing of highways and wires is presented in the photo:
If someone suddenly forgot how the auxiliary unit drive belt is installed:

We remove the decorative cover that closes the coils and wire of the wires, disconnect and carefully pull out the harness.
Disconnect electrical out fuel injectors and the camshaft position sensor connector.

Then, turn off the connector of the flow meter and remove the entire feeding air duct assembly - we draw two clamps connecting the body of the flow meter with a "papinge" and unscrew 3 bolts with an internal hexagon of 5 mm. From the throttle housing. Remove the entire feeding air duct assembly.
Of course, with the slightest signs of grindingIt is necessary to remove the flow meter and rinse it by Air Mass Sensor Cleaner`om, and the rest of the air duct - gasoline \\ solvent, etc.
Important!
With a large amount of oil in the inlet pipeline, it is strongly recommended to disassemble and rinse the entire system. - oil separator, both paiping and intercooler - The lowest point of the system.
Replace oil separator (A 111 018 03 35) no need - rinse it quite carefully.
In the context, it represents the classic "snail" - there is absolutely nothing to break there.
We continue.
We unscrew the remaining fourth bolt fastening the choke of the choke, disconnect the electricity and remove the throttle.
With the slightest hint of pollution and, moreover, Nagar, the choke must be rinsed thoroughly and bleed with compressed air!
Remove the intermediate flange, which is fastened with three bolts in ext. Hexagon 6 mm.
We try not to damage the sealing ring A 111 997 04 45 - it costs it expensive, and it is completely incomprehensible, with what fright ...
And the intermediate filter between the flange and the throttle housing (A 000 140 27 87) is better to replace the new one - good, it is inexpensive.

We unscrew the vacuum nozzle (19 mm) and gently pull out the 3 fastening of the plastic engine harness.
Surround the feed and "reverse" fueling (17 mm.)
We assign both fuel highways to the side.
We unscrew 2 long-cutting bolts E-12 fastening the fuel ramp to the GBC - they are passive, hide through the collector housing.
We unscrew 7 bolts (13 mm head) fastening the intake manifold to the GBC.
Gently assign the intake manifold from the GBC.


As they come to Kebab-Service - Canno Fsely, Na, remove the Callover.
PSHIK-PSHICA Galriteliel, Igon's Tyk Farkunka, Taim Ashot Majes Fso Red Germeneg, Sabyat, Inshalla - FSE. 5 ruble, 2 hours of work, Cleener Davival!
Parvius Path Leave without comment - still focus on removing the collector.
For this, it is necessary to disconnect part of the wiring passing between the inlets 3 and the 4th cylinders - remove the connectors from the detonation sensor, the crankshaft position sensor, disconnect 2 wires from the starter ( i hope you did not forget to turn off the battery) and disconnect 2 vacuum pipes connected to the intake collector from the back, in the R-non-Motor Shield.
After that, the collector can be carefully removed without removing the fuel ramp.
Of course, the collector, as well as the intermediate flange, must be thoroughly rinsed and cleaned from nagar and other deposits. If you want to remove and rinse nozzles and fuel ramp, do not forget to replace all sealing rings! When assembling and mounting, all rings need to be "scolding" silicone.
If the nozzles of the ventilation system per frequent. Loads, have such a planic look, as in this photo (Machine 2000 G.V., mileage approx. 215000 km.), They need to be carefully cleaned with the help of various chemicals, medical syringe and compressed air. The procedure is not enough, but still, it seems to me much more secure than the recresting of new nozzles.
You can use various Carb Cleaner`a, but I personally have a long time I prefer a means for washing kitchen stoves - "Shumanit".


After the patency of the holes is completely restored, it is necessary to replace the check valve of the ventilation system and all the nozzles.
Part numbers are given above.

The assembly is made in the reverse order.
Before fixing the intake manifold, you must pave the wiring harness to the dentation sensors and the position. Crankshaft, connect vacuum highways and starter.
Fuel filter at the entrance to the ramp (17 mm fitting.) It is necessary to replace the new!
Before starting, do not forget to reset all adaptations!

If timely does not clean the engine crankcase ventilation system, then clogging can lead to an increase in pressure due to gases that partially fall there.
Maintaining the VAZ 2110 engine crankcase ventilation system is associated with providing the normal functioning of the engine cylinder block required for burning gases. The accumulation of resinous sediments appearing for some time of operation of the machine formed by crankcase gases prevents the removal of gases through the oil separator into the cylinders, in the cover of the head of which it is located. As a result, there is an increase in the pressure of gases in the engine system and the subsequent leakage of oil through seals, that is, gaskets and glands. In order to prevent these consequences, it is required to clean and rinse the engine ventilation system when this need comes.
The manufacturer is recommended to produce a cleaning system of the crankcase ventilation system every 30-60 thousand kilometers of the car mileage necessarily before replacing the oil. Such a schedule is preferable than waiting for when problems with the machine begin.
The sequence of actions when cleaning the ventilation system of the VAZ 2110 engine crankcase should provide a clear execution of the following procedures.

2. Removing the washers after the removal by unscrewing long (1) and short (2) fastening bolts of the oil separator, located on the inside of the block cover of the block.
3. Removing the oil separator housing.

4. Removing the package of grids located in the cover of the head of the cylinder block.
5. Careful flushing of the grid, oil separator housing and block head cover using kerosene, which requires marginal care so that kerosene does not become in the engine crankcase. If this happened, then the oil should be replaced.

6. Ensuring the same mesh orientation in the packet by turning them with the subsequent installation of the package in the lid in such a way that it rests on one side to its protrusions, and on the other hand, the hole provided for the bolt for fastening the oil separator housing is visible. Install the oil separator housing and tighten the fastening bolts.
7. At the last stage, it is required to check the condition of the cover of the crankcase ventilation system cover, followed by their replacement if necessary. Next, replace the cover on the cylinder head.
Next you can watch the video as you can eliminate the problem of throwing into the oil receiver.
Using a conventional cooker for dishes can significantly reduce oil consumption. The procedure was carried out by car DEU SENS:
Video of Cartrenic Gas, Methods for their elimination, DMRV:
Principle of operation of engines internal combustion Based on burning the mixture of hydrocarbon fuel and atmospheric air in a closed volume. Due to the thermal expansion of this volume and useful work. If the supply of a combustible mixture and the removal of exhaust products have technically organized processes, then penetration exhaust gases in mechanical part The engine is a by-product, to remove which and there is a motor crankcase ventilation system.
These extra gases are also called crankcase, and for which they need to be deleted and how the crankcase ventilation works, and we will try to figure it out further.
Device and principle of operation

Carter ventilation systems for different types DVS have a slightly different device, but they all necessarily consist of several main parts and nodes such as:
- air nozzles;
- valve ventilation, the purpose of which consists in the intensity of suction of gases, depending on the discharge strength in the intake manifold;
- oil separator.
Moreover, regardless of the type of engine, the forced ventilation is designed so that its scheme has two parts:
- small branch;
- large branch.
The first - selects gases from under the valve cover, the second - removes the unwanted exhaust directly from the crankcase.

The principle of operation of the crankcase gas removal system in carburetor, injection and diesel engine It may also differ significantly, but the whole process can be described by the following sequence:
- Fence of exhaust gases from the engine crankcase;
- Purification of these side gases in the oil separator from oil vapor and other mechanical products of combustion;
- Transmission of already purified gas on air nozzles into the structure of the intake manifold;
- Mixing crankcase gases with a combined combustible mixture and combustion of it in working cylinders.
Due to the possibility of hitting a certain amount of gas into a permanent cycle of clause 1 to clause 4 and using part of exhaust gases, technologically for the preparation fuel mixes - The selection of exhaust gases from the engine crankcase is also called the exhaust gas recirculation system.
Possible malfunctions, their diagnostics
Carter ventilation problems are generally not an obvious nature, but until it occurs complete clogging of any part of the exhaust gas removal air path such as: fitting, rubber slog, part indoor space oil separator or valve mechanism itself.
Such a fatal malfunction will cause a frankly well-working engine, or due to increased internal pressure, it simply will simply squeeze the oil through the rubber gaskets of the palter pallet and the valve cover. In this case, the problem is already a simple washing of the oil separator and the valve, it will not be possible to solve the problem as it takes a complete cleaning of the crankcase ventilation system.

However, the following symptoms should be started to begin to manifest themselves the following symptoms before complete clogging.
- gradual reduction in engine power;
- a slight increase in fuel consumption, especially in the city cycle;
- dips in the work of the accelerator pedal;
- the appearance of oil isolation on gaskets and engine cuff cuffs.
Methods for troubleshooting and cleaning ventilation
When the above-listed symptoms are first followed, checking the elements of the oil separator and valve, as well as all parts there are on the subject of various side deposits from combustion products. Even if, in your opinion, everything is in order there and it would be so no need to clean, then in any case, clean the oil separator from there with oils there, especially this is true for a diesel engine.
Engine crankcase ventilation does not work. Effects:
Gas pressure rises, problems begin. Slags flow, Zhor oil, everything is not as necessary. The engine repair comes, which will require a good penny. The yield is obvious - to serve it in a timely manner, or is urgently repaired.
Dear friends, hello.
As you guessed, today's topic is Carter Volvo ventilation system. Moreover, consider the most running option that I was with me after buying a car with good mileage.
As they say, we went.
If you use high-quality oil, use good gasoline And in a timely manner, then most likely, the entire cleaning of the ventilation of the crankcase will be reduced to the replacement of the tank of the butter (No. 1 figure below), checking the cleanliness of outputs for nozzles in the engine block, and checking the bandwidth of nozzles (the main attention is paid to the tube under No. 8 Fig. below).
If you have a running option, you will have to sweat to bring repairs to the desired result.
A little distract. When buying, in my case, the machine was well-groomed, clean beauty, except one. The oil was poured, the old owner, semi-synthetic, and it is in the turbo engine, requiring special attention to oils and cooling. Clear things, the old oil was burning, and it was visible directly on the bay neck. I immediately moved to Synthetic Castre, recommended by dealers, but unfortunately this oil was not distinguished by a special delegation and by the middle of the term between replacements, substantially litto leaving a characteristic flaw of reddish color. I had to refuse him ...
Let's go back to work.
We throw off the intake manifold. Remove the oil collector (replacement), all the nozzles and check them on the bandwidth.
We inspect the holes in the cylinder block, top and bottom.

Special attention by lower hole. If it is clogged, get ready to remove the pallet. You can certainly clean it, but I firmly believe that the pallet removal is inevitable, for complete confidence. The removal of the pallet has some features that I will tell in the following articles. Now we will concentrate on the engine seen in the pallet and block. The channel in the engine block from the lower opening goes at a right angle to the bottom into the pallet and scored tightly.
The painting of the pallet itself is also not beautiful.
All are carefully laundered, to shine. In the case of pallet removal, sealant is required, two rings of oil highways (Volvo 8642560, 8642559), two oil cooler seals (Volvo 30637339) and accuracy. The procedure may take a whole day, so stock time.
The video shows the complete cleaning procedure.
Happy viewing!
Yours faithfully, .
Welcome!
In the "classic" procedure, this procedure must be done every time before replacing the oil in the motor to a new one, otherwise the ventilation system of crankcase gases in the engine will be clogged, which will lead to the loss of car power. Due to the engine from the dirty air with particles of the emulsion accumulated in the crankcase ventilation hoses, the motor resource is reduced in the literal sense. In addition, gas pressure in hoses and engine will grow - oil heates will appear through seals.
A completely small number of people worry about cleaning ventilation, since you went here - it means you are not from their number. We have prepared an interesting article with detailed description Cleaning procedures.
Note!
You will need the following tools: screwdriver, set of wrench "on 8", "on 10" and "on 13", clean rags, a container for washing parts (hose, sapun, etc.) and kerosene.
When to clean ventilation?
Regularly with a frequency of 15,000-20,000 km of car run.
Note!
It is best to clean the system before each change of oil, otherwise the new oil will deteriorate faster due to the contamination of the system.
Pay regular attention to the engine: does he not be grilled? Noticing is nobadnoe - proceed to cleaning.
Cleaning on VAZ 2101-VAZ 2107
Removal
Note!
In mandatory, remove the plane sensor from the crankcase ventilation hose and rinse it kerosene in case of severe pollution.
2. Loosen the fastening clamp of the extra hose to the Sapuna lid (specified in the red arrow) and disconnect the additional hose of it. Go to the weakening of the main hose clamp (specified in the blue arrow) and disconnect it from the lid.
3. Remove the probe oil level indicator in the engine.
4. Remove the fastening bolt of the Sapuna cover and remove the cover from the car engine.
5. Moisten a rag in kerosene and wipe the inner cavity of the oil separator.
Note!
Be careful during wiping, do not drop the dirt particles inside the engine. If you are uncomfortable to consider dirt on the installed oil separator, remove it from the car, pulling the fastening nut (indicated by the red elder). Shot oil separator Put the prepared container with kerosene in advance.
6. Clean the surface of the airfielder from dirt, rubbed it with a cloth moistened in kerosene.
Note!
Remove the sealing gasket from the filter housing and clean it from dirt.
Installation
It is made in reverse order.
Note!
Torn or cracked gaskets replace new ones. Check that the airflow case is inserted into the gasket laying. metal sleeves (Shown in the photo).
For newbies!
Question: What does the oil separator looks completely?
Answer: in the photo.