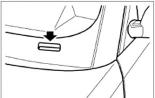
Repair and adjustment of the brake system. Repair and adjustment of the brake system Design features of the brake system
Periodic maintenance of the brake system ZAZ is carried out at such steps:
- After 20,000 mileage mileage, dismantling the brake drums, cleaning the brakes from pollution, checking friction linings, update the brake pads (for the need).
- After a run of 60 thousand kilometers, brake cylinders disassemble, are washed and examined for worn and defective parts. After replacing the unsuitable parts to the new system, the liquid is replaced and produced.
Friction overlays on brake pads have a relatively short life - about 30 thousand kilometers. Wear lining largely depends on the style of driving and road conditions. The replacement of the drums is advisable to carry out a car overhaul. The absence of dirt in the hydraulic brake drive, as well as the use of high-quality fluid guarantees long-term and reliable operation of the system.
Remove the brake drum ZAZ

We dismantle the front wheel by unscrewing 3 bolts, remove the cap, the hub cap is with a hammer with a screwdriver. Then we remove the pin and unscrew the wing connections, with a neat movement we tear the hub perpendicular to the axis, pull the brake drum.
The drums after long-term operation can be with a ledge, in which exemption from the pad is difficult. Use the following method: extremely put forward the drum along the axis, knock down with a hammer on the external diameter of the drum (laying the wood linings) - it will postpone the pads. To dismantle the front drums, the impulse should be transmitted vertically for the rear - horizontally.
On the wheels behind the brake drum, ZAZ is removed like this: we remove the cap, unscrew the 6 fastening bolts between the hub and the drum, remove the drum from the pad. If you cannot remove, knock the drum with the hammer in the hammer.

Since the friction pads of the pads on the head wear out much earlier brake drums, the principles of their replacement should be understood. Often on old pads make new lining. For this heats old overlays to 300 ° C and remove them, or cut off with a chisel and sandwich the file. The surface of the shoe, intended for gluing, needs 8 4.4 mm holes; These holes should be evenly distributed over the area. Applying a block as a conductor, drills holes in the linings themselves. We process the holes of the cekeside outside. With the help of a mandrel, we split rivets from brass, aluminum or copper. The lining work until it is scribes by 90% of the initial thickness.
By performing the maintenance of the brake system, you need to know and correctly use the materials. On the lining applies glue of the aircraft 10 t, it allows you to withstand three times an enlarged force on the cut than in the case of rivets.
Timely diagnostics and maintenance of the brake system will exclude problems in performance.
Removing the brake drum of the front and rear wheels. To remove the drum of the brakes of the front wheels (made in conjunction with the hub), it is necessary to remove the wheel, then, turning three bolts, remove the decorative cap of the wheel and remove the hub cap with a screwdriver and the hammer. After that, it is overpowering and unscrew the hub fastening nut and a slightly swaying the hub in the plane perpendicular to the axis, remove the brake drum.
With a significant development of the drum and the formation of the ledge, it may be difficult when removing the drum from the pads. To remove such drums, you should maximize them in the axial direction, and then the hammer blows along the outer diameter of the drum through the wooden spacer to be placed both pads. Apply shocks on the front drum follows in the vertical plane, and on the rear - in the horizontal.
To remove the rear brake drum, it is necessary to remove the decorative cap of the wheel, then unscrewing six drum mounting bolts to the hub, remove the drum from the pad. With difficulty removal, it is necessary to slightly knock the hammer along the flange of the drum and remove it from the pads as well as the front brake drum.
^ Removing the brake pads. With the help of special ticks or a pointed rod with a diameter of 4 mm, both tie springs of the pads are removed, then, lifting the end of the presser spring, remove the block.
Fig. 134. Fastening the friction linings of the brake rivets: O-block brake assembly; B-friction pad in the scan [dimensions 2.5 mm and (99.8 ± 0.1) mm are indicated after grinding]
When removing the rear brake pads, additional operations should be performed: to fray and remove the slot lever and the spacer. Removed brake pads are purified from dust and dirt. Worn friction linings replace new.
Installation of pads on the brake shield is performed in the reverse order.
^ Replacing the friction linings of the brake pads. In the absence of new pads with overlays, you can stick or glue new pads on old pads.
P  strong with new overlays needed with a pad to remove old lining by heating the pads to a temperature of 300 ... 350 ° C or cut them into a chisel and clean it with a file. On the glued surface of the block, eight holes with a diameter of 4.4 mm are drilled, evenly distributing them throughout the area (Fig. 134). When drilling holes in the pads, the block should be enjoyed as a conductor. After drilling the hole of the core from the outer surface side (Fig. 135). Rivets are made of brass hollow rod. Instead of brass, you can use aluminum or copper rivets of the same form, but with a solid rod. For splitting rivets apply a mandrel (Fig. 136).
"Fig. 135. Sizes of rivets and holes for it in a friction lining: but-
holes in the lining; B - Rivet
Claimed lining can be securely operated to wear 80 ... 90% of their original thickness. However, the gluing process itself will be performed only in the presence of special equipment. For gluing linings apply glue glue 20-t.
Before gluing the lining, the surface of the pads is cleaned with a coarse abrasive circle to get a degreased rough surface, free from scale. The lining is degreased by rubbing the solvent. Then the glued surfaces of the blocks and the lining are mounted three times with glue, giving every time to dry up. Next, the pads are glued onto the pads and they are strongly pressed using a device consisting of a ribbon clamp and a slot screw. In this form, the pads are laid into the furnace, where it is kept at a temperature of 180 ... 200 ° C for an hour.
The glued overlays are kept in 2 ... 3 times greater force on the cut than the glued.
^ Disassembly and assembly of the main brake cylinder. When disassembling the main brake cylinder, it is necessary:
Clear from dust and dirt one of the front and rear brake air outlet valves, remove the rubber protective cap and put on the front brake valve head hose pumping hose, omit the free end of the hose into a glass vessel and, removing the plugs with nutrient tanks, dig a brake fluid . The same to do with the rear brake;
disconnect from the main brake cylinder 12 (see Fig. 130) Pipelines going to the brakes and to the tank of the main cylinder;
Finger 7 pedals 1 brake pedals, disconnect the plug of the pusher from the pedal and, turning two bolts 13 fastening the main cylinder brake to the bracket, remove the main cylinder brake from the nest;
secure the main cylinder in the vice or in the device, remove the protective cap from the cylinder ^ 10 (see Fig. 131), twisting the lock bolts 18 and traffic jam 16, And then remove all the details by following the sequence specified in Fig. 131.


Fig. 136. Mandrel for spouting rivets overlay to the brake block (roughness of the surface of the working profile should not exceed 1.25 microns)
After the cylinder is disassembly, all parts and housing should be thoroughly rinsed with alcohol or fresh brake fluid, carefully examine and ensure in the perfect purity of the cylinder mirror and the working surface of the pistons, in the absence of rust, rice and other irregularities or increased gap between pistons and cylindrome.
If damage is detected on the cylinder mirror, it is necessary to eliminate them with wipes so that there is no liquid leakage and premature wear of the piston cuffs. When damaged, causing a significant change in the inner diameter of the cylinder, it is necessary to replace the cylinder body new. It is recommended for each disassembly of the cylinder to replace the cuff new ones, even if it looks in good condition.
It is also necessary to check the state of the protective cap of the cylinder and, if it is damaged, replace the new one. Check if the elasticity of the springs of the piston did not lose.
Before assembling, all the parts of the brake cylinder and the inner cavity of the cylinder are lubricated with castor oil or fresh brake fluid. The cylinder assembly is performed in the sequence, reverse disassembly, not allowing dust, fibers from fabric, etc.
After installing the main brake cylinder on the car and connecting the hydraulic pipelines, the system is filled with liquid and air is removed from it.
Disassembly and assembly of wheeled brake cylinders. For s n i - t and I can turn the wheel brake cylinders (Fig. 137) pipeline connecting nuts 9 and 8, coming from the main brake cylinder 6 To flexible hoses 7 and 7, then remove the brackets / 7 fastening of flexible hoses to the brackets and twist flexible hoses from brake cylinders. Cut off the shield 3 (see Fig. 128) brakes connecting pipe 6, Then replete two bolts 7 and remove the brake cylinders upper and lower from the shield. The same to do on the second front brake shield.
To remove the brake cylinders of the rear wheels, it is necessary to unscrew the connecting nuts of the pipelines. 15 and 10 (See Fig. 137) from brake cylinders and, turning around two bolts, remove cylinders from shields.
Disassembling the brake cylinder should be performed in the following sequence: remove the protective covers 7 (Fig. 138), turn out the pistons 6 Cylinder of stubborn rings 4, from using copper or wooden flipping (only at extreme need) Stubborn rings 4 Rear brake cylinder. The details of the disassembled brake cylinder are thoroughly washed, inspect and determine their suitability to further work.
The assembly of wheel brake cylinders is performed in the reverse order, taking into account the following instructions.
Pistons are installed only from the side of the cylinder with which they were turned out. Before assembling, all parts are thoroughly washed in alcohol or fresh brake fluid and bleed with compressed air. It is not recommended to wipe the details with the rags or ends to avoid falling on the sealing surfaces. fibers .. Cuffs 4 (Fig. 139), pistons 5 and the inner surface of the cylinder 3 Before assembling, lubricate with castor oil or fresh brake fluid.
When installing the pistons in the cylinder, they should be screwed into the rings completely, and then unscrew to the half turn, otherwise the pistons will not move into the threads and the drums are jammed. In this case, the slot on the piston support rod should be located parallel to the brake shield.
When assembling the cylinder, it is necessary to install the piston with the rings to the original position, for which the piston is for easy blows along the support rod so that the support surface of the rod has rested from the cylinder edge by 7 mm.
Disassembly and assembly of the wheel cylinder of the front brake are performed as well as at the rear brake. To ensure tightness, it is necessary to tightly tighten all the connections.
After installing and securing cylinders on the shield of the brakes, the assembly of the pads with springs and the installation in the location of the brake drum should be removed air from the hydraulic system.

Fig. 137. Pipelines of the hydraulic drive of the brakes. 1.7 - Front brake hoses; 2 - tee; 3 - washer; 4 - nut; 5, 8, 9, 10, 12, 15, 16 - pipelines; 6 - the main cylinder; 11 - flexible brake rear drive hose; 13 - tee; 14 - flexible rear left brake hose; 17 - bracket.

Fig. 138. Details of wheel cylinders of the front and rear brakes: 1 - the upper wheel cylinder of the front brake; 2 - washer; 3 - coupling; 4 - split spring ring; 5 - cuff; 6 - piston; 7 - Protective Case: 8 - valve; 9 - rear Brake Wheel Cylinder

Fig. 139. Wheel brake cylinder rear brake: / - reference rod; ^
2 -
protective case; 3-
cylinder; 4-
cuff; 5-
piston: 6-
spring split ring
Disassembly of brake drive pipelines. Remove (see Fig. 137) Pipeline Pipeline Nuts, 8, 9, 10, 12, 15, 16
remove brackets 17 hose mounting 1, 7, 11
and 14
and tee. 2
and 13,
Remove tubes and hoses. Damaged pipelines or nuts, as well as hoses replace new.
Before installing pipelines, it is thoroughly washed in denature, alcohol or gasoline and purged with compressed air. After installing a new front brake hose, make sure that at maximum angles rotation of the front wheels, the hose does not hide the wheel tire or for the suspension levers. Hoses of front wheels are interchangeable, rear - non-violent.
^ Filling the brake system with liquid and air removal from it. To refill the hydraulic drive of the brakes, the brake fluid "Neva" is used (TU 6-01-1163-78) or BSK (TU 6-10-1533-75). It is strictly forbidden to fill the system (or add the most slight amount) mineral oils, gasoline, kerosene or mixtures. It is not allowed to mix the brake fluids of different grades before refueling, as well as add the liquid of another composition to the one that is already in the hydraulic drive system. The use of brake fluid on a glycerin-based basis is not allowed.
Fill the pure glass transparent vessel with a capacity of approximately 0.5 l from 1/3 to 1/2 height;
remove the cork with the neck of the nutrient tank of the main brake cylinder and fill the liquid to normal levels;
Clear from dust and dirt valves for the release of air from wheel cylinders and remove rubber protective caps. Wash the hose for pumping the hydraulic drive to the air outlet valve head of one of any wheel, and the free end of the hose is lowered into a glass vessel. At the same time it is necessary to keep in mind - you can not press the brake pedal when it was removed. I would have one brake drum, Since the pressure in the system will scorch the pistons from the wheel cylinder and the brake fluid flows outward;
Strongly press 3 ... 5 times the brake pedal with an interval between pressing 2 ... 3 s and, holding the pedal in the pressed position, unscrew to 1/2 ... 3/4 turns of the valve, displacing by pressing the pedal in the system fluid Together with the air to the full pedal stop. Not releasing pedal, valve wrap. Repeat these operations for each wheel. When performing these operations in the nutritional tank, a normal fluid level should be maintained.
Remove air from the system can also be supplied to the air tank under pressure (for each pair of brakes) not more than 2 kgf / cm 2 when the pumping valve is open, without touching the brake pedal.
With normal gaps between the brake pads and the drums and the absence of a brake pedal, when pressed to it, the foot should not move more than 90 ... 95 mm of its stroke. At the same time, the leg should feel strong resistance (the feeling of the "tough" pedal). If the pedal moves further, but the "hard" pedal, then it indicates an increased gap between the pads and brake drums. In this case, it is necessary to make five to six sharp braking when the car is moving forward at a speed of 30 km / h and several sharp braking when moving by reverse.
^ Disassembly and assembly of parking brake drive. To remove the parking brake drive from the car:
Shake and remove from the finger of the expansion lever ^ 8 (See Fig. 133) Cable Tip 4, Become a bracket II. Fastening the shell to the lever of the rear suspension and remove the cable from the stop bracket. The same operations are performed on the second rear suspension lever;
remove five screws ^ 12 Cover mounts 3 Tunnel of the floor and remove the cable from the holes;
Unscrew four bolts 5 Fastening the parking brake lever to the tunnel and pull it out of the tunnel assembly with the cable.
To disassemble the parking brake lever, it should be fragmented and removed the fingers of the roller and sector, remove the lock
ring and knock the lever axis, then unscrew the button and remove the springs from the lever and the button rod.
Details of the brake drive must be thoroughly rinsed in gasoline and inspect. The main drive malfunctions may be an excessive cable extract, which is subject to replacement (provided that all three adjustments for the cable extract have been used), or the wear of the dog's tooth. The worn dog is replaced by a new one.
Assembly The actuator of the parking brake and the installation of it on the car is produced in reverse order. When assembling, all the driving surfaces of the drive (axis and cable roller) should be lubricated with graphite lubricant.
^ Adjusting the actuator of the parking brake. With proper adjustment, the parking brake must securely hold the car on the slope. The need to adjust the actuator of the parking brake in operation is caused by two reasons: wear of the friction pads of the brakes of the rear wheels and pulling and loosening the drive cable.
To adjust, you should install a car on the stand so that the rear wheels rotate freely, make sure the magnitude of the free move of the brake pedal in the correctness of the gaps between the pads and the brake drums of the working brake drive. The parking brake lever should be in the extreme lower position.
There are three methods for adjusting the actuator of the parking brake (see Fig. 133):
Change the cable tension by moving the bracket 6 lever forward. To do this, you need to release four bolts fixing the bracket to the tunnel and move the bracket along the oval holes forward. Tighten two bolts and check the course of the lever. The course of the lever must not exceed four or five snoring snapshots. After adjusting the bracket mounting bolts, tighten;
when using the entire length of oval holes, there is an additional cable stretch by rearranging the equalization roller to the next hole BUT in the lever, after which the operations specified in the previous paragraph should be repeated;
regardless of the cable drawing, the course of the expansion lever on the brake shield increases due to wear of the layers of the brake pads and the automatic shift to the drum.
With the wear of the brake linings by 50 ... 60% of their thickness and inability to ensure the efficiency of the brakes only due to the above adjustments, the spacer should be rearranged 9 Both brakes for a larger size. If, after rearrangement of the braking, the braking occurs when the lever is moved by two or three clicks, it is necessary to weaken the cable stretch using the lever bracket or the rearrangement of the equaline roller.
.. 126 127 128 129 ..
Tavriya Nova / Slavuta. Symptoms of wear chain timing
The main signs of the timing of the timing chain
Coarse and uneven work at idle (the result of changing phases of gas distribution);
Drying and rustling - especially at idle when the oil pressure is very low;
Maximum tensioner output (seen after removal of the lid);
Wear of stars teeth (seen after removal of the lid);
The corresponding parameters removed from the phase sensor (using the diagnostic tester).
Symptoms of malfunction - crash, base, rattling when starting a cold motor, caught fire with a cross-engine or the engine is simply not started.
Premature chain wear associated with defects production. A stretched chain can jump on several links. Hence the drop in the power, overclocking dynamics, an increase in fuel consumption, an increased noise of the engine and so on.
Inlet camshaft position controller malfunction. It should be replaced with a new optimized option.
Jumping tensioner. The chain tensioner hangs in the same position, as a result, the chain does not acquire normal tension.
Thermal protection for the oil pipeline. When replacing the talessed chain, it is necessary to replace the thermal screen, wrapped along the oil pipe to the turbine.
If you notice any of these symptoms should not be tightened with a car service trip, since the breakdown of the timing chain in some cases can lead to engine overhaul.
How often do you need to change the timing chain?
It all depends on the specific engine model. For each engine model, their rules are installed on the replacement of the timing chain. On average, the timing chain needs to be changed every 100 thousand km., But this is a strong average value, in some models it may be less, and others have significantly more. Most modern cars, while approaching the timing chain to the state requiring its replacement, give an error of the Endin check, so you will know exactly when it is time to change the timing chain.
Operating Tips and Replace Timing
In most new cars, the chain service life is less than the service life of the engine;
Pay attention to unusual noises, especially after launch;
Avoid an increase in the life of the oil replacement - the more often the better;
Normal oil pressure ensures the operation of the chain tensioner;
If you change the chain, then definitely replace the gears (asterisks) and guides - they also wear out;
When replacing the original components, or high-quality substitutes.
Removing the brake drum of the front and rear wheels. To remove the drum of the brakes of the front wheels (made in conjunction with the hub), it is necessary to remove the wheel, then, turning three bolts, remove the decorative cap of the wheel and remove the hub cap with a screwdriver and the hammer. After that, it is overpowering and unscrew the hub fastening nut and a slightly swaying the hub in the plane perpendicular to the axis, remove the brake drum.
With a significant development of the drum and the formation of the ledge, it may be difficult when removing the drum from the pads. To remove such drums, you should maximize them in the axial direction, and then the hammer blows along the outer diameter of the drum through the wooden spacer to be placed both pads. Apply shocks on the front drum follows in the vertical plane, and on the rear - in the horizontal.
To remove the rear brake drum, it is necessary to remove the decorative cap of the wheel, then unscrewing six drum mounting bolts to the hub, remove the drum from the pad. With difficulty removal, it is necessary to slightly knock the hammer along the flange of the drum and remove it from the pads as well as the front brake drum.
Removing the brake pads. With the help of special ticks or a pointed rod with a diameter of 4 mm, both tie springs of the pads are removed, then, lifting the end of the presser spring, remove the block.
Fig. 134. Fastening the friction linings of the brake rivets: O-block brake assembly; B-friction pad in the scan (dimensions 2.5 mm and (99.8 ± 0.1) mm are indicated after grinding)
When removing the rear brake pads, additional operations should be performed: to fray and remove the slot lever and the spacer. Removed brake pads are purified from dust and dirt. Worn friction linings replace new.
Installation of pads on the brake shield is performed in the reverse order.
Replacing the friction linings of the brake pads. In the absence of new pads with overlays, you can stick or glue new pads on old pads.
Before withcluding new linings, it is necessary to remove old overlays from the pad by heating the pads to a temperature of 300 ... 350 ° C or cut into them with chisel and clean the file. On the glued surface of the block, eight holes with a diameter of 4.4 mm are drilled, evenly distributing them throughout the area (Fig. 134). When drilling holes in the pads, the block should be enjoyed as a conductor. After drilling the hole of the core from the outer surface side (Fig. 135). Rivets are made of brass hollow rod. Instead of brass, you can use aluminum or copper rivets of the same form, but with a solid rod. For splitting rivets apply a mandrel (Fig. 136).

Fig. 135. The size of rivets and holes for it in the friction lining: A - holes in the lining; B - Rivet
Claimed lining can be securely operated to wear 80 ... 90% of their original thickness. However, the gluing process itself will be performed only in the presence of special equipment. For gluing linings apply glue glue 20-t.
Before gluing the lining, the surface of the pads is cleaned with a coarse abrasive circle to get a degreased rough surface, free from scale. The lining is degreased by rubbing the solvent. Then the glued surfaces of the blocks and the lining are mounted three times with glue, giving every time to dry up. Next, the pads are glued onto the pads and they are strongly pressed using a device consisting of a ribbon clamp and a slot screw. In this form, the pads are laid into the furnace, where it is kept at a temperature of 180 ... 200 ° C for an hour.
The glued overlays are kept in 2 ... 3 times greater force on the cut than the glued.
Disassembly and assembly of the main brake cylinder. When disassembling the main brake cylinder, it is necessary:
clear from dust and dirt one of the front and rear brake air outlet valves, remove the rubber protective cap and put on the front brake valve head hose pumping hose, omit the free end of the hose into a glass vessel and, removing the plugs with nutrient tanks, dig a brake fluid . The same to do with the rear brake;
disconnect from the main brake cylinder 12 (see Fig. 130) pipelines that go to the brakes and to the main cylinder tank;
finger 7 pedals 1 brake pedals, disconnect the pusher fork from the pedal and, turning two bolts 13 of the mounting of the main cylinder of the brake to the bracket, remove the brake cylinder from the jack;
secure the main cylinder in the vice or in the device, remove the protective cap 10 from the cylinder (see Fig. 131), byverting the locking bolts 18 and the plug 16, and then remove all the parts by observing the sequence specified in Fig. 131.

Fig. 136. Mandrel for spouting rivets overlay to the brake block (roughness of the surface of the working profile should not exceed 1.25 microns)
After the cylinder is disassembly, all parts and housing should be thoroughly rinsed with alcohol or fresh brake fluid, carefully examine and ensure in the perfect purity of the cylinder mirror and the working surface of the pistons, in the absence of rust, rice and other irregularities or increased gap between pistons and cylindrome.
If damage is detected on the cylinder mirror, it is necessary to eliminate them with wipes so that there is no liquid leakage and premature wear of the piston cuffs. When damaged, causing a significant change in the inner diameter of the cylinder, it is necessary to replace the cylinder body new. It is recommended for each disassembly of the cylinder to replace the cuff new ones, even if it looks in good condition.
It is also necessary to check the state of the protective cap of the cylinder and, if it is damaged, replace the new one. Check if the elasticity of the springs of the piston did not lose.
Before assembling, all the parts of the brake cylinder and the inner cavity of the cylinder are lubricated with castor oil or fresh brake fluid. The cylinder assembly is performed in the sequence, reverse disassembly, not allowing dust, fibers from fabric, etc.
After installing the main brake cylinder on the car and connecting the hydraulic pipelines, the system is filled with liquid and air is removed from it.
Disassembly and assembly of wheeled brake cylinders. To remove wheel brake cylinders of the front wheels, it is necessary to unscrew (Fig. 137) The connecting nuts of the pipelines 9 and 8, which come from the main brake cylinder 6 to flexible hoses 7 and 7, then remove the stakes / 7 fastening of flexible hoses to the brackets and unscrew the flexible hoses from the brake cylinders. Unscrew from the shield 3 (see Fig. 128) The brakes connecting pipe 6, then unscrew the two bolts 7 and remove the brake cylinders of the upper and lower from the shield. The same to do on the second front brake shield.
To remove the brake cylinders of the rear wheels, it is necessary to unscrew the pipelines of pipelines 15 and 10 (see Fig. 137) from brake cylinders and, turning two bolts, remove the cylinders from the shields.
Disassembly of the brake cylinder should be performed in the following sequence: remove the protective covers 7 (Fig. 138), remove the pistons 6 of the cylinder from the stubborn rings 4, with the help of a copper or wooden rinse, to knock out (only at extreme necessary) resistant rings 4 of the rear brake cylinder. The details of the disassembled brake cylinder are thoroughly washed, inspect and determine their suitability to further work.
The assembly of wheel brake cylinders is performed in the reverse order, taking into account the following instructions.
Pistons are installed only from the side of the cylinder with which they were turned out. Before assembling, all parts are thoroughly washed in alcohol or fresh brake fluid and bleed with compressed air. It is not recommended to wipe the parts with a rag or ends in order to avoid fiber sealing surfaces. Cuffs 4 (Fig. 139), pistons 5 and the inner surface of the cylinder 3 before assembly lubricate with castor oil or fresh brake fluid.
When installing the pistons in the cylinder, they should be screwed into the rings completely, and then unscrewed to half a turn, otherwise the pistons will not move into the threads and the drums are jammed. In this case, the slot on the piston support rod should be located parallel to the brake shield.
When assembling the cylinder, it is necessary to install the piston with the rings to the original position, for which the piston is for easy blows along the support rod so that the support surface of the rod has rested from the cylinder edge by 7 mm.
Disassembly and assembly of the wheel cylinder of the front brake are performed as well as at the rear brake. To ensure tightness, it is necessary to tightly tighten all the connections.
After installing and securing cylinders on the shield of the brakes, the assembly of the pads with springs and the installation in the location of the brake drum should be removed air from the hydraulic system.

Fig. 137. Pipelines of the hydraulic drive of the brakes. 1.7 - Front brake hoses; 2 - tee; 3 - washer; 4 - nut; 5, 8, 9, 10, 12, 15, 16 - pipelines; 6 - the main cylinder; 11 - flexible brake rear drive hose; 13 - tee; 14 - flexible rear left brake hose; 17 - bracket.

Fig. 138. Details of wheel cylinders of the front and rear brakes: 1 - the upper wheel cylinder of the front brake; 2 - washer; 3 - coupling; 4 - split spring ring; 5 - cuff; 6 - piston; 7 - Protective Case: 8 - Valve; 9 - Rear Brake Wheel Cylinder

Fig. 139. Wheel brake cylinder rear brake: 1 - hydraulic rod; 2 - protective case; 3-cylinder; 4 cuffs; 5-piston: 6-spring split ring
Disassembly of brake drive pipelines. Refused (see Fig. 137) Pipeline knitting nuts 5, 8, 9, 10, 12, 15, 16, remove the hose fixes 17, 7, 11 and 14 and 13 and 13 and 13, remove tubes and hoses. Damaged pipelines or nuts, as well as hoses replace new.
Before installing pipelines, it is thoroughly washed in denature, alcohol or gasoline and purged with compressed air. After installing a new front brake hose, make sure that at maximum angles rotation of the front wheels, the hose does not hide the wheel tire or for the suspension levers. Hoses of front wheels are interchangeable, rear - non-violent.
Filling the brake system with liquid and air removal from it. To refill the hydraulic drive of the brakes, the brake fluid "Neva" is used (TU 6-01-1163-78) or BSK (TU 6-10-1533-75). It is strictly forbidden to fill the system (or add the most slight amount) mineral oils, gasoline, kerosene or mixtures. It is not allowed to mix the brake fluids of different grades before refueling, as well as add the liquid of another composition to the one that is already in the hydraulic drive system. The use of brake fluid on a glycerin-based basis is not allowed.
fill the pure glass transparent vessel with a capacity of approximately 0.5 liters from 1/3 to 1/2 height;
remove the cork with the neck of the nutrient tank of the main brake cylinder and fill the liquid to normal levels;
clear from dust and dirt valves for the release of air from wheel cylinders and remove rubber protective caps. Wash the hose for pumping the hydraulic drive to the air outlet valve head of one of any wheel, and the free end of the hose is lowered into a glass vessel. At the same time, it is necessary to bear in mind - you can not press the brake pedal when at least one braking drum is removed, since the pressure in the system will scorch the pistons from the wheel cylinder and the brake fluid flows outward;
strongly press 3 ... 5 times the brake pedal with an interval between pressing 2 ... 3 s and, holding the pedal in the pressed position, unscrew on 1/2 ... 3/4 turns of the valve, pusing by pressing the pedal in the system fluid Together with the air to the full pedal stop. Not releasing pedal, valve wrap. Repeat these operations for each wheel. When performing these operations in the nutritional tank, a normal fluid level should be maintained.
Remove air from the system can also be supplied to the air tank under pressure (for each pair of brakes) not more than 2 kgf / cm2 with an open pump valve, without touching the brake pedal.
With normal gaps between the brake pads and the drums and the absence of a brake pedal, when pressed to it, the foot should not move more than 90 ... 95 mm of its stroke. At the same time, the leg should feel strong resistance (the feeling of the "tough" pedal). If the pedal moves further, but the "hard" pedal, then it indicates an increased gap between the pads and brake drums. In this case, it is necessary to make five sudden braking when moving the car forward at a speed of 30 km / h and several sharp braking when moving by reverse.
Disassembly and assembly of parking brake drive. To remove the parking brake drive from the car:
to fragrate and remove from the finger of the expansion lever 8 (see Fig. 133) The cable tip 4, bend the shell bracket II to the rear suspension lever and remove the cable from the resistant bracket. The same operations are performed on the second rear suspension lever;
remove the five screws 12 screw screws 12 of the floor tunnel and remove the cable from the cover;
remove the four bolts 5 fastening the parking brake lever to the tunnel and pull it out of the tunnel assembly with the cable.
To disassemble the parking brake lever, it should be fragmented and removed the fingers of the roller and sector, remove the lock
ring and knock the lever axis, then unscrew the button and remove the springs from the lever and the button rod.
Details of the brake drive must be thoroughly rinsed in gasoline and inspect. The main drive malfunctions may be an excessive cable extract, which is subject to replacement (provided that all three adjustments for the cable extract have been used), or the wear of the dog's tooth. The worn dog is replaced by a new one.
The assembly of the actuator of the parking brake and the installation of it on the car is produced in reverse order. When assembling, all the driving surfaces of the drive (axis and cable roller) should be lubricated with graphite lubricant.
Adjusting the actuator of the parking brake. With proper adjustment, the parking brake must securely hold the car on the slope. The need to adjust the actuator of the parking brake in operation is caused by two reasons: wear of the friction pads of the brakes of the rear wheels and pulling and loosening the drive cable.
To adjust, you should install a car on the stand so that the rear wheels rotate freely, make sure the magnitude of the free move of the brake pedal in the correctness of the gaps between the pads and the brake drums of the working brake drive. The parking brake lever should be in the extreme lower position.
There are three methods for adjusting the actuator of the parking brake (see Fig. 133):
change the cable tension by moving the bracket 6 lever forward. To do this, you need to release four bolts fixing the bracket to the tunnel and move the bracket along the oval holes forward. Tighten two bolts and check the course of the lever. The course of the lever must not exceed four or five snoring snapshots. After adjusting the bracket mounting bolts, tighten;
when using the entire length of oval holes, there is the possibility of additional cable tension by rearranging the equalization roller to the next hole and in the lever, after which the operations specified in the previous paragraph should be repeated;
regardless of the cable drawing, the course of the expansion lever on the brake shield increases due to wear of the layers of the brake pads and the automatic shift to the drum.
With the wear of the brake linings by 50 ... 60% of their thickness and the impossibility of ensuring the efficiency of the brakes only due to the above adjustments, the spacer strips of 9 of both brakes should be rearranged. If, after rearrangement of the braking, the braking occurs when the lever is moved by two or three clicks, it is necessary to weaken the cable stretch using the lever bracket or the rearrangement of the equaline roller.
Brake system design features
A drum-type brake mechanisms with floating (self-aligning) pads and a device for automatically maintaining a constant gap between drums and pads are installed on the car. To control brake mechanisms, the car is equipped with two independent drives: hydraulic from a foot pedal acting on all wheels, and mechanical from the hand-made handle operating only on the rear wheels.

Fig. 128. The front wheel brake: 1 - clamping spring; 2 - Changing Spring; 3 - shield; 4 - block; 5 - wheeled cylinder; 6 - tube, 7 - cylinder mounting bolt; 8, 10 - washers; 9, 13 - bolts; 11, 12 - Nuts
The hydraulic drive of the brakes consists of two independent systems for braking the front and rear wheels. In the main cylinder there are two independent cavities with two pistons and one Bacho with two hoses for nutrition of liquid of each cavity separately. Two independent systems are entered for security. If one pipeline is damaged, one braking system will not act, and the second will work.
The brake mechanisms of the front wheels (Fig. 128) are mounted on steel stamped shields that are attached to swivel fists with three bolts. Each brake has two working wheeled cylinders with the inner diameter of the upper - 22 and the bottom - 19 mm, each of which acts on one of the two pads.

Fig. 129. Rear wheel brake: 1 - wheeled cylinder; 2 - shield; 3 - shoe; 4 - clamping spring; 5 - nut pipeline; 6 - cylinder mounting bolt; 7 - washer; 8 - seal; 9 - nut; 10 - screw; 11 - expansion lever; 12 - Scroll Planck; 13 - pinch; a - slot when installing new pads; B - slot to rearrange the pads when wearing friction linings by 50%.
Brake drums are made of ductile cast iron and made together with the wheel bearings hub. The pads of the pads are made of asbocoic mass and glued to the pads with special glue with subsequent heat treatment. Pads are pulled by two springs. The shields are welded support racks to which the pads are pressed with special springs.

Fig. 130. Details of the hydraulic drive of the brakes: 1 - pedal; 2 - seal; 3 - bracket; 4, 13, 15 - bolts; 5 - spacer sleeve; 6 - sleeve; 7 - finger; 8 - plug; 9 - tank; 10 - Tank mount nut; 11 - flexible hose; 12 - cylinder chief assembly; 14 - Spring; 16 - pusher.
The wheel brake cylinder consists of stubborn split rings that are pressed into cylinders with an effort of at least 35 kgf. The rings of the rings are set parallel to the brake shield. Rings are inside a rectangular thread, according to which pistons with sealing cuffs are written. Width of the widget of the thread rings are more thread threads on the piston. The piston can freely move relative to the ring by 2 mm. A steel support rod pressed into the piston, in the groove of which enters the end of the rib pad (sock pads). A rubber protective case protects the inner surface of the cylinder from dust, water and dirt.

Fig. 131. Details of the main cylinder of the brake: 1, 3 - springs; 2 - cup; 4, 9 - sealing cuffs; 5 - spacer ring; 6 - piston rear brakes; 7 - Stubborn washer; 8 - piston of the front brakes; 10 - Cap; 11 - Carter; 12 - lock washer; 13 - fitting; 14, 15, 17 - gaskets; 16 - plug; 18 - Installation Bolt
The brake mechanisms of the rear wheels (Fig. 129) are mounted on steel stamped shields and are attached to the rear suspension levers together with the bearing housing by four bolts. Each brake has one working wheeled cylinder with an inner diameter of 19 mm, acting on both pads. Brake drums are made of ductile cast iron and attached to the hub with six bolts. The working wheel cylinder is attached to the brake shield with two bolts. Two pistons with cuffs and spring rings are inserted into the inner end-to-end cavity of the cylinder, and are structurally identical with the pistons of the front wheels and interchangeable with the pistons of the working lower cylinder. Brake pads, tie and clamping springs of the rear and front brakes are interchangeable.
The hydraulic drive to the brake mechanisms includes a suspension pedal 1 (Fig. 130), which is attached to the bracket with 3 bolt 4 with plastic 6 and spacer 5 sleeves.
The bracket of the pedal is also attached a braking signal switch. The pedal is connected to the main cylinder of the brake through the adjustable pusher axis and is kept in the initial position of the exhaust spring. An adjusting washers are installed between the pusher fork and the pedal, which compensate for the possible inaccuracy of the coincidence of the axis of the main cylinder of the brake and the axis of the pusher.
The main cylinder of the brake is attached using two bolts to the bracket, welded in the trunk.
The main cylinder of the brake (Fig. 131) consists of two movable pistons to create two independent front and rear brake systems, powered by a tank connected to a cylinder flexible hoses.
The pusher of the brake pedal is operating on the piston of the main cylinder. Sealed from the rear end is provided by a rubber cuff 9 placed in the groove on the piston. Floating cuff 4 is placed from the front end of the piston. When the main cylinder is in a non-working condition, the cuff is kept on contact with the piston spacer 5, resting to the installation bolt 18 of the piston.
When you click on the brake pedal, the piston moves forward and comes into contact with the cuff pressed against the piston of the spring 3. From now on, the message is stopped with a nutritional tank and the pressure begins to grow in front of the piston of the main cylinder.

Fig. 132. Hydraulic brake drive: 1 - paddling signal; 2 - nut; 3 - tip; 4 - nut; 5 - pusher; 6 - the main cylinder; 7 - spring; 8 - pedal
Cuffs have a cross section of a toroidal shape, the outer diameter of which in the free state slightly exceeds the inner diameter of the cylinder. If the rings are not exposed to the pressure of the brake fluid, then only the average outer belt rings comes into contact with the cylinder mirror, and the edges do not come into contact.
Under the action of the brake fluid pressure, radial and axial pressure causes rubber rings to expand, thus creating a seal with a cylinder mirror. The side of the cuff facing the piston is pressed against the cylinder mirror, and the opposite side, washed by fluid under pressure, retains its rounded shape and remains separated from the cylinder mirror even when moving.
The contact area of \u200b\u200bthe cylinder mirror is reduced to a minimum, and the rounded shape of the cylinder mirror provides quite satisfactory surface lubrication with a slide with a particularly low friction resistance. The cavities formed between the details of the main cylinder, at rest, have a volume that fully ensures compensation in the event of an expansion of the brake fluid.
The piston of the rear brake drive is driven by the pressure of the brake fluid, and the piston of the front brake drive is the pusher when the brake pedal is pressed.
The main cylinder of the brake has an inner diameter of 19 mm. There should be 0.3 ... 0.9 mm between the pusher and the piston (Fig. 132), which is provided by changing the position of the braking signal 1 and the design of the adjustable pusher 5 (forks and threaded tip). At the same time, the free stroke of the pedal is 1.5 ... 5 mm. The position of the pedal is adjusted as follows:
the change in the position of the switch is set to the pedal of 160 ... 165 mm, while the pusher 5 stroke should be 30 ... 31 mm;
the change in the length of the pusher is set to the gap between the pusher and the piston of 0.3 ... 0.9 mm. The control is carried out by measuring the gap between the focus of the pedal 8 and the plastic tip 3 of the braking signal switch.
With the wear of the pads and the drums, the stroke of the pistons of wheel cylinders increases and accordingly increases the stroke of the brake pedal. To restore the normal stroke of the brake pedal, it follows a smooth dry highway to carry out five of sharp braking, moving at a speed of 30 km / h forward, as well as several sharp braking, moving reverse.
Parking brake (Fig. 133) acts on the brake mechanisms of the rear wheels through the lever and the thrust. The lever swings on the axis in the bracket attached on the floor tunnel by four bolts. The bracket has oval holes that serve to move the bracket when adjusting the brake (cable tension). In the lever, there is an additional hole for rearrangement of the roller with a significant cable extract.
An additional slot with a smaller deepening is provided on the spacer. With the wear of the friction linings by 50 ... 60% of their thickness, the spacer planks are recommended for a larger size.

Fig. 133. Parking brake drive: 1-. 2 - Roller Equipment; 3 - floor tunnel cover; 4 - cable; 5 - Bolt mounting bracket; 6 - bracket; 7 - roller axis; 8 - Scroll lever; 9 - spacer plank; 10 - Returning spring; 11 - cable shell fixtures; 12 - screw; A - adjusting hole; B - slot to rearrange the pads when wearing friction linings by 50%.
Repair and steering adjustment
Removing and installing steering wheels. To remove the steering wheel, a screwdriver is drunk under the mandrel of the decorative button (for this purpose on the mandrel there is a sample under the screwdriver) and neatly, trying not to damage it, remove the button on the sound signal assembly from the steering wheel hub. Outwarked the steering wheel fastening nut over two turns and with the help of the puller (Fig. 119) shifted the steering wheel from the shaft, and then remove the puller, finally open the nut and remove the steering wheel.
Before removing the steering wheel from the shaft, you need to make labels on the hub and the shaft to set the steering wheel when assembling in the previous position. The label is applied only if the worm is not supposed to be disconnected with the steering shaft.
The steering wheel is installed in the reverse order. At the same time, the moment of tightening nuts fastening the steering wheel should be 3.5 ... 4 kgf.
Removal and installation of the steering mechanism. Before removing the steering mechanism, purified from dirt steering, shaft and nut

Fig. 119. Steering wheel puller: 1 - screw; 2 - traverse; 3 - foot; 4 - Stand; 5 - nut fastening of the steering wheel; 6 - steering wheel; 7 - Val.
Screw the nut 14 (see Fig. 118) of the fastening of the bump and with the help of the puller, the tower is scored from the shaft. The puller (Fig. 120) consists of two parts: housings 1 and nut 2. For the extension of the bump 3 it is necessary to fully screw the nut 2 nut 2, then start the housing / puller to the tower and the shaft so that the lower shelf of the housing 1 entered the ring groove on the nut 2.
Twisting nut 2 puller, remove the steering tower 3 from the shaft. Three bolts 15 and 16 are rejected (see Fig. 118) Fastening the cutter of the steering mechanism to the body (two of the trunk and one of the front wings), set the ignition key to the "off" position, then screw off the nuts from the support bolts 4 (rice 121) A steering shaft to the body and take out the bolts 3. Disconnect the plugging pads of the switch wires of the switches, are removed from the plugs of the ignition switch four wires and, slightly tilting the steering shaft, remove the shaft support from it along with the switches and the wire bundle.
Rim up the steering mechanism for the crankcase and remove the bay tree from the hole in the body, then, moving the steering mechanism forward, remove it from the trunk.
The installation of a renovated or new steering mechanism on the car is performed as follows.
Open (see Fig. 121) on the steering shaft seal / and lubricate the grate of the sealer compacting and supports 4 with the shaft 2, then the steering mechanism is set to the place, pre-checking the presence of the seal 13 (see Fig. 118) installed in A hole of the mounting bracket of the steering mechanism to the body.

Fig. 118 Steering. 1 - Carter assembly; 2 - shaft of the steering mechanism; 3 - ignition lock; 4 - shaft support; 5, 15 - bolts; 6 - contact liner; 7 - insulating sleeve; 8 - seal; 9 - steering wheel; 10 - ignition lock contact device; 11 - contact plate; 12 - terminal compound; 13 - seal; 14 - nut fastening nut; 16 - bolt fastening crankcase from under the wing; Wiring colors: A, D - red; b - orange; C - purple; E - Green.

Fig. 120. The puller for removing the tower of the steering mechanism:
A.-details of the puller; B-diagram installation of puller for removing the bump; 1-housing; 2 - nut; 3 - Cup

Fig. 121. Steering details: 1 - seal; 2 - steering shaft; 3 - Bolt fastening support; 4 - shaft support; 5 - support casing; 6 - screw fastening of the casing; 7 - the fastening of the switch; 8 - steering wheel hub: 9 - lever switch wiper and windshield washer; 10 - nut fastening of the steering wheel: 11 - locking ring; 12 - reference cover; 13 - Spring; 14 - contact ring; 15-gasket; 16 - button; 17 - mandrel; 18 - steering wheel: 19 - bolt fastening of the switch clamp; 10 - switch switcher turning; 21 - headlight switch lever; 22 - ignition lock; 23 - Spring sleeve; 24 - screw fastening of the ignition lock: 25 - bolt; 26 - contact plate; 27 - contact liner; A - risk on the protrusion of the ring of turning signs
Out (see Fig. 121) on the steering shaft 2 of the steering control of the support 4 assembly with the ignition switch (the ignition key must be set to "off"), switch and casing. Connect the support of the steering shaft of two bolts 3 to the struts of the instrument panel, wrapped in advance for two or three turns of the nut.
Two bolts 3 are wrapped and tightened (see Fig. 123) Fastening the steering of the steering mechanism to the body of the trunk. The gap formed between the crankcase grain and the bracket is chosen by adjusting washers 25, put on the crankcase mounting bolt 24, passed through the hole in the mudguard (under the front left wing) and finally tighten it.
Install the steering wheel on the shaft so that with the straight-line movement of the car, the smaller angle between the knaps of the steering wheel was directed down and is located symmetrically relative to the instrument panel. Fix the steering wheel, tightening the nut, the tightening torque is 3.5 ... 4 kgf "m.
The rotor pointer ring is necessary to set so that the protrusion A (see Fig. 121), on which there is a vertical risk, was located at the top. By moving the rolling of the shaft up to the steering wheel (the steering wheel needles must be arranged as described above), the protrusions of the shifter in the slot of the steering wheel are introduced.
Finally tighten the nuts mounting nuts 4 to the body. Connect the plug pads of the wiring of the switch wires. Connect the wires to the ignition lock (see electrical circuit, Fig. 140).
Check the operation of the rotor switches switch. To do this, turn on the rotation pointer to any side, turn the steering wheel to an angle of at least 90 ° and return to its original position, while the disset must work, and the switch handle return to the middle position. The same operations are performed in the other direction. Then check the operation of the anti-theft device, for which you need to install the ignition key to the "Parking" position, then remove it and turn it out to the steering wheel to the right or left until it is fixed, i.e. the ignition lock rod will enter the cutting rings fixed on the steering shaft Control. Re-install the key to the ignition lock to the "O" position (off) and, slightly turning the steering wheel to the right, turn off the anti-theft device.
Connect the tower with the shaft. At the same time, it should be noted that the sushka should be hoping so that the slot missed on the shaft coincided with the protrusion on the tank. Tighten the tip fastening nut (tightening the nut 16 ... 19 kgf).
Disassembly and assembly of steering shaft support (Fig. 122). Disassemble the shaft support in the following order: screw 11 casing fastening 6 to support 5, move the casing down, then, turning the bolt 10 of the clamp 9, remove the switch and the casing with the shaft support. The inner diameter of the plastic sleeve is measured in the shaft support, it should be 19.6 + 0.28 mm. If the bushing has significant wear and when driving, the shawls are felt in the sleeve, it is necessary to replace the bushing new:
remove from the support of the shaft contact plate 15 of the audio signal, set the ignition key to the "Off" position. Two screws 13 screws 13 fastening the ignition switch in the shaft support, then with a screwdriver blend the sleeve 14 into the ignition lock 12. The screwdriver should be administered from the plugs of the ignition lock plugs, i.e. below. By moving the castle up, take it out of the nest. (From August 1982, the fastening of the ignition lock was changed in the support. The lock is attached by two side screws 13 (there is no screw in the bottom of the screw of the screw). In addition at the bottom of the tide, a special liner is installed, which is fixed with a spike in the lower bore (instead of screw 13 ). To remove the ignition lock, you need to unscrew two side screws, and at the bottom of the support (where the spike is viewed from the hole) to drill a diameter of 5 mm to drive a spike to a depth of 4 mm, after which the lock is removed from the support, as described above.)
Collect the tip of the shaft in the reverse order with the following features:
the shods of the wiring harness 4 in the casing 6 are introduced, they are installed on the sleeve sleeve 9 with a bolt 10 and nut;
out on support 5 shaft steering casing 6 and switch. The switch on the shaft support should be installed until it stops into the protrusion so that the widest slot in the sleeve enters the pin. Fix the switch on the support clamp by installing the clamp as shown in Fig. 122:
move the casing 6 to the switch and fix it with a screw. To set the ignition switch to the support, you must set the key to the "off" position, drown the spring of the switch sleeve and install the switch to the socket until it fixes it to the spring, secure the lock with screws.
Disassembly, assembly and adjustment of the steering mechanism. When disassembling the steering mechanism, it is necessary:
unscrew the tube 14 (Fig. 123) of the oil-filling hole and drain the oil from the crankcase;
unscrew the bolt 4 of the steering wheel of the steering shaft 5 with the worm 9 and light blows of the hammer on the spline sleeve in the axial direction to discharge the worm with the shaft. Carter cover fastening bolts 10 and, carefully (in order to avoid damage to the gasket), lifting the cover, remove along with the lid 2 shaft 20 steering tower;
paste a screwdriver into the slot of the adjusting screw 12, unscrew the locking nut 11 and, byverting the adjusting screw 12 of the cover 2, disconnect the shaft 20 of the steering bump from the adjusting screw:
remove the puck 13 from the adjusting screw 12 and the gasket from the crankcase; Roll into one or two turns of the locking nut 7, then reflect the adjusting plug 6, remove the worm 9 together with the outer ring of the bearing, the bottom bearing separator and the extent of the upper bearing worm;

Fig. 122. The pillar of the steering shaft assembly: 1 - the protrusion on the ring of shutter of the turning indicator with vertical risk; 2 - lever of the engine wiper and windshield washer; 3 - Ring of rotation pointer: 4 - Wiring harness; 5 - shaft support; 6- Support casing; 7 - Turn switch lever: 8 - headlight light switch lever; 9 - clamp; 10 - Khomut bolt; 11 - screw fastening leather-ha; 12 - Ignition Castle; 13 - screw fastening of the castle; 14 - ignition lock sleeve; 15 - Sound Contact Plate
press out the outdoor curl of the upper bearing of the worm's top bearing, remove the cuff 17 shaft shaft and the worm shaft, discharge with a mandrel with a diameter of 26 mm (Fig. 124) from the crankcase 1 (see Fig. 123) the sleeve 15 of the tower shaft and using the puller or by the puller Bills on the lathe remove the sleeve 15 of the shaft shaft from the cover 2, when the wear of the roller's wear 22 is detected, to fly one of the ends of the axis 21 of the roller with a diameter of 9 mm to a depth of 4 ... 5 mm and with a mandrel with a diameter of 7 ... 8 mm , resting in the bottom of the drilled hole, knock out or discharge the axis of the roller. Then, using a round twist as a lever, remove the roller from the tower groove.
The steering assembly should be kept in the reverse order, guided by the following instructions:
when replacing the sleeves 15 shaft steering tower, pressed new sleeves deploy to diameter 23 + 0.050-0.080 mm. Cutter Carther Carter Press with a mandrel with a diameter of 23 mm (see Fig. 105, a). Moreover, the cushion shaft cuff is pressed by the spring inside the crankcase, and the worm cuff is a spring outward (see Fig. 123);
tightening Bearings Worm 9 adjust to the assembly and installation of the shaft of the steering bump with the roller in the crankcase. To do this, tighten the adjusting stopper 6 to the failure, then let it be released until the worm is free to rotate without axial backlash in bearings. Snap to the adjusting stopper of the locking nut 7 and make sure that the adjustment has not changed. The tightening of bearings is controlled by a measurement of the moment necessary to turn the shaft. Tightening torque must be 3 .. .5 kgf.
To ensure proper (not exceeding 0.05 mm) the gap between the head of the adjusting screw 12 and the washer 13 in the T-shaped groove of the shaft head 20 screw 12 and the puck 13 are selected to each other.
Between the walls of the T-shaped groove and the screw 12 with a washer 13 should not be a tangible gap and at the same time the screw must rotate freely from the fingertips. With a significant cutting screw or the groove of the head shaft head, you need to measure the dimensions of the groove and screw head and make a thickened calene washer (HRC 45 ... 50 hardness).
Steering Tower Shaft Collect the steering Carther cover is necessary in the following sequence: Washer 13 at the end of the adjusting screw 12, screw the screw into the threaded hole of the cover 2 so that you can unsubscribe the screw with a screwdriver. Then insert the screw head 12 with a washer 13 in the T-shaped groove of the head of the shaft of 20 bumps. Lightly lubricate the shaft with an engine oil for the engine and, rotating the screw with a screwdriver, enter the cylindrical end of the shaft of 20 steering bumps until it stops in the hole of the sleeve 15 in the lid, then screw the thread on the adjusting screw to the nut //.
To prevent damage to the edge of the cuff 17 shaft shaft with sharp edges of the shaft slot, it is necessary before installing the shaft in the carcaris to press the edge of the gland cuff using the device 1 (Fig. 125).

Fig. 123. Steering mechanism: 1 - Carter; 2 - Casel cover; 3 - Carter fastening bolt; 4 bolt terminal compound; 5 - shaft of the steering control; 6 - adjusting plug; 7, 11 - lock nuts; 8 - Bearing; 9 - the worm of the steering mechanism; 10 - bolt covers; 12 - adjusting screw; 13 - adjusting washer; 14 - plug; 15 - sleeve; 16 - seal; 17 - cuff; 18, 23 - washers; 19 - Nut; 20 - shaft of the bump; 21 - Roller axis; 22 - roller; 24 - bolt; 25 - adjusting washers.

Fig. 124. Mandrel for utilization of the steering shaft sleeve: 1 - mandrel; 2 - knob

Fig. 125. Device for pressing the edge of the cushka cuff when assembling the RU-Left Mechanism: 1 - fixture; 2 - cuffs; 3 - Carter; 4 - Tree Tower.
The collar shaft is installed in the middle position and, rotating the adjusting screw 12 (see Fig. 123), choose the gap in the engagement of the worm and roller. Uncordable engagement The worm with a roller must be within the turn of the worm at an angle of 45 ° to the right and left, counting on the middle position corresponding to the average position of the bump. This is ensured by adjusting the side gap in the engagement of the worm pair using the adjusting screw. The found position of the screw 12 is fixed, tightening the lock nut 11.
It should be warmed from an unnecessary tight tightening of a worm bearings, as well as from an unnecessarily small side gap in the engagement of a worm with a roller. This leads to an accelerated wear of a worm and a roller or to destroy their working surfaces. In addition, the "tight" steering mechanism counteracts the automatic stabilization of the front wheels and thereby worsens the resistance of the car, which is expressed in a bad road holding. With proper assembly and adjustment of the steering mechanism, the moment on the rim of the steering wheel, which is required to rotate the steering shaft, should not exceed 1 kg.
The shaft 5 of the steering mechanism with the worm 9 is connected so that the blur part of the worm is inserted into the shaft sleeve until combining the groove on the worm with the hole of the connective sleeve. Wrapped in the sleeve of the shaft bolt 4 (tightening torque 3 ... 3.5 kgf).
Disassembly and assembly of steering hinges. When disassembling the steering drive, it is required to fragrate and unscrew the bollar finger fastening nut (Fig. 126).

Fig. 126. Steering wheel drive: 1 - locknight of transverse thrust; 2 - Control of the transverse thrust (Left carving); 3 - transverse thrust; 4 - pendulum lever; 5 - nut; 6 - protective case; 7 - Stubborn washer; 8 - wire; 9 - tip; 10 - seal; 11 - plug; 12 - stop ring; 13 - Spring; 14 - pressure liner; 15 - insert; 16 - finger; 17 - swivel fist; 18 - craving steering left; 19 - Cup of the steering mechanism; 20 - Hole to rotate thrust when adjusting the wheel convergence; 21 - rotation limiters
Strong from the place of a ball finger with the help of a puller or to apply a few sudden blows with a hammer over the side surfaces of the swivel lever head. Then, if necessary, with light blows of the hammer at the end of the finger through the copper or aluminum rod knock out the finger of the tapered hole. Steering thrust can be removed together with the pendulum lever and the steering bump. To do this, it is necessary to remove ball fingers from the rotary levers from the heads (as described above), remove the bracket with the pendulum lever and remove the steering tower.
Then you should deploy a wire 8 and remove a protective cover from the ball finger with a stubborn washer 7. Remove a screwdriver with a bitumen mastic plug and compress the absorption ring 12, remove the plug II, spring 13, pressing insert 14, ball finger 16 with support liners 15.
Assembly of the steering drive lead in reverse order. Before assembling, rinse and check the status of the details.
If the head of the finger does not have deep traces of corrosion and wear, it can be used for further operation. A small black and rust can be derived by cleaning the head of shallow glass sandpaper with butter.
When installing new liners 15 on the fingers 16 it is necessary to check the end gap between them. The gap between the liners must be 1.5 ... 2.0 mm. When assembling, lubricate inserts with transmission lubrication, and also check the presence of a sealing washer 10 and the cleanliness of the groove under the lock ring 12. If the seal 10 is damaged, then it is replaced by a new one. In the absence of sealing washers of factory production, they can be made of 3.5 mm thick rubber sheets.
It should be paid to the state of the rubber protective cover, from the purpose of which further work of the hinge depends on the facility and correctness of the installation.
Disassembly and assembly of the pendulum lever. Disassembly is recommended to behave in the following order:

Fig. 127. Pendulum lever: 1 - pin; 2 - nut; 3, 4, 9 - washers; 5 - sleeve; 6, 12 - Brackets: 7 - pendulum lever; 8 - pin; 10 - axis; 11 - bolt; 13 - bolt (rotation limiter); 14 - locknight.
replete two bolts 11 (Fig. 127) fastening the pendulum lever to the suspension, separate the pendulum lever assembly with the bracket from the suspension;
with the help of a hammer and a beard, discharge from the pendulum lever 7 locking pin 8 from the opposite to the exclusion end. Holding the key behind the axis of the axis 10, unscrew the nut 2, pre-rapid it with it;
remove the axis 10 from the bracket 5, rubber bushings 5, washers and pendulum lever.
Before assembling, when installing new sleeves, it is necessary to clean the axis of the shallow skin from dirt, rust and burnt rubber. The sequence of assembly operations is as follows: Wear on the axis of the washer and the rubber sleeve, enter the pendulum lever into the bracket, and then insert the axis into the hole of the bracket, aligning it with the hole of the pendulum lever;
wear on the top of the axis the rubber sleeve, the support and locking washer, tighten and squeeze the nut. Tighten the nut is so much so as to ensure the axis turning into any side by 30 °. Tightening torque on the axis head 1 ... 2 kgf "m;
press in the combined hole of the pendulum lever with the pin axis and uninstall the hole from the pressing side at three points. When pressing the pin, the pendulum lever is necessary to install so that between the upper plane of the lever and the bracket there is a clearance of at least 2 mm (see Fig. 127).