How to make a warm salon on the field in winter. In Niva, is it all cold? How to close a small hole in the radiator (aluminum) glue or argon welding
The alteration of the stoves on the Niva 21213 is needed with their own hands in the work of the car heating system. Honey is not worth it, because uneven thermal regulation leads to stuffing glasses or icing. In any of these cases, an overview of what is happening on the road is worse. A malfunction causes wear of individual elements of the device or factory marriage.
Diagnosing a fault
The alteration of the stove supplied in the standard configuration is required, in preventive purposes. A lot of time the procedure does not take away, but will prevent many problems in the future. Driving experience suggests that the first strong frosts will submit the "health" of the device. The list of main weak points is as follows:
- the optimal range of operating temperature model 2121 from -5 to + 10 ° C;
- the inability to warm up the air in the cabin, if overboard -8 ° C and below;
- with increasing power increasing, the temperature does not increase;
- when driving on the II gear, the noise from the stove of the Niva becomes essential.
That is why it is better to adopt the necessary measures in advance. Alternative to the driver a bit. On the one hand, everything remains in its places. The heating device is used at minimum power. During soft winters, this is still tolerant, but with the arrival of real cold weather, the conditions will be unbearable. On the other hand, it is easy to spend several hours to correct the situation.
Further development of events is as follows. If the heating in the machine works on ½ power, you can restrict ourselves to insignificant repairs. The main thing is to make sure there is no noise and extraneous knocks, otherwise Niva 21213 should immediately go on a technical inspection.

The presence of unpleasant audio support speaks of the need to replace the device. The specialized trading network presents ready-made options for heating mechanisms for the Niva. If desired, it is assembled independently.
The second option is considered more preferable. With self-assembly there is an opportunity to literally personalize the stove. To fulfill the work, you will need to visit a specialized store or market for buying spare parts.
When buying, original parts or analogues are selected. The main thing is that they have a quality certificate. Otherwise, it is impossible to put them. We will not be able to rewrite the technical data of the vehicle in order not to exceed the parameters recommended by the manufacturer.
Technical subtleties of the procedure
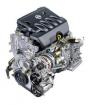
The effectiveness of the new heating system on the Niv will determine the cost of purchased parts, but their quality. The following elements will be needed for work: a car resistor, the heater of the eight and "snail". It is mistaken to believe that only "native" spare parts for the repair of the heating device are suitable. The main requirement is technical compatibility.

If doubts arise, the drawing of the heating system will make clarity. Further order of action looks like this:
- Cut a new planting hole. This is done neatly, because the quality of the preparatory process depends the reliability of the heating system. It is recommended to place the engine in the duct as low as possible, otherwise the device will rest in the hood. It is not worth allowing this, otherwise the stove fan will not last long.
- Smoothly output the power of the engine from the duct. To do this, use the outlet.
- The correct installation involves reliable engine securing in the air duct. After that, all the place of fasteners are compacted by car sealant. It is strongly recommended to miss anything. Otherwise, due to the vibratory loads and exposure to external factors, the stove connection scheme will be broken.
- Take 2 plates of stainless steel, which are adapted to the size of the nozzle and the upper opening. Measurements are held several times. Pedanticity will eliminate the need for subsequent revision.
- Using a wrench and screwdriver is removed by the manufacturer installed by the manufacturer. Use the tools must be carefully. One is enough of the careless movement so that 21213 requires expensive repairs.
- It is recommended to refuse another heating device in the machine. The second heat stove will not add, but the load on the "engine" will increase several times.
- The process of installation of a new air duct with the engine is completed.
The heating system of the new sample test is checked. It is recommended to smoothly switch modes. On each of them, the device must be at least 5-7 minutes. The task of the driver is to make sure that the system's work is not accompanied by outsiders and vibration.

As mentioned earlier, such a choice is not affected by the quality of the heating system. At the same time, autosleys make several reservations. Those who plan to use the VAZ stoves will optionally check the power system. Some modifications are different. That is why all actions are consistent with the drawings.
The use of the heater of the VAZ 2108 is allowed, subject to two recommendations. First, the landing socket is 1-2 cm more than the size of the device. Additional area will reduce the vibration effect. Secondly, the switch is set taking into account the specifics of the VAZ heating system. Less will have to tinker when minor system refinement is needed.
The ventilation system is updated in 1-2 hours, depending on the degree of wear of the engine.
If the "snail" installed by the manufacturer does not have traces of physical wear, it is only necessary to replace the "engine" heater itself.
Worse, if the factory setting of the Chevrolet model has production defects. The complete replacement of the device is recommended. This will save time.
The operation of the heating system determines the comfort and safety of the ride. The driver constantly tracks the efficiency of the system. In case of emergence of extraneous noise, it is necessary to urgently conduct a technical inspection.
Dear Conferences!
I have in Niva (Ser.) For some reason, it is cold, in its 21099 much warmer. Question: Everything is there or there is a secret.
If there is, tell me pliz!
Re: In Niva, is it all cold?
I'm not cold in Niva 2121, but the feeling of temperature for each person is different, so, maybe where it is warm for me, you will be cold. Another thing to compare the temperature in the cabin after some time of the engine operation, but unfortunately there is no regular thermometer in our cars.
Yes, really cold!
Even if you heat the interior (holding the stove in the 2nd position of the switch), then the side windows are always frozen. Especially rear side.
Good luck!
Sergey.
To be warm and did not freeze the glass
ONLY FOR OPERATORY NIVE. At one time did it. Removed the sealer from the air intake box in the engine compartment and tightly closed the slots in the hood over it. What gives: The heater has already heated air from the engine compartment, it does not fall into the air flow box, the snow does not fall, respectively, does not melt and does not freeze the glasses in the cabin. Of course, your engine should not ring anything (watch for cleanliness). Well, the main thing in the eighth family is initially noticeable heat than in all previous vazovski cars (it is certainly necessary to compare serviceable cars). At least the fact that the power of the heater motor from the chisel is 100 W in all the other only 20 - expect the difference + above the temperature of the coolant.
Modern Car-Audio design?! |
21 | 2000-09-19 |
2 zr-editor again |
18 | 2000-09-17 |
Gentlemen How will the 102nd winter start? Maybe there are some nuances? With its old eight problems do not have |
7 | 2000-09-19 |
Old diesel |
11 | 2000-09-20 |
How to close a small hole in the radiator (aluminum) glue or argon welding ??? |
12 | 2000-09-18 |
How many people have a liter 92, and to what level is the price increase for you? |
14 | 2000-09-18 |
|
In winter, it is very nice to go to the car and feel comfortable. And comfort is warm. In the field of Chevrolet the heater is installed, for heating the car's interior. The salon is pretty volumetric, therefore the heater is set with the calculation of the heating of the entire cabin. But it happens that the heater does not warm. It turns on, but only the fan works. And the warm air is absent. The cause of such a heater failure is either the failure of the heater radiator or the breakage of the heater itself. The cause of the radiator breakage can be determined by the smell of toosol in the cabin and at a slow decrease in the level of antifreeze in the expansion tank. Therefore, it is necessary to remove the radiator and replace it. We divide the process of repairing the heater for 2 stages: Removing the heater and replacing the heater radiator.
Thus, renovating the ventilation system, check for its performance.
Similar articles:
Categories
Popular
|
 Disconnect the traction of the heater dampers and the heater electric fan switch. The heater is repaired, if it requires that, and in the reverse order is installed in place.