Drawing on a summer theme for kindergarten. Drawing for children on the theme: Summer
The summer drawing can be the culmination of the past summer holidays and family travel season. It allows you to recall in your memory all the most significant events of days filled with sunlight and save them for the future, transferring them to a piece of paper.

Questions for conversation in a lesson on the topic “Summer”
In order to make it easier for children to spill out their memories onto the space of a white sheet of paper, they need to be configured accordingly, to open a channel to the source of imagination and creativity. Therefore, before we begin the actual drawing process, we conduct a focused conversation, during which we look for answers to auxiliary questions:
- Did the kids enjoy their summer holiday?
- Where does summer feel best - in the apartment or on the street? In the city or in nature?
- What natural phenomena indicate that it is summer outside?
- How can you tell by plants that it’s summer outside? Which plants have become the real symbol of summer?
- How do you remember this summer - fine, warm, or rainy, cloudy?
- Which days did you like best – sunny or rainy?
- What did you do when it was raining outside? Did you enjoy it?
- What event do you remember most?
- What colors would you like to depict a memorable event?
- Which colors are happy and which are sad?
- What colors best reflect the colors of a sultry sunny day? (We gradually lead the children to the definition of warm and cold shades).
How to conduct a lesson on the topic “Summer Drawing”?
Having smoothly guided the kids to think about the upcoming work, we give them a few basic ideas to start the creative process.
- Let's discuss where to start our drawing. (By defining what exactly we will try to depict).
- Many kids will want to depict nature. We tell you that such a picture will be called a landscape, and in French this word means “country” or “terrain.”
- We are thinking about where we will start filling the space of the white sheet. (From drawing the horizon line). We think in which case the horizon line should be lower (if we want to draw a lot of sky) or higher (if the main goal is to draw what is located on the ground). We explain that the horizon line is drawn thinly, with a simple pencil, and then erased.
- We are thinking about whether it is necessary to depict the sun, and if so, in what ways can this be done.
- We ask if someone will paint the forest. Usually there are a lot of such people in the group. Then we conduct a small master class on drawing trees: we gradually lead the kids to the fact that trees become thinner as they move up their trunk, that their branches are also thicker and more powerful at the bottom than at the top. We examine several ways to depict the deciduous crown and silhouettes of coniferous trees.
- Let's find out if someone will draw flowers. We think about how best to do this, remember that some flowers have a center and petals, and some do not. We recall the stylized image of flowers, explain to the children what the concept “stylized” means.
- We discuss how animals can be depicted - realistically or stylized. Children are very fond of stylized drawings; they manage to convey well the main characteristic features of the depicted object.
- For inspiration, we show the kids several reproductions of summer images by famous artists. We discuss how the master managed to convey the atmosphere of a summer day, how he distributed objects on his canvas, what colors he used, and what special techniques he uses in his work.
- Let's turn on some nice light classical music and begin the creative process. As we work, we approach the children and tell them if something is not working out for them.
- At the end of the lesson, we make sure to arrange an impromptu gallery, asking each child to tell about their painting and give it a name. We suggest doing a series of similar works yourself in order to preserve a more complete picture of the past summer days.
Children's drawings: ideas for inspiration
Children's drawing summer is always rainbow colors, positive energy and piercing sincerity.


Such a painting will not just decorate the room, it will fill the surrounding space with its positivity, attract attention to itself and create a benevolent atmosphere in the house.


 drawing summer 9
 Traditionally, at the beginning of September everyone tells each other about how I spent the summer. Someone writes an essay, someone shares gigabytes of photographs with friends... We suggest drawing or making stories with children that tell better than any words what they remember most about their summer vacation.
www.pinterest.com
... In the summer, my family and I went camping. We cooked food over a fire, admired the stars, spent the night in a tent and even... saw a bear! Don't believe me?
A similar craft will be an excellent postcard for grandparents, telling about emotions and impressions. The collage technique will help create an original story even for those who are not good at painting: we cut out photographs and fragments of pictures from magazines and paste them on colored paper.
 www.pinterest.com
... We also swam and dived to the very bottom of the blue sea with scuba gear. We wanted to see the Little Mermaid, but her friend whispered that there was no one at home and it was better for us to quickly surface before mom and dad started to worry.
This idea is good for an exhibition of children's works. You need large photographs of the child and a separately made scuba diving mask made of paper and transparent film (you can use a file). Next comes absolute, unfettered creativity: we draw the underwater world and its inhabitants.
 www.bloglovin.com
... Of course, we saw the world as beautiful and colorful, because in front of our eyes we had huge sunglasses, where everything that was happening was reflected as in a mirror.
On a separate sheet of paper we draw huge glasses with bright frames. The glass in them is mirrored, so the reflection in them speaks louder than any words. The masterpiece can be accompanied by a cover letter with an essay about how I spent my summer, if the child already knows how to write independently.
 www.facebook.com
This idea will be useful for those who like to craft from natural materials, who like to decorate their home with trophies brought from various travels. Pebbles, caressed by the sea and the sun, will help to depict a happy family on the beach.
Dear readers! Share your stories about summer vacations with the whole family in the comments. It's interesting to see what crafts your Creators and Travelers have made.
Evgenia Kirillova
Goals:
1. Using artistic words, show children how beautiful nature is in the summer.
2. To develop in children an emotional perception of the world around them, to form realistic ideas about nature.
3. Learn to reflect impressions and observations in artistic and creative activities.
4. Teach children the ability to select and reflect the color scheme characteristic of the summer season.
5. Encourage children’s initiative and independence in constructing the composition of the work and making additions to the drawing on the topic of the work.
Materials:
Landscape sheet
Wax crayons
Simple pencil
Preliminary work:
learning poems about summer, looking at illustrations about summer, collective viewing of the cartoon “Father Frost and Summer” directed by V. Karavaev, excursion to the forest (to a clearing, meadow).
Progress of the lesson.
1. Organizational part.
The teacher begins the lesson by reading L. Korchagina’s poem “Summer”:
If the wind blows warm, even from the north,
If the meadow is full of daisies and clover lumps,
Butterflies and bees are circling over the flowers,
And a puddle turns blue like a fragment of the sky,
And the baby skin is like chocolate...
If the garden bed turns red from strawberries -
A sure sign: it has arrived...
Children. Summer.
Teacher. You are right, summer is a wonderful, generous time of year. Just recently we met one character who didn’t know what summer was. I will remind you of this story. In the far cold North lived Santa Claus. When winter came, he hit the road to help nature cover itself with fluffy snow, freeze rivers, and decorate the windows of houses with patterns. Santa Claus spent his time usefully during the cold season. And he especially loved the New Year holidays - that’s where there was a lot of fun, noise and joy. Together with the kids he led round dances, sang, danced, played, and then presented gifts that he lovingly prepared for each child. Once during the New Year's holiday, one of the children asked Santa Claus: “Will you come to us in the summer?” Santa Claus became curious, what is summer? The children were surprised that such an old grandfather had never heard, much less seen, summer, and they sang him a song about summer.
(An audio recording of the song “Song about Summer” by Yu. Entin to music by E. Krylatov is played)
Teacher. Since then, Santa Claus has lost peace, he really wanted to see summer with his own eyes. And he decided to come visit the kids not in winter, but in summer. And he set off. What happened to him?
Children. He became very ill in the heat and began to melt.
Teacher. Right. Santa Claus feels bad when it is very warm, he needs cold. Then the children figured out how to help their beloved Frost. They put him in an ice cream crate. And they began to take him in it to different places: to the forest, to a meadow, to a river, so that Santa Claus would finally know what summer is. And then Santa Claus returned to his North to come to the children only in winter. Guys, how do you imagine the image of summer, its portrait?
Children's answers: In a colorful sundress, with a wreath of flowers on her head, ruddy, cheerful, with freckles, barefoot.
Teacher. Where do you think summer lives, where does it go when winter comes?
Children's guesses.
Teacher invites children to listen to B. Sergunenkov’s story “Where does summer hide?”
Once upon a time there was no winter on earth, but only summer. What a wonderful time it was: the earth was soft as feathers, the water in the river was warm, the trees grew all year round, did not shed their leaves and were forever green!
This continued until one day winter took offense.
“What is this,” he says, “all summer and summer, it’s time to know your conscience.”
Winter has begun to crowd out summer, and where should summer go? Summer rushed into the earth, and frost bound the earth. It rushed into the river - the river was covered with ice.
“I’m dying,” he says, “I have nowhere to go.” Winter will kill me.
Here the buds on the trees say to the summer:
Come to us, we will hide you.
Summer hid in the buds of trees, sheltering from the cold winter.
Winter has gone. The sun shone, the streams began to gurgle. The buds on the trees swelled and opened. And as soon as they opened, it burst out and summer rolled out into freedom. Summer has come to earth...
Teacher. People rejoice and say: “Summer has come.”
Today we will draw summer. What color paints do you think you will use? What color is our summer?
Children. Summer is colorful.
Physical education lesson “What color is summer?”
Summer... Summer... Summer...
What color is it?
Come on, tell me, come on, describe it!
Clap your hands.
Delicate green, like a grasshopper in the grass.
Yellow, yellow, like sand near rivers.
Blue, blue, the most beautiful.
What a summer!
Jumping in place.
Summer... Summer... Summer...
What other color?
Come on, tell me, come on, describe it!
Clap your hands.
Bright, hot, like a dashing dance!
Starry, starry, like a night fairy tale!
Light, early morning, sweet strawberry.
What a summer!
Squats.
Summer... Summer... Summer...
What other color?
Come on, tell me, come on, describe it!
Clap your hands.
2. Practical part.
The teacher offers to draw pictures and then give them to Santa Claus.
3. Summary of the lesson.
When examining finished works, the teacher pays attention to the color scheme, combination of shades, creation of a composition, and observance of proportions.
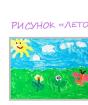
Here's what kind of work we got.


In this lesson we will look at how to draw summer with a pencil step by step. All stages and techniques for drawing summer with a pencil are shown. This lesson contains a video and pictures from it in sequential order, everything will also be explained. If your internet allows it, be sure to watch the video; it shows the entire drawing process, how to hold the pencil and what movements to make with it. If you are watching from a mobile phone, then go straight to the images - step-by-step drawing of summer. how to draw a village in summer.
This will be a small drawing, take a thick sheet of paper, a landscape sheet for drawing will also work. You can mark the size of the drawing with a pencil so that there are clear edges, but the author separated it with paper tape. First of all, draw the horizon - this is a horizontal line in the middle of the sheet, then we start drawing the house.
Draw a mountain in the distance and a silhouette of trees and greenery on the right with uneven and knotty curves. Draw a country road near the house and windows in the house itself. The lines should not be bold - this is a sketch. To view a larger image, click on the picture.

On the left, draw silhouettes of trees and a fence.


Take a pencil as you usually hold it and draw the branches, they are darker than the foliage, then use the same method to draw a second peeking tree on the edge of the roof.

Place an auxiliary sheet of paper on the edge of the house and shade the part in a light tone to the silhouette of the bushes on the left. Blend.

Using the curl method, draw dense bushes on the left.

Draw the grass near the house.

Paint over the windows and doors of the rural house, make the fence stakes bold, draw the branches of a dry tree in the center of the picture (you can make it alive, draw a woo), then start drawing the foliage of the trees on the right.

On the left, where you just drew the foliage, draw tree branches between them. Draw the grass from the edge of the country road on the right, as well as some grass on the right and blend it out. Place dots on the road to show its unevenness.

Here is the finished drawing of summer.


If you go over the edge, you can take a ruler and place it on the edge of the design and go over it with an eraser. Then the edges of the picture will also be smooth.

Depicting summer on paper and at the same time conveying its warmth, colors and mood in a drawing is not so easy. But if you make the strokes consistent, add important elements, you can get a beautiful picture. We will look at how to easily draw a picture on the theme of summer below.
Summer sun
Where does summer begin? Of course, from the warm sun. Therefore, let's start with it. However, we can observe the sun at any time of the year, so we will add the inscription “Summer” to the picture. Let's take a checkered sheet of paper and multi-colored pens.
Checkered paper is optional. You can also use the regular landscape format. But it is better to practice on a notebook sheet, as difficulties may arise with writing letters. Let's get started:
All that remains is to paint over our drawing. To do this, we will use multi-colored pens. Try to choose the brightest shades. For the sun we use yellow, leaving the handles unpainted.
Drawing on the theme of the summer of my dreams
In the summer, you really want to go to the beach, sunbathe, relax by the sea and soak up the warm sun. If this is a dream summer for your child, then we suggest trying to draw a simple picture with a beach. For drawing we will use a black felt-tip pen and multi-colored crayons. How to create a drawing of the summer of my dreams:
- Let's draw an arc on the right side of the sheet. This will be a beach with sand.
 On the other hand, we draw a wavy stripe. We will use it to indicate the location of the water.
 - Let's install an umbrella on our beach. We draw a large arc. We connect its ends in semicircles so that sharp corners are formed. We draw stripes from each corner to the top of the umbrella. Let's draw a stick on which the upper part of the umbrella is attached.

- Place a beach towel under the umbrella. We draw two parallel wavy lines and connect them at the ends.
- What else can you add to the work? You can make waves on the water. We will put many dots on the beach so that the land becomes like sand. Let's decorate the towel with stripes and draw the sun in the sky.
- Now this summer landscape needs to be painted. Let's make the stripes on the umbrella white and red. Red can also be applied to a towel.

- To do this, use blue and green. For sand, you can use yellow, and to make it look more natural, add some orange touches.
All that remains is to paint the sky, the sun and the rest of the towel. If desired, you can show birds flying in the sky. , we already know.
That's all. We successfully completed this simple drawing.
How to draw summer with a pencil for children
The following drawing may seem complicated to you, but it is not. Using simple lines and shapes, you will create an interesting painting.
For drawing you will need: an eraser, a set of multi-colored pencils, paper, a thin black felt-tip pen and a simple pencil with medium hardness.
Let's start drawing:
- The drawing sheet must be positioned vertically. It will be in the picture.
 In order for the walls of the house to be positioned correctly, you need to do a few simple steps.
Using a simple pencil, draw a line for the horizon. Mark the point in the center where the projection of the house will intersect. We sketch out the contours of the house, leading all auxiliary segments to the previously marked point. Refer to the sample. - We apply windows to the house. We arrange them in the same way as the walls of the house.
 We lay a winding path near the building. It should go to a point on the horizon.
 - Sketching the silhouettes of trees. Let’s immediately detail them and draw the outlines of the crowns. To add more variety to the foreground, you can add some mallow buds that are opening.

- We outline the sketch with a black felt-tip pen. Erase all auxiliary lines with an eraser. Let's move on to coloring.
- We paint the path brown. We make the grass in the area where the shadow from the trees falls dark green, and shade the rest of the space with a light color.
 The tree trunks need to be made dark brown, some places can be made lighter using an eraser.
 - Let's make the cat near the house red. The remaining unpainted parts in the foreground can be painted over with a delicate light green shade.
Detail the shadows with a dark color. To make the shadows more natural, you can add a brown tint.
- The array located in the background is colored blue and green. The leaves can be given a little gray tint. Let's decorate the sky blue. Use pink to color the mallow and yellow for the center.

All that remains is to paint over the walls of the house and the summer pencil drawing can be considered completed. We use a brown pencil for these details, and a gray pencil for the foundation and windows.
Drawing a beautiful summer landscape
Another example, based on which you can understand how to draw summer with multi-colored pencils for children. In this drawing we will use the same tools that were required in the previous lesson. Let's move on to the creative process:
- This time we place the sheet horizontally.
 On the right side, use a ruler to draw the horizon line. We don’t bring it to the opposite side. Draw a circle closer to the edge of the sheet.
 - There will be a silhouette of sushi on the right. We draw wavy lines from the horizon that will become the edge of the water. It will take three lines to make waves in the future.

- At the bottom right we will draw an umbrella. We have already discussed how to do it above. Under the umbrella you can depict a beach chair.
On the piece of land that we have placed in the background, we will draw several lines; later they will become.
- The sketch of the summer landscape is ready. You can start coloring. We will paint the sun with a light yellow color, you can even use a cream shade. We make the light that comes from the sun bright yellow. Shade the rest of the sky blue.
- The edge of the water should be painted dark blue. The closer the water gets to the edge, the lighter it needs to be made. We draw the horizon near the sun and water with a dark blue pencil. We leave the two strips of water near the shore white and add gray strokes at the end.

- Use a brown pencil to paint over the umbrella. We highlight its folds. We use the same shade for the chair, but you can also add cream stripes to it.
- In the background, near the trees, we paint over the dense vegetation with green. We highlight some areas with a black pencil. We paint the tree trunks with brown.
We draw the foliage of the palm trees, giving it a jagged appearance. To make the leaf structure clearer, use a thin black pencil.
Gouache painting
So, we have already considered several options for drawing summer and even depicted a picture on the theme “the summer of my dreams.” Now let's try, together with the site, to create a stunning, realistic summer painting using gouache.
In addition to paint, we will need thick canvas embossed paper, brushes of different sizes, masking tape and water. Let's get started:
- Attach the sheet to the work table using masking tape. This will help you stay within the picture. Clean edges will allow you to insert the finished landscape into a frame.

- Make a preliminary sketch using a simple pencil. This option is suitable for those who are going to paint for the first time. In the picture we will place several bushes, one of them will be in the central part.
You can depict bushes instead. Let's draw a river and indicate the location of the land.
- Let's move on to paints. We arm ourselves with a flat, wide brush. Apply white gouache to the top of the sheet. Mix blue and white and cover the sky. The closer to the horizon, the lighter the color of the sky. You can add a little white tint below, this will help create a beautiful, smooth transition of paint layers.
- Let's draw clouds. We do this with white and blue paint. First apply a white layer in neat circles, add blue on top, apply white again, and so on until you have formed air clouds of the desired size. We place clouds all over the sky.

- Let's do the bottom part. Here we need gray and different shades of green. Using green paint we depict silhouettes. Fields located in the background can be painted with a mixed green and yellow tint. On the left side we’ll paint one of the bushes a dark shade. Let's detail its foliage. We add a piece of land near it.
- Now let's draw water. We draw blue paint near the bush on the left and draw water on the right. Leave an unpainted area in the center of the sheet. This will be a bush. You can immediately give it an outline.
Add some white and dark flowers to the water to create shimmer. It is imperative to depict the silhouette of a bush that appears in the water. To do this, we use green gouache, it is advisable to make it darker, for this you can add a little black to the base.
- We draw the second shore. Mix green and yellow. There will be several land areas here. We continue to draw land covered with grass in different shades of green. Leave a few unpainted areas so you can add a few more small bushes later. Mix yellow and white. Draw a winding path. The sides of the path should be decorated in a brown tone.
- To make the grass look natural, you need to draw small stripes across all areas of the land. This can take a lot of time, so just put paint on the tip of the brush and make a lot.
- Now it's time to work on the gaps that we left for the bushes. We draw the smallest ones, which are located on the left side. We do this with one color, but leave light areas between the leaves. Using gentle pressure, we shape the central bush and the bush on the right. Mix green with yellow, place light areas on the vegetation.
The picture is ready. If you wish, you can complement the landscape with plants using green, as shown in the sample.