Preparing a car for painting with your own hands: stages, work order. Do-it-yourself car painting
Do-it-yourself car painting
Can you paint your own car? This question was probably asked by more than one car owner, who at least once was forced to contact a car body shop.
Sometimes the cost of painting an old car exceeds the market value of the car itself.
In order to fully answer this question, it will be necessary to present such a mass of information that it would require the publication of at least a full-fledged textbook. Therefore, this article is only a brief step-by-step instruction for painting a car with your own hands.
Disassembly
First of all, you should dismantle those parts that either will not be painted at all, or you need to work with them separately. For example, a car is produced only when it is withdrawn.
It is imperative to remove door handles, moldings, exterior mirrors, rubber seals on the doors, an antenna (if any), fenders and mudguards, sills and arches, front and rear lights - in general, everything that will not be painted.
You should also carefully, without breaking, remove all kinds of emblems (“nameplates”). Carefully pulling them towards you, you need to cut the double-sided adhesive tape on which they are glued with a sharp spatula. In the future, the remnants of adhesive tape from the body are easily removed with a special rubber roller installed in the drill chuck.
Removing chips and scratches
Deep chips and scratches should be removed, albeit together with old paint and primer, down to metal - in other words, sanded with sandpaper. Moreover, the places most prone to gravel impacts can be immediately treated with coarse-grained paper - PP - 80-100.
You might be wondering how to remove a chipped windshield? Read the details
Sandpaper should be applied to the bar. However, for workshops this is the last century, since the sandpaper is glued with Velcro either on a special hand tool or on the sole of a grinder. Just sanding the chips, pressing the sandpaper with your fingers, you will make “pits”, and the car after painting will look like a crumpled samovar.
Sometimes when removing chips, dents are revealed on the parts. In this case, after cleaning the surface to metal and processing, they are leveled with an auto-filler, after which they are applied.
Priming and grinding
Priming, regardless of which layer of soil is applied, must be preceded by degreasing the surface with special means such as Antisilicone. Only those areas where the old coating has been removed to the metal should be primed.
Areas cleaned to metal must be primed, sometimes two or three times, until small irregularities are completely eliminated. In order to ensure a smooth (without steps) transition between the primed surface and the one on which the old coating remains, the boundary is “sanded”, i.e. smooth. In this regard, it is very convenient to make borders in places where the surface of the part forms “ribs” - the transition is smoothed out more easily.
In order for the fresh primer to qualitatively “adhere” with the old coating, it is pre-sanded with P 400 abrasive.
The last coat of primer is sanded either by hand with PP 600-800 abrasives or by machine with P 400-500 abrasive.
Old paint is also sanded, or matted, otherwise the fresh coating applied to the gloss will soon begin to peel off.
The choice of abrasive depends on what materials you have to work with later. Acrylic paints are able to “fill in” larger scratches resulting from sanding. In most cases, cars are now painted with nitro paint, which is varnished, or with protective paints like. It is used to protect the car body from environmental influences.
If the car has a three-layer, or pearlescent coating, then it is better to forget about self-painting the car - without certain knowledge, skills and professional equipment, you will inevitably screw up.
How to make soundproofing a car with your own hands? right now!
For surface preparation for painting, see the following video:
Masking or sticking
The purpose of masking is to prevent paint and varnish from getting onto unpainted surfaces. The main materials for it are a covering film and masking tape.
In order to avoid paint getting into the gaps between the doors and other parts, a special self-adhesive foam roller is used.
In those places where it is necessary to protect the rubber bands of the glass (windshield, rear, "windows"), a special tape is used that allows you to bend the rubber band from the surface or you should put a piece of wire of a suitable diameter under it. This is done in order to ensure that the paint gets on the area of \u200b\u200bthe body covered with an elastic band. However, sometimes (especially if it is necessary) the glass has to be cut out and glued again after painting.
When gluing, make sure that the film is in a taut state. The boundaries between the old and new paintwork are usually made in inconspicuous places - at the corners of the thresholds, in the gaps between the hood and fenders, etc.
Car painting equipment
The technology of car painting requires the use of not only high-quality materials, but also the use of professional equipment and tools.
So, what is needed for high-quality painting of a car? We list the main points:
- Spray booth with good ventilation (hood). In addition, the chamber must be equipped with heaters and have good lighting.
- . Its characteristics (capacity, outlet pressure, receiver volume) must ensure uninterrupted, without pressure surges, air supply. Moreover, these characteristics must correspond to the parameters of the spray gun.
- Air purification and dehumidification system. Condensed moisture that gets into the paint will tear the paint layer.
- Paint gun. Professional spray guns allow you to minimize the risk of streaks and other defects, but their cost is quite high - from $ 400.
- Protective overalls and mask.
In addition, to carry out work with individual elements, you will need devices that allow you to fix the removed parts, for example, a bumper or fender.
The use of tools and materials that are not professional will never lead to the desired result. For example, painting a car from a spray can:
- firstly, the pressure will constantly change, which will make it difficult to apply paint in an even layer. In addition, the jet of paint (or torch) is not regulated in any way;
- secondly, such paints cannot be polished after drying;
- and finally, the coating will be unstable.
Such “original” methods, like painting a car with a roller, should not be considered at all - the look of the car will be sloppy and repulsive.
But if you have the opportunity to use good equipment, it is still better to practice on individual parts in order to learn how to work with a gun.
With small scratches on the paint, a wax pencil will help to cope
How to use a spray gun correctly
It takes practice to learn how to use a spray gun.
First of all, you need to learn how to hold the gun at a certain distance and at the same angle to the part.
Chaotic movements should be avoided, and paint should be applied in even stripes, partially overlapping them. You should also learn how to adjust the torch and determine the viscosity of the paint by eye.
It is very important to learn not to stop the movement of the hand with the gun - the paint will immediately flow.
Paint layers need to dry. The paint applied to a poorly dried layer will flow, and will subsequently peel off from the “dry” layer.
How to paint a car with your own hands, see the following video:
Painting individual elements
Painting of plastic parts
The biggest parts are the bumpers. To work with them, you need to remove them and place them on a special stand. Very often, the lower part of the bumper is not painted in the color of the car and can be detached from the main one. It is also required to remove the parking sensors and the radiator grill, if it is made in one product with the front bumper.
The part that is painted in the color of the car is subjected to the same treatment as metal parts - it is ground, primed and then painted with the same materials as iron. Similarly, painting the exterior mirror of a car is carried out.
Unpainted parts of the bumper can be painted black with special paint for plastics. True, the coating will differ from the factory one - it is very difficult to calculate the viscosity of the paint and pressure in order to achieve an acceptable surface roughness.
Painting car sills
The difficulty in painting thresholds is that the car must be hung out so as to be able to work with a gun. To do this, you need to either put it on stands or lift it with a lift. In the latter case, you will have to paint the thresholds not in the chamber, which is risky in terms of dust sticking, and complications may arise with warming up the room.
However, a black anti-gravel coating is often applied to the thresholds, without then painting them to match the color of the car.
You can learn about the ceramic coating of the car body from
Painting with a transition
This method of painting is used in cases where it is difficult to select the desired shade.
For example, you want to paint the front fender of a car, but you get a strong color contrast compared to the door and hood. In this case, the latter are also partially painted, and as they move away from the wing, the paint layer disappears, and even further away, only a layer of varnish remains. The transition formed by layers of old and fresh varnish is subsequently polished.
Also, transition painting is used when repairing the rear fenders, because it is impossible to paint the rear fender of a car separately, since there is usually no such part - iron is stamped immediately with roof racks and sills. The transition in such cases is done in the narrowest places - on the roof rack and on the threshold.
Of course, this is a simplified description of the process. In fact, even sanding during transition painting has its own subtleties. For example, that part of the part where it is supposed to apply only varnish is polished with one abrasive, while the places under the paint coating with another. A special solvent is added to the paint at the transition point, which makes it possible to achieve an imperceptible "stretch" of the color.
How to polish a car after painting
Immediately before polishing, it is required to remove small irregularities (dust particles, stuck insects, etc.) with P 2000 sandpaper.
It is done using a polishing machine with a foam disk attached to it. The work is carried out in three stages - with pastes of various sizes of abrasive grains. Each paste corresponds to a polishing wheel of a certain color. After each stage of work, the remaining paste should be thoroughly washed off.
Video on how to properly polish a car after painting:
Polishing should be done, remembering that you can overdo it and remove the varnish from the paint, especially at all kinds of corners - the "ribs" of the hood, doors and wings.
Full car painting is a service, the cost of which in auto repair shops varies between 30-50 thousand rubles - the price, for most of us, is unbearable. Painting work is a complex technological process that requires proper experience and the availability of special equipment, however, you can paint a car, with strict observance of the instructions given in this article, on your own.
From this publication, you will learn how to do it right at home, while saving a considerable amount of money, and getting a result that is not inferior in quality to salon painting.
How to paint a car at home
In your garage, you will need a spray gun and a compressor. This is not cheap equipment (the initial cost of a high-quality spray gun is 30-40 thousand rubles), and it is irrational to purchase it for a one-time job - if you do not plan to do this in the future.
It makes sense to take a compressor and which varies in the range of 400-800 rubles per day, depending on the model of equipment. We will immediately warn you that it will not work to paint a car at home with the help of spray cans - this approach is applicable only for local painting of individual body surfaces.
Requires proper selection of materials. Paints that dry at elevated temperatures immediately disappear, since it is impossible to provide the proper conditions for working with them in the garage. We do not recommend trying to paint a car at home with metallic compounds - the complexity of painting when using them increases significantly.
When choosing how to paint a car, give preference to one of the following options:
- "Synthetic" melamine alkyd enamels are one-component formulations that dry at room temperature. Synthetic paint already contains a hardener, so there is no need to perform additional manipulations with it. Such compositions give a high-quality coating with an expressive shine, but they dry for a long time;
- Acrylic paints are two-component compositions that are resistant to wear during operation (not subject to fading under the influence of ultraviolet rays). A kind of "cocktail" is prepared from acrylic paints - a hardener is added to the material before painting, after which the composition is diluted with a solvent and brought to the required consistency.
To . It is impossible to work outdoors, since there is a high risk of dust and dirt getting onto the surface of the body during the painting process.
We recommend painting work in the garage, having previously equipped an effective lighting system there - you will need powerful LED lamps, located at regular intervals around the perimeter of the room. In this case, you will be able to see and eliminate emerging defects and smudges. Carry out a wet cleaning in the garage to remove all accumulated dust from the room, if possible, blow the floor with compressed air.
Preparing the car for painting at home begins with washing the vehicle using car shampoo and cleaning the body of oil stains with a solvent. Next, the following parts are dismantled:
- front and rear bumpers;
- all outdoor optics;
- antennas;
Dismantled parts are washed, cleaned of rust and stored in a convenient place.
Puttying defects and priming the surface
Before defects and pockets of corrosion, otherwise all subsequent efforts will go down the drain. Make a visual inspection of the body for chips, dents and cracks, and circle any damage found with chalk.

Further with the help of a chisel and coarse sandpaper. Do not intentionally increase the size of the cleaning, the paint stripping area should correspond to the size of the damage. Make the transition between metal and paint as smooth as possible so as not to complicate the puttying process for yourself.

Upon completion of the stripping, dust is removed from the body with a damp rag, the treated areas are wiped with white spirit and puttying work begins. We recommend using polyester-based synthetic putty compounds, they have the highest mechanical strength after curing.
For applying putty, two types of spatulas are used - standard metal and soft rubber. Initially, add the hardener included in the kit (proportions according to the instructions) and stir the material until a homogeneous consistency. Apply the mixture to the defective area and level the surface with a rubber spatula, carried out with a hard spatula using cross movements.

After hardening, the puttied surface is roughened using fine-grained sandpaper of a different gradient (from 100 to 600), which gradually increases. As a result, the putty layer should be perfectly even with respect to the plane of the body.
Putty grouting is carried out dry - without moistening the surface with water. Upon completion of the grouting, the body is cleaned of dust and the treated areas are wiped with a rag soaked in white spirit. Next, you need to cover the puttied areas with a primer. If the surfaces are small, you can use the primer in aerosol cans.

Painting a car with primer is carried out with a smooth transition of the primer layer to untouched surfaces. The distance between the spray can and the body is 20-25 cm. After priming, the defects you made during puttying will become visually noticeable, in problem areas the putty coating is re-updated.
Paint application
To paint the car, it is necessary to sand the body paintwork with fine-grained sandpaper (600) to a matt state. to the metal is optional, the main thing is to give it a roughness. In this case, grouting can be carried out with moistening of the treated surface, which reduces the amount of dust.

Upon completion of matting the body with a damp rag, remove the dust accumulated on it with an adhesive tape (sticky rag) and degrease the surface of the machine with white spirit. If not the entire body is to be painted, but only certain zones, cover the remaining areas with newspapers or oilcloth using masking tape. Without fail, glass, door handles and wheels overlap with paper.

Dilute the used paint with solvent according to the manufacturer's instructions. The optimal consistency of the composition for the spray gun can be determined visually - lower the rod into the paint and lift it above the can, 3-4 drops should fall from it in a second.

The application of paint is carried out at a supply pressure of the spray gun in the range of 2.5-3 atmospheres. The distance between the nozzle of the gun and the body is 20-25 cm. The paint is applied from the top of the body down in successive horizontal stripes, the gun is moved with smooth movements so that the painting is carried out in layers even in thickness.
To properly paint your car, especially if you are new to using a spray gun, practice painting the outside metal surfaces first. So you will understand how fast you need to move the gun and what distance between the surface and the delivery nozzle is optimal in your case.

The total number of layers when using acrylic and melamine-alkyd compositions is 3 pcs. Pauses between applying layers are maintained according to the manufacturer's recommendations, the average time is 20-30 minutes. At room temperature, the total drying time of the paint is 24-40 hours.
WATCH THE VIDEO INSTRUCTIONS
To paint the car yourself, with a complete update of the body paintwork, you will have to spend about 3-4 days, most of which will be spent on preparatory work. However, in the end, you will save a considerable amount of money and get an excellent quality result.
During the operation of the vehicle, its appearance may noticeably deteriorate, the paintwork will darken, and in some places chips and scuffs may appear. This is primarily due to the impact on it of negative environmental factors, the influence of ultraviolet radiation and a sharp temperature drop, as well as the aggressive effect of chemical road reagents and gravel flying out from under the wheels.
Re-painting will help to improve the appearance of the car, and in some cases, bodywork will additionally need to be done before painting work.
Painting a car is not a cheap pleasure, so many car owners arm themselves with a spray gun and decide to do all the work themselves. In the process, it is necessary to follow the technology of applying paint and be sure to pre-train on an unnecessary part.
So you can not only adjust the spray gun, but also evaluate the quality of the paint and fill your hand a little. You need to follow some tips from experienced car painters:
- You can not save on paint, it is better to use materials only from a trusted manufacturer.
- Painting with a brush leaves stains, so it is better to work with an airbrush.
- Before starting work, check the spray gun and practice a little to apply the coloring composition to any metal surface.
The quality of the coating will be influenced by many factors. Here are the main ones:
- If you perform work in an unprepared room, there is a risk of defects in the unpainted surface. Under the influence of dust and dirt, the paint will lie unevenly and the car will have to be repainted.
- The quality of the resulting coating is strongly influenced by the cleanliness of the surface to be painted and its preparation (including degreasing).
- Has the body been repaired correctly?
- Was the coloring mixture well prepared (proportions were maintained when adding components to the mixture).

It is recommended to carry out work in a specially equipped spray booth. But many motorists do it in a garage converted into a workshop. Before performing work, you need to read the information on how to paint a car at home.
How to paint a car at home
First, the vehicle is well washed and dried. This is necessary in order to evaluate the appearance of the car and detect coating defects. Some parts can be dismantled to make it more convenient to work and there was no need to protect them with plastic wrap (these are optics, a radiator grille, etc.), but you can work without dismantling.
Defects are best detected under good vehicle lighting, and immediately after detection, they must be carefully cleaned with sandpaper of different grain sizes. You can use a grinder or a drill with special nozzles to remove the old paintwork, this will significantly save the time and effort of the master.
When working with sandpaper, you need to periodically moisten the surface and check the transitions. After polishing is completed, the body is cleaned with a soft cloth and degreased.
Puttying defects and priming the surface
The putty mixture must be carefully mixed with the hardener. in this case, it is necessary to follow the recommendations of the material manufacturer. You need to work with a spatula, on which a small amount of the mixture is superimposed. It is necessary to close up scratches both along and across so that the defect is completely filled with putty mixture.

It will usually be necessary to apply several even layers of putty to get a smooth surface. At the same time, each of them must be given enough time to dry completely and only after that apply the next layer.
After drying, the surface is polished with sandpaper with a gradual decrease in the grain of the abrasive until the moment when the body acquires its geometry. Before that, the surface is checked for drying - if, after rubbing the place with sandpaper, there is no adhering mixture on it, then the putty has dried up.
At the same time, it should crumble with fine dust. It is better to work without the use of water, as this can lead to the fact that the properties of the putty deteriorate noticeably. Masters recommend using finishing putty to repair defects - it is fine-grained, so working with it is very simple and convenient.
Sometimes a few minutes after kneading the mixture, lumps appear in it. This is a signal that the putty can no longer be used and it is better to prepare a new one.
Then, after degreasing, a primer can be applied in a thin layer from an aerosol can to the surface. If defects are found, they must be eliminated immediately and proceed to the next stage of work. Before painting, all non-paintable surfaces must be protected with masking tape and polyethylene.
In this case, it is necessary not to forget about the boundaries of the parts that will be painted and non-painted surfaces. Painting work will be successful if the room for them is carefully prepared and cleaned of dirt and dust.
Next stage
To avoid the appearance of defects and peeling of paint, experienced craftsmen recommend painting the car and using materials exclusively from one manufacturer in the process of preparing it.

Material rejection can occur because different manufacturers add different chemicals to paint products. Usually, defects will be immediately visible on the applied paintwork, at best, such a coating will last a little, but soon it will completely lose all its performance and the vehicle will have to be repainted.
Using materials from one manufacturer will protect against this.
Unpainted body parts are protected with masking tape, while observing the boundaries between the painted parts and those parts that are not painted. It is best to place such boundaries along the boundaries of individual elements of the vehicle body.
Just in case, the body is re-cleaned of dust and degreased. Do not get carried away with a degreaser, because its abundance can lead to a softening of the primer layer, it will become unusable and all preparatory work will need to be done again.
The room for painting work must be chosen very carefully.. It should be spacious for ease of work, clean and dust-free. It is also necessary to equip a ventilation system in it, since the fumes of paint and varnish materials are very toxic.
You need to choose paint in accordance with the taste preferences of the owner, while you also need to pay attention to its chemical composition and quality. Mobichel paint is well suited for work.
Paint application
Before starting work, you need to make sure that the spray gun and compressor are in good condition. The paint is mixed in a special container, while it is necessary to strictly adhere to the manufacturer's recommendations and not violate the proportions.
Particular attention should be paid to the choice of solvent, it should be selected only after consulting with the seller (its evaporation too fast or vice versa can lead to the formation of defects on the only applied paintwork).
Then the prepared paint must be filtered through a filter or through an ordinary nylon stocking, and only after that it is allowed to be poured into the spray gun container. It is best to start painting the car from the roof and gradually go down.
The spray gun must be at least 25 cm away from the surface to be painted (the distance must be carefully monitored - the paint should not splatter and form smudges on the surface). Before starting work, the pressure of the spray gun can be adjusted by painting an unnecessary part of the body.
You need to work smoothly, do not try to apply all the paint at once. Each stripe of paint should overlap the previous one by about half, it is recommended to dry the applied layer thoroughly and only then apply the next one.
The color will fully appear only after a day, it is forbidden to operate the car and wash it at this time, the paint must dry. All defects that may appear on the surface are recommended to be removed only after the car has dried.
Small pebbles can be removed by careful polishing, more serious flaws will require removal of the applied coating, all preparatory work and re-painting on the car body. There are several types of drying a freshly painted vehicle:
- In a special chamber under the influence of high temperature.
- Drying under the influence of ultraviolet light.
- Under the influence of infrared radiation.
It is not recommended to force-dry the parts using a hair dryer; acrylic paints and enamels dry well even at room temperature.
When painting, you must follow these rules:
- You need to work in a well-ventilated garage and wear a respirator.
- The air compressor must be located outside the room in which the painting work is carried out.
- It is forbidden to smoke in the room where the paint is applied.
Then you can apply varnish over the paint and polish the car to a shine.
To make minor scratches, defects, damage invisible and save money at the same time - the following tips on how to paint a car at home will help you. Even without experience, any skills in such a creative business, having familiarized yourself with the details, you will find the makings of a car painter in yourself. Let's get down to more detailed recommendations on how to paint the car yourself.
Prepare your car for painting
It from all kinds of dirt, dust, sand, grease stains, etc. Get rid of defects, corrosion, chips, using special tools. Do not use thinner or benzine. The cleaner the surface, the easier the paint will lay down.
Now you need to remove everything from the car that can interfere with painting - bumpers, turn indicators, headlights, antenna. Everything that can be removed - remove, too, dry and set aside for now.
Sometimes it is possible, but undesirable, to avoid dismantling, to seal parts of the machine or paint over with such a paste that is simply washed off: glycerin (30%), chalk (40%), dextrin (20%), water (10%).
Cleaning and polishing the surface of the car
To paint the car yourself, you need to clean its surface to metal. Take a screwdriver (3–5 mm), sandpaper, a scraper, a brush and, having looked at all the damage on the paintwork, remove them. Try to keep obvious transitions to the touch imperceptible.
To facilitate the manual method flushing solutions can be used. Here is one of them: paraffin and xylene, 10 to 45. Dissolve at a temperature of 80 degrees. Then cool to 50 degrees and add acetone, 45 parts. Do not prepare the solution on an open fire! Apply the finished mixture with a spatula for 30 minutes, then check how much the coating peels off.
Need to degrease the surface of the car, white spirit is used for this. Checking the degree of degreasing is easy with filter paper. If you see marks on the car, repeat the procedure until they disappear.
Puttying machine
At this stage, we level the surface of the car. Suitable finishing putty, having a fine-grained structure, seals defective areas better. You will also need a rubber or metal spatula of the appropriate width. There are rules for putty: apply on primed surfaces and its layer must be very thin (not exceeding 0.3 mm).

The putty with a hardener is diluted in the proportions specified by the manufacturer, mixed for several seconds. Then it can be applied at a fast pace, in a criss-cross pattern. Avoid lumps.
On the video - preparation for painting the car:
After application, especially in several layers, drying takes place. It takes about 45 minutes, and maybe longer in natural, "home" conditions before painting the car. Readiness is checked with an emery cloth. Rub the surface and look - if dry powder is pouring, then we start cleaning.
Cleanup
Using the same emery cloths, numbers from 120 to 600, by hand, without water, until the desired result. Further again you need to wipe the car with white spirit and primed from an aerosol can.

Completion of the painting process
We are approaching the most interesting stage.
In order to properly paint the car, pay attention to the room in which your car is parked. It should be spacious, at least 2 meters for free passage. First remove all dust and dirt from it too, and moisten the floor with water from a spray bottle. From the ceiling, clean the cobwebs, falling plaster - all this can suddenly settle on a freshly painted surface.
So, we breed enamel for painting a car. If you have already decided . One-layer paints are for a matte effect, while two-layer paints are suitable for metallic colors. If it is necessary to color one part it is important to choose the right shade. Consult with a specialist.

Do the dilution in accordance with the manufacturer's instructions, but the density should look like this: when lowering the metal rod, drops flow down 3 per second.
For the convenience of applying paints, a special gun is used - "spray gun". Armed, apply the first developing layer. He deserved this name thanks to his work, the manifestation of all defects after putty. In addition to the gun, you can use a vacuum cleaner! Take out the filter and add a hose with a gun.
To properly paint the car yourself, start the process from the roof of the car. The paint should lay down evenly, keep the pressure in the gun at 3 atm. The distance between it and the roof should be about 200 mm. Spread the coating with horizontal movements, in a thin layer. When finished with the development phase, let the car dry for 20 to 40 minutes.
On the video - painting the roof of a car:
On the video - painting the car:
If you notice irregularities, use putty to remove them. And proceed to the main stage, applying a decorative layer. Make the paint thicker. If you need another layer, increase the density.
Do not be discouraged when you notice small insects on the car cover or dust particles - carefully get rid of them with tweezers. In the end, to give the car a glossy effect, you can finish painting with a special varnish.
Drying takes place indoors, not in the sun, for about two days.
Do not forget about your safety when painting a car with your own hands, purchase a respirator beforehand, as the materials are all toxic. Do not smoke indoors!
And finally
Such a simple thing as a spotlight can come in handy for you. Two is even better. With good lighting, you will achieve the best quality. In addition, they, to some extent, play the role of heating. Look for power in 500 watts or 1 kilowatt.
On the video - how to paint the car yourself:
To paint a car yourself, it’s good to arm yourself with tools, namely:
- Orbiter. It is useful for grinding and for further application of putty, primer.
- small spray gun. For surfaces that are inaccessible to a large gun.
- Building hair dryer. By heating plastic parts, they can. If there are glue mounts, then this is also a job for a hair dryer.
As you can see, the answer to the question “how to paint a car yourself” is simple. If you wish and have the time, you can realize your plans on your own! Well, by the way, if the car is for work, so as not to invent occupations for itself, there is phosphoric acid that destroys rust, and you can paint over a scratch with a simple brush.
The paintwork of the car is extremely difficult to keep in decent condition if you use the car every day. It seems that all known road factors work against the paint of your favorite iron horse, pebbles flying from under the wheels of neighboring cars, dusty suspension flying along the road in spring and summer, snow and reagents in winter, ultraviolet rays, which in the end also burn out the structure of the paint making it weak and faded.
Against this background, do you think nothing can be done in order to restore the former beauty and appearance of the car body? No matter how! And we'll show you how to take pride in the look of your car. Inexpensive and simple car paint repair that will help the paintwork shine again with all the colors of the rainbow.
However, don’t get us wrong, we agree that there are times when it’s better to send the car to the professionals for repainting, to one of the body shops of a local workshop that you trust. However, if you just want to freshen up your old car by repairing minor paint blemishes, this approach can certainly save you a lot of money and reward you with a presentable result. We'll consider the following body repairs:
Removal of mechanical damage on the bumper
Removing bumper cracks
Local tinting
Shading of chips
Find your color
Before you start painting, you need to go through the first, but extremely important stage - the selection of the desired paint color. Dozens of shades of the same color can make searching tedious and inefficient. Of course, you can come to the store and sort through all the probes from them, applying them to the body of your car, or you can make it easier by looking at the coded designation of the paint shade that is used on your car. The factory paint code for your car can be found on a plate on the inside of the pillar on the driver's side or under the hood (usually the automaker installs it on the front reinforcement in front of the radiator or at the rear of the engine compartment).
An example of the location and type of code
Type this code into Google search and you will easily find the name of the desired color.
List of materials
With the search and purchase of materials for work, you should not have problems. Remember one simple but effective technique for any type of work. To save money and time, you need to buy everything you need in advance.
Armed with your car paint code, you can easily find all the necessary products on the Internet and order them directly to your home. Within a few days, you will have them. However, only paint can be included in the list of virtual purchases (if its shade is not represented in your local auto shops).
Materials such as primer, sandpaper, putty and masking tape can be easily purchased at ordinary auto shops.

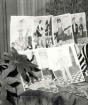
Click on photo to enlarge
An exhaustive list of the plastic bumper of your car needed for repair is presented in the photo above. The total cost of a quality automotive material will be approximately 5.000 rubles . You can find cheaper options, but the quality of repairs when using such tools may not be as high. Therefore, we advise you to find out from the professionals on the forum or from the seller in the paint and varnish store the best materials for repair. You don't want to pay twice, do you?
However, if you only need to retouch the resulting chips, the list can be seriously reduced.

The photo above shows a set of all the items that you will need the body of your car. Such a repair kit will cost about 1000 ruble And it will serve you for a long time. Not a single chip can remain unsmeared.
Preparation for repair

Do-it-yourself home repair professionals have long noticed that paintwork repair is easier and easier if it is possible to isolate the repaired part from the entire car. For example, to work with a bumper, it is best to remove it from the car. On different cars, this process can take different times and cause more or less difficulties depending on the method of attaching it to the car.
However, for surface repairs, for example, painting chips and removing scuffs, you can leave this part in its place, but according to the canons of repair, it would be better to twist such a complex element as a bumper from the car in order to avoid spray paint on other surfaces of the car.

Help site: In order to find out how this or that element is removed on your car, refer to the manual.
The vehicle that will be used today for the refurbishment demonstration is a Nissan 300ZX Twin Turbo. Let's get to work.
But first, a little advice, before starting work, drive the car to the sink, the body must be clean.
1) Mechanical damage to the bumper

The damage looks serious, what can be done about it?
Step one step In our photo example, someone has already tried to fix the damage to the bumper, so first we will remove a layer of old and unnecessary putty. A dremel is perfect for this job. However, if it is not at hand and your neighbors in the garage, no problem, we act in manual mode, with coarse sandpaper. Tedious and long work, but it must be done. It is important that the roughness remains on the working surface, so the epoxy compound will “stick” better to the bumper surface.

step two Then go over the surface with finer grit sandpaper.
Step Three Clean the surface of fine dust.
Step Four Application of epoxy resin. * On a clean surface, apply a base coat of epoxy on the inside of the bumper, after mixing the epoxy with a hardener (the proportions are indicated on the package). Before that, it is important to combine the elements of the bumper, as they should be located in a normal way.

Immediately after applying the epoxy, reinforce the surface with fiberglass, a piece of which you previously cut in accordance with the dimensions of the repaired part of the bumper. Crimp the fiberglass so that it takes the form of an element over its entire area and is impregnated with epoxy. Coat the fiberglass with a second coat of epoxy.

Wait for the time allotted for the hardening of the composition. It is written on the package. At the end of the work, you will see that the crack is practically not noticeable, and the element has regained rigidity.
*We will not recommend soldering broken bumper parts. The effect of it will be comparable to the use of epoxy, but the risk of completely ruining the part due to inexperience is too great. However, there are a number of other options for repairing cracks: using acetone and pieces of plastic, welding with a hot air gun or soldering iron, sealing a crack with a liquid polymer. But in our case, the repair will be carried out using epoxy and fiberglass. We carry out work in rubber gloves!
3) Part coloring
We continue to work on the bumper. Let's move on to painting. The most difficult and responsible part of cosmetic repairs. In our example, the paint was applied using an aerosol can. It is extremely important to start by practicing spraying paint at the right angle and from the right distance. Too close and you'll have streaks, too far and the paint will be too thin. Therefore, practice on an unnecessary part, if the result is practically indistinguishable from the factory, proceed to painting.

Security measures! Work with paint in a well-ventilated area or outdoors. Its vapors, however, as well as vapors of acetone and other chemical liquids in high concentrations, are hazardous to health.
For a good painting result you need*:
* We wrote about this in detail in the following article: Here is an excerpt from it:
Step one To paste over the borders of the car painting, on which the paint should not get. There are many pitfalls here.
Do not use newspapers, the paint can easily soak them or seep under the folds, leaving streaks.
In advance, buy a special film used for painting bodies. There are a huge number of them and their main advantage is density, through them the paint does not leak onto other surfaces, they fit well to the body, and are able to take on various forms of relief. Usually sold in paint shops.
But just wrapping the car with a film is not enough, for a good result, glue the joints with adhesive tape, only in this case there is a guarantee that the paint will not get on other surfaces.

step two Apply a primer to the surface. The tone of the primer should be as close as possible to the color of the paint. Prepare the surface for painting by wiping it with white spirit. Apply primer evenly from a can. Three coats should be applied, allowing each coat to set for a few minutes. Let the primer harden for at least 12 hours.

Step Three Smooth out the primed surface with fine sandpaper (400). It is necessary to achieve perfect evenness of the surface. This is where mechanization comes in handy. Wipe the surface from dust.

Step Four We apply paint. Three or four layers, over and over. Gradually, the primer will show through less and less under the layer of paint, you will understand that the job is done when the old and newly applied color merge together.

In our example, simply painting over a previously damaged surface would have left an obvious stain, so we had to resort to the trick of applying new paint over the old in a thin, light layer. This will mask the fresh paint against the background of the faded old, and the redecoration will be visible only from a close distance.
Let the paint dry for 24 to 36 hours.
Step five Apply clear varnish. Washed off the application is the same as that of the paint. Do not stop monitoring the surface when applying varnish, it must also be applied in moderation. Disguise your work by making a transition to the old paint. Let the varnish dry, the hardening time is written on the can.

After that, you can remove the masking tape. Peel off the tape carefully to prevent visible edges on the border with the new paint.
4) Painting chips
Probably the easiest part of the job. Chips appear on the car inevitably, unless of course this is a museum piece. Therefore, they must be fought.

First step Cleaning the surface from dirt. You washed your car at the car wash, that's good. But just in case, the surface where there are chips must be re-wiped, degreasing it with white spirit. Clean cloth, cleaner and go!

step two We take a bottle of paint and shake it so that the paint takes on a uniform consistency. We unscrew the brush, and remove excess paint by wiping it on the inner surface of the neck of the bottle.

Step Three Apply paint to the chip. Make sure that its amount is not very large.

Step Four Take a paper towel, apply some equalizing thinner on it and while the paint is still wet, rub the paint lightly so that it lays evenly on the chip. This way you will avoid a hardened ball of paint on a chip, it will lie flush with the native paintwork of the car.
Carry out the same ritual with all other chips.
Perfection Budget or Perfection on a Budget

Are you waiting for the perfect result from your work? Do not worry in vain, it most likely will not. Not every spray booth can paint a car body well, to say nothing of home conditions. Therefore, in our today's article, we talked specifically about an old car, on the redecoration of which it is a pity to spend a lot of money, but on which it is not a pity to experiment.